The Complete Guide to Custom Tissue Paper: Printing, Gelli Printing, & Decoupage
Custom tissue paper is tissue paper you print, paint, or gelli-print yourself, so you get a one-of-a-kind pattern for decoupage, collage, or gift wrap instead of the generic designs sold in stores. The catch: regular tissue paper falls apart the moment it meets water or acrylic paint, so making your own starts with choosing the right base paper (wet-strength tissue, not the party-favor kind), then adding your design with a gelli plate, paint, or a modified printer.
I customize tissue paper constantly in my mixed media practice, most recently with an image of my dog Penny's face, which turned into one of my favorite decoupage projects yet. Once you can customize tissue paper, a lot opens up: decoupaged vases, bowls, seashells, collage backgrounds for mixed media, and wrapping paper nobody else has.
As a mixed media artist, it would be easier to just buy pre-printed tissue paper. But easier isn't the goal. Originality is what makes your work recognizable. That's why most mixed media artists eventually start making their own tissue paper for collage and for adhering to canvas.
What Makes a Good Paper for Custom Tissue Paper Crafts
When you're adding paper to a collage or decoupage project, you want three qualities at the same time:
Thin. It melts into the surface instead of sitting on top of it.
Paintable or printable. It needs to take pigment or ink without resisting it.
Moisture-resistant. It has to survive contact with wet paint, gel medium, or Mod Podge.
Standard store-bought tissue paper has qualities 1 and 2, but not 3: add water-based paint and it tears almost immediately. To get all three qualities, you sometimes have to pay a bit more for the right paper. Below is a breakdown of which papers deliver, and where to find them.
Where to Buy Wet-Strength Tissue Paper for Crafting
Standard tissue paper doesn't hold up to water. Add wet paint and it tears, which makes it frustrating to work with for anything beyond dry collage. Wet-strength tissue paper (and a couple of paper alternatives) solves that. These are my go-to brands:
Amazon Basics Wet Media Tissue: reliable, affordable, my everyday choice.
Carnival wet-strength tissue paper: costs a bit more than the Amazon brand, but the quality is excellent.
Bonus, budget-friendly alternative: medical-grade paper, an insider tip. It's thin and handles water well, though it's less transparent than true wet-strength tissue.
For gelli printing specifically: this wet-strength tissue paper is my favorite. It resists tearing, accepts multiple paint layers, and nearly disappears once decoupaged onto a surface. It's the one I'd recommend if you're building tutorials or selling finished artwork, and it can be cut down to whatever size you need.
How to Print Custom Designs on Tissue Paper
There are four main ways to get a custom design onto tissue paper. Which one you choose depends on the equipment you have and how much control you want over the final pattern.
Option 1: Gelli Printing
Gelli printing is my favorite way to make custom tissue paper for decoupage, and it's genuinely fun to do.
I made custom tissue paper using my dog's face, and it made everyone happy.
I've also done a full image transfer onto a gelli plate, then transferred that print to wet-strength tissue paper (full walkthrough below).
Option 2: Inkjet or Laser Printer
You can tape tissue paper to a sheet of cardstock and run it through a home printer. Full disclosure: this hasn't worked well for me. It's jammed my printer more times than I'd like to admit. If you want to try it anyway, plenty of tutorials online show people doing it successfully; just adjust your printer settings (manual feed, lighter paper weight) before you start.
Option 3: Painting
Using brushes, sponges, or other texture tools, you can add pigment directly to your paper. Paint it on by hand, or dip the paper briefly in liquid paint and let it dry. Just make sure you're using wet-strength paper. This is where regular tissue paper falls apart fastest.
Option 4: Commercial Printing
The most expensive option is having custom paper printed for you. I haven't done this personally, but print-on-demand companies like Spoonflower can produce custom tissue paper to your specifications if you want a larger, more consistent run.
Custom Tissue Paper Design Ideas
If you're not sure what to print or paint, here are patterns that work especially well on wet-strength tissue paper:
Floral repeats
Hand lettering
Vintage ephemera
Abstract textures
Brand logos
Seasonal patterns
Collage papers
Decoupage tissue paper patterns
Common Printing Mistakes to Avoid
Using regular tissue paper for a wet technique. It tears almost instantly under paint, gel medium, or Mod Podge, so always start with wet-strength tissue.
Applying paint too thick on the gelli plate. A thick layer stays wet too long and saturates the tissue paper until it rips. Thin, even layers work best.
Skipping the "matte test" before pulling a print. If the paint on the plate still looks glossy and wet, it's not ready. Wait until it turns slightly matte.
Forcing tissue paper through a printer without proper backing. Loose or poorly taped tissue is the fastest way to jam an inkjet or laser printer.
Rubbing or repositioning the paper mid-transfer. Once tissue paper touches wet paint or ink, shifting it causes smearing and tears. Place it once and press down.
Peeling a print before it's fully transferred. Check a small corner first. If it still looks grainy or black, rub the back a little more before fully peeling.
Skipping the dry time before decoupage. Moving straight from a wet print to gluing it down invites tearing and bubbling.
How to Gelli Print on Tissue Paper
Gelli printing on tissue paper is one of my favorite techniques. The first time I tried it, I made a repeat pattern using my dog Penny's face, and I've been hooked ever since. Here's what you need to get started.
Supplies
Why Tissue Paper Works Well for Gelli Printing
As covered above, this only really works with wet-strength tissue paper (napkins can work too, in a pinch). It's a great fit if your end goal is a mixed media piece or a decoupage project. If you want something sturdier for standalone prints, stick with regular printer paper or printmaking paper instead.
Step-by-Step Process
Apply paint. Using your brayer, apply acrylic paint to the surface of your gelli plate.
Add texture. Place your stencil on the wet paint, then lay your wet-strength tissue paper over it.
Press. Use your brayer or your hands to press the tissue paper down evenly.
Pull the print. Lift the tissue paper away from the plate.
Layer if desired. Repeat with additional colors or stencils for a multi-layered pattern.
Let it dry completely before handling further.
Move to decoupage once the paper is fully dry.
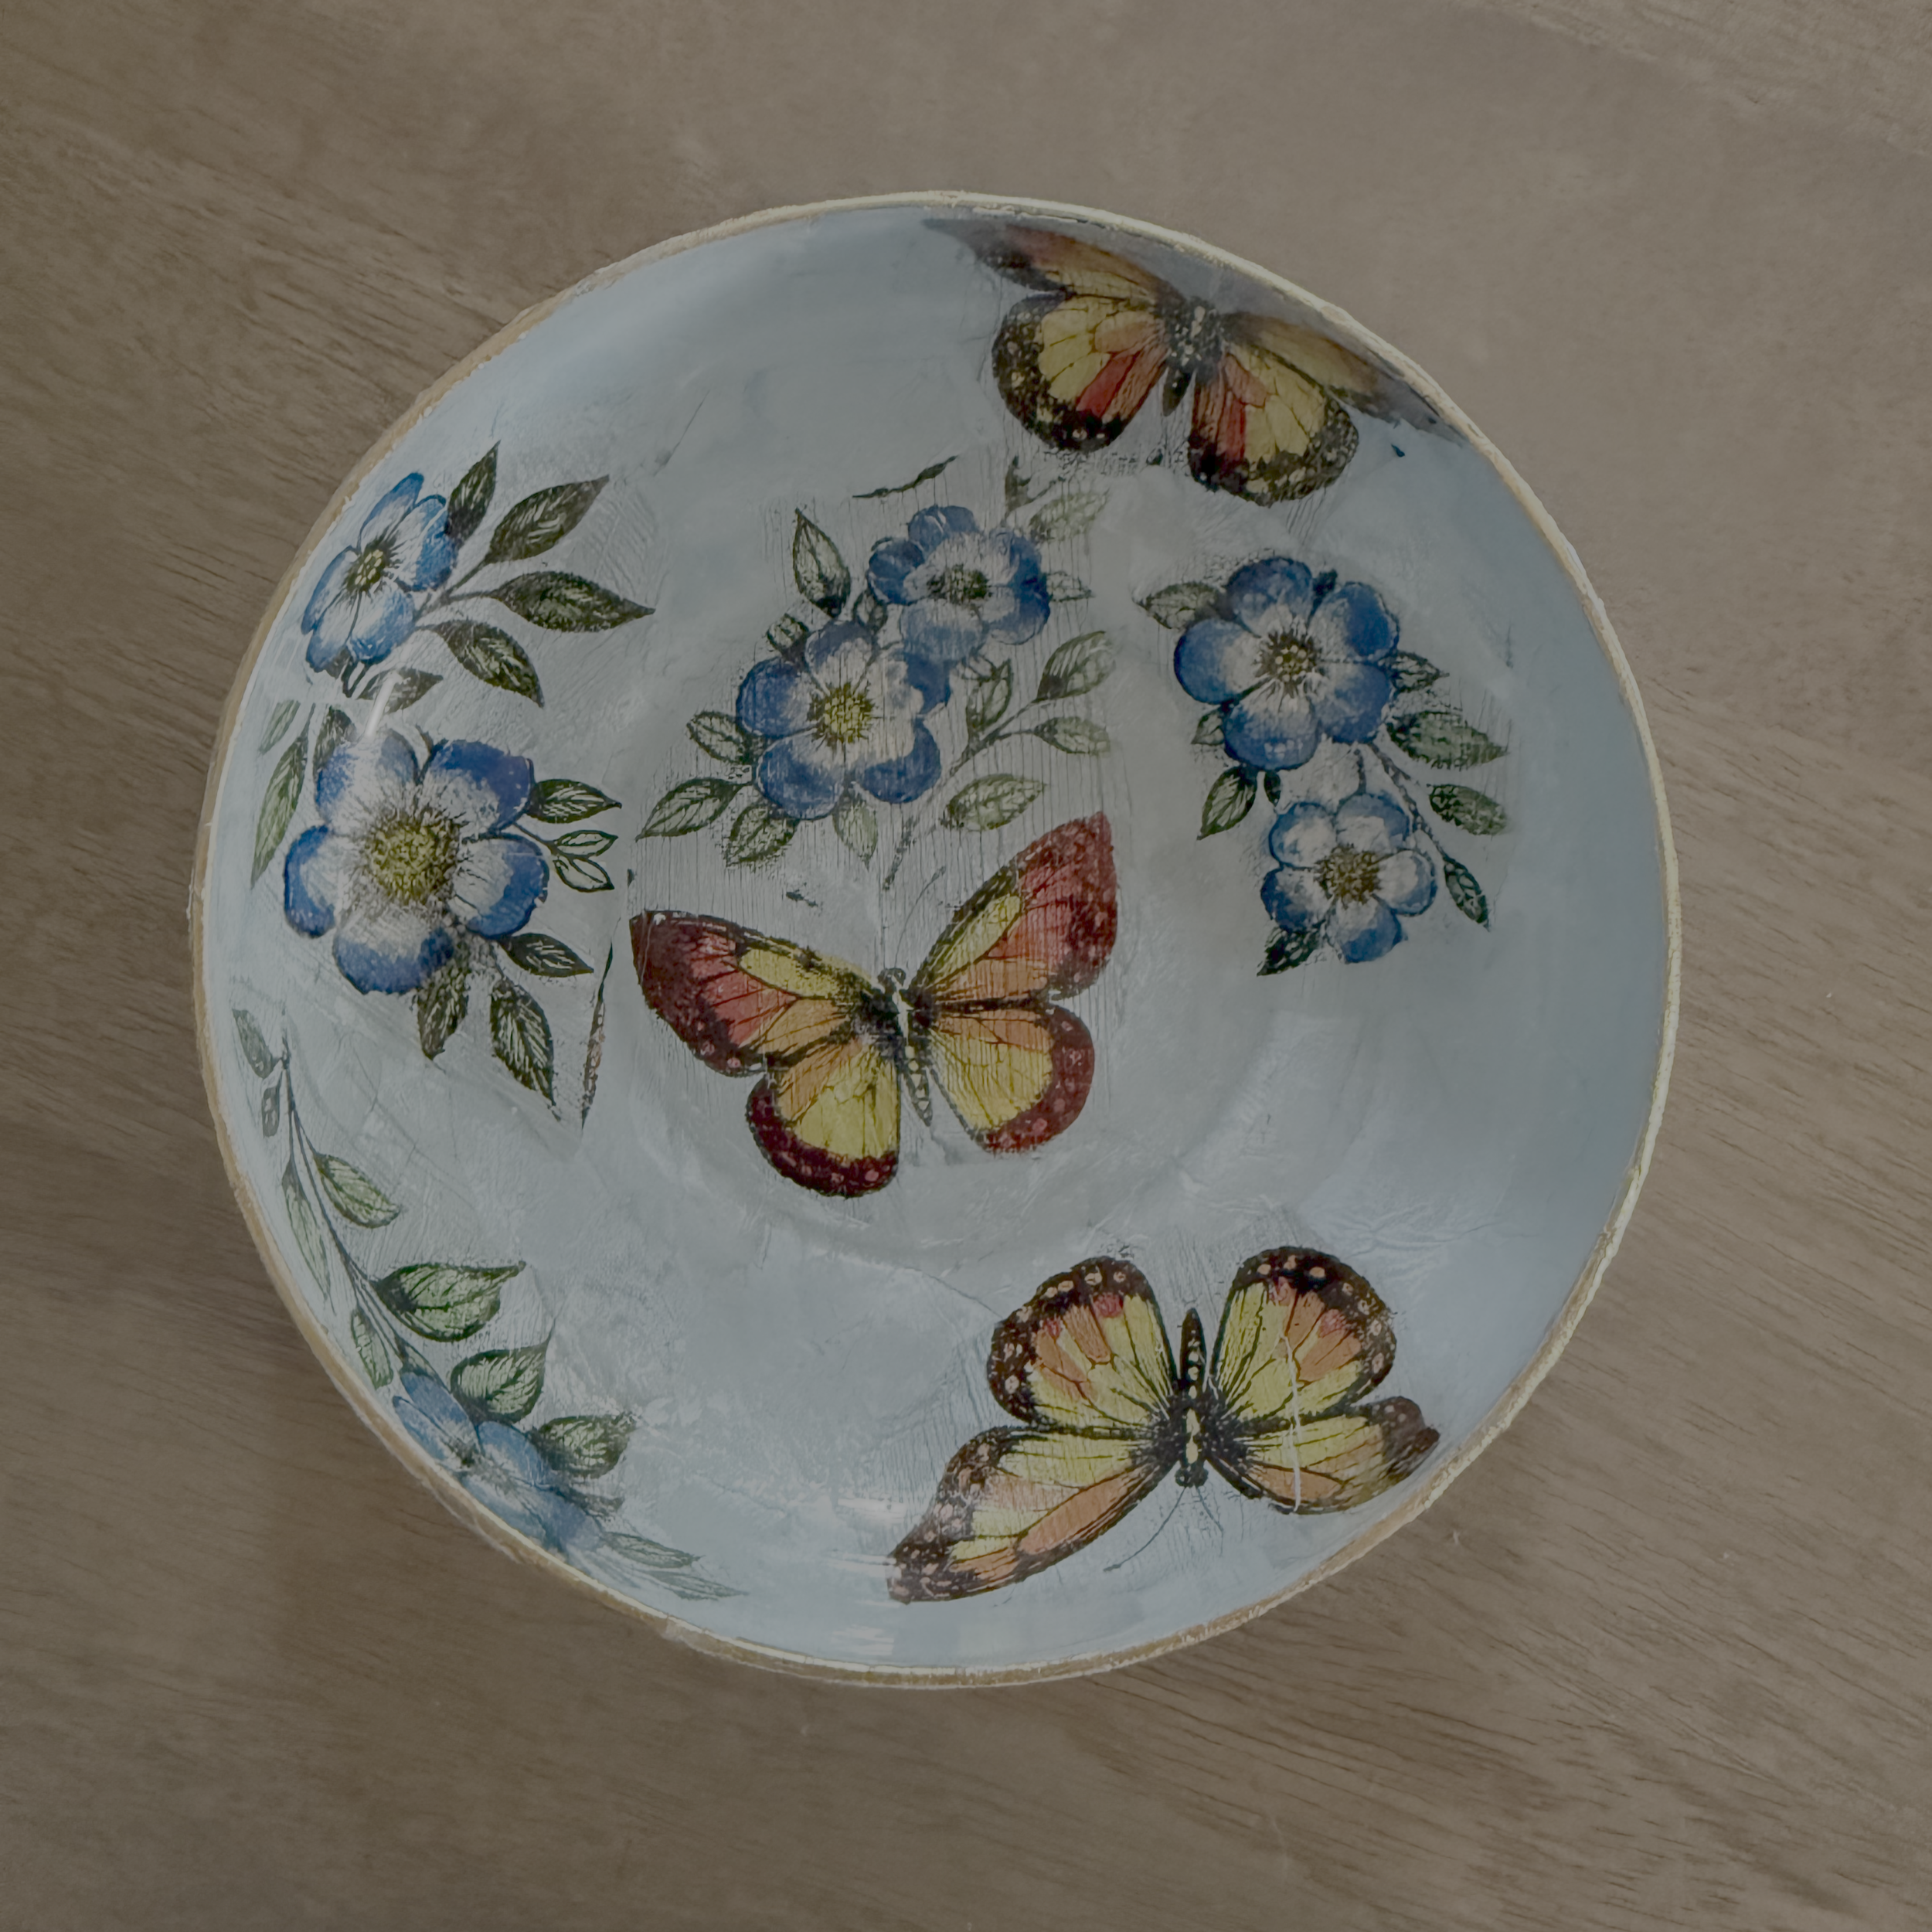
Gelli Plate Image Transfer: Butterfly Bowl Tutorial
Ready to tackle the butterfly bowl? Keep reading for step-by-step instructions for transferring an image using your gelli plate.
Apply a thin, even layer of black acrylic paint to your gelli plate. I like Amsterdam Acrylic, and a little goes a long way. You'll know it's ready to print when the paint loses its glossy look and turns slightly matte.
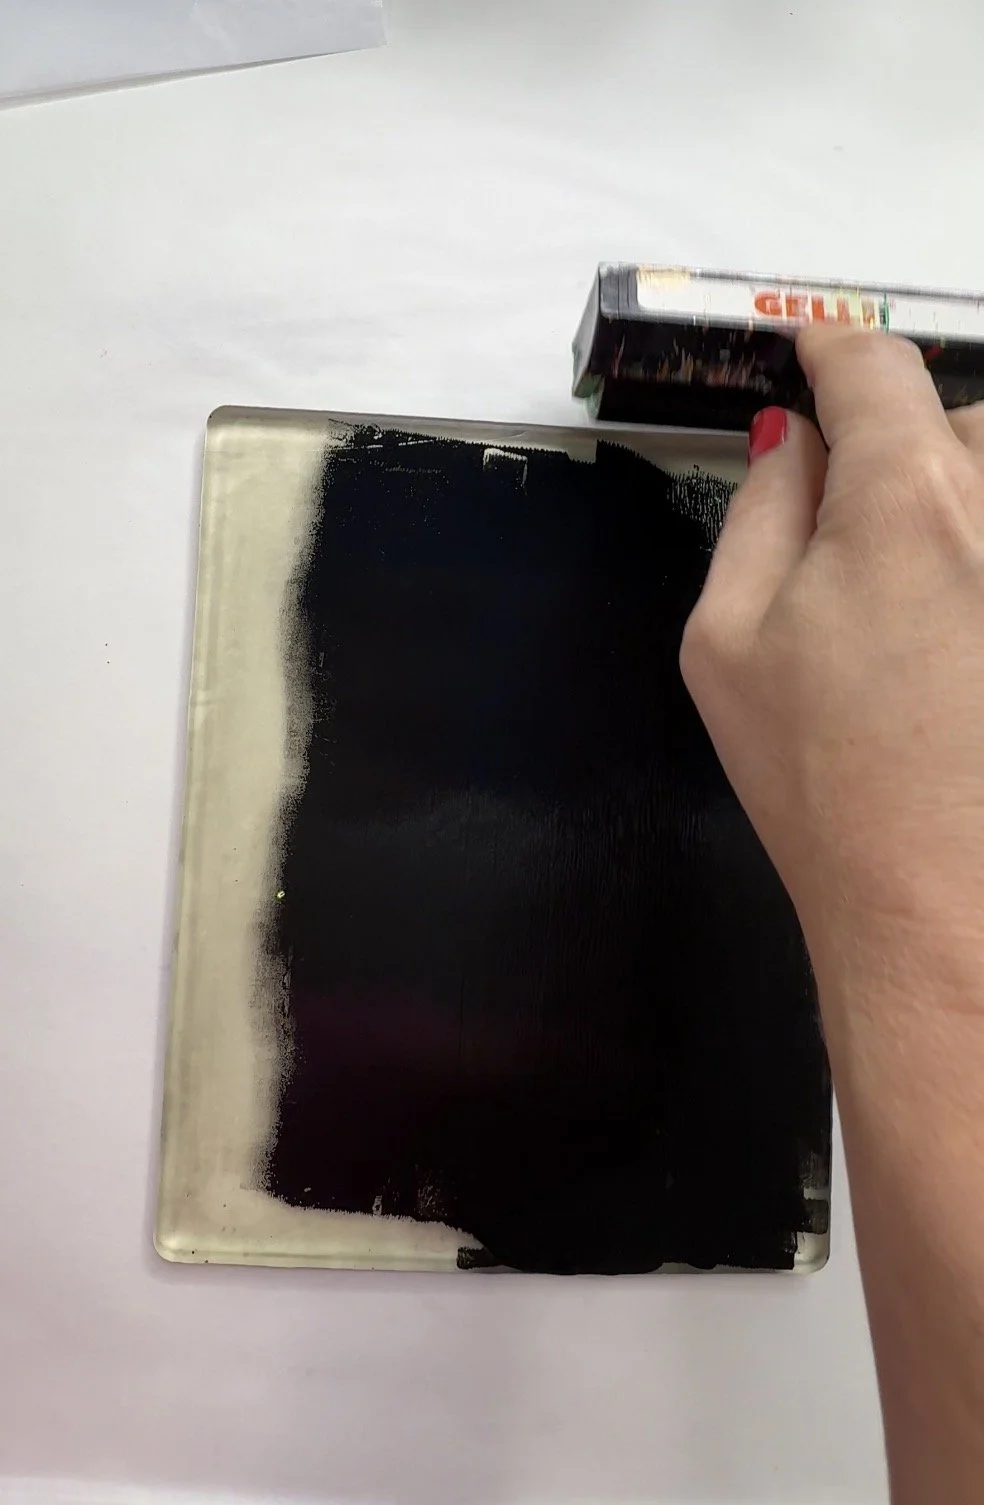
Place your printed image or illustration face-down onto the ink.
Using light pressure (about what you'd use to rub in lotion), move your hands over the back of the image for 10–15 seconds.
Peel back a small corner to check progress. If it still looks black and grainy, rub the back a little more before continuing.
Peel the full image away once it looks fully transferred.
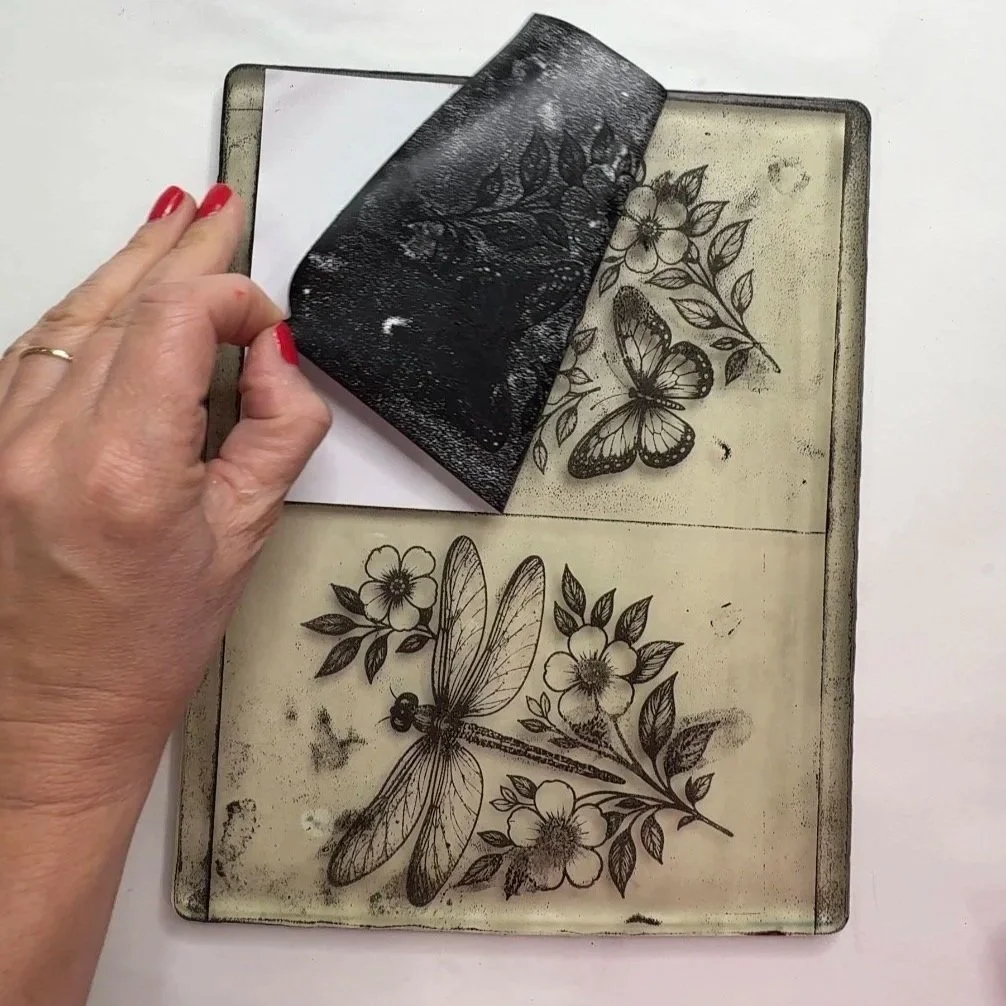
Clean the gelli plate with a baby wipe or a wet wipe (I prefer these). Once the plate is clean and dry, apply a thin layer of gel medium to its surface. This makes the next step, reverse painting, much easier.
Once the gel medium dries, begin reverse painting in layers, building up the design gradually.
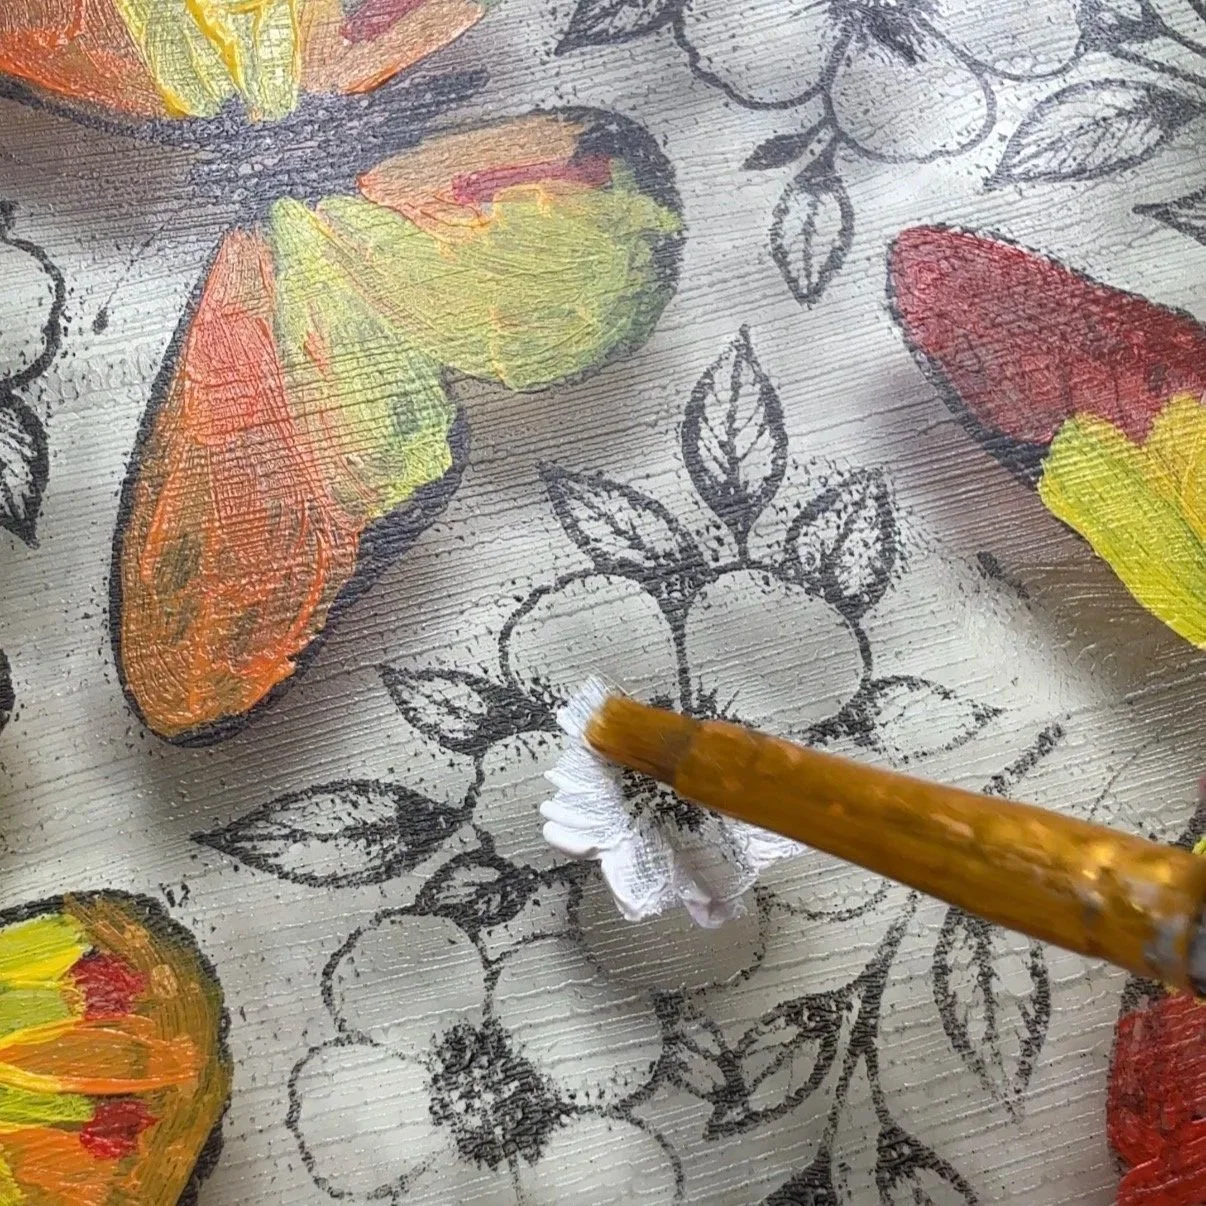
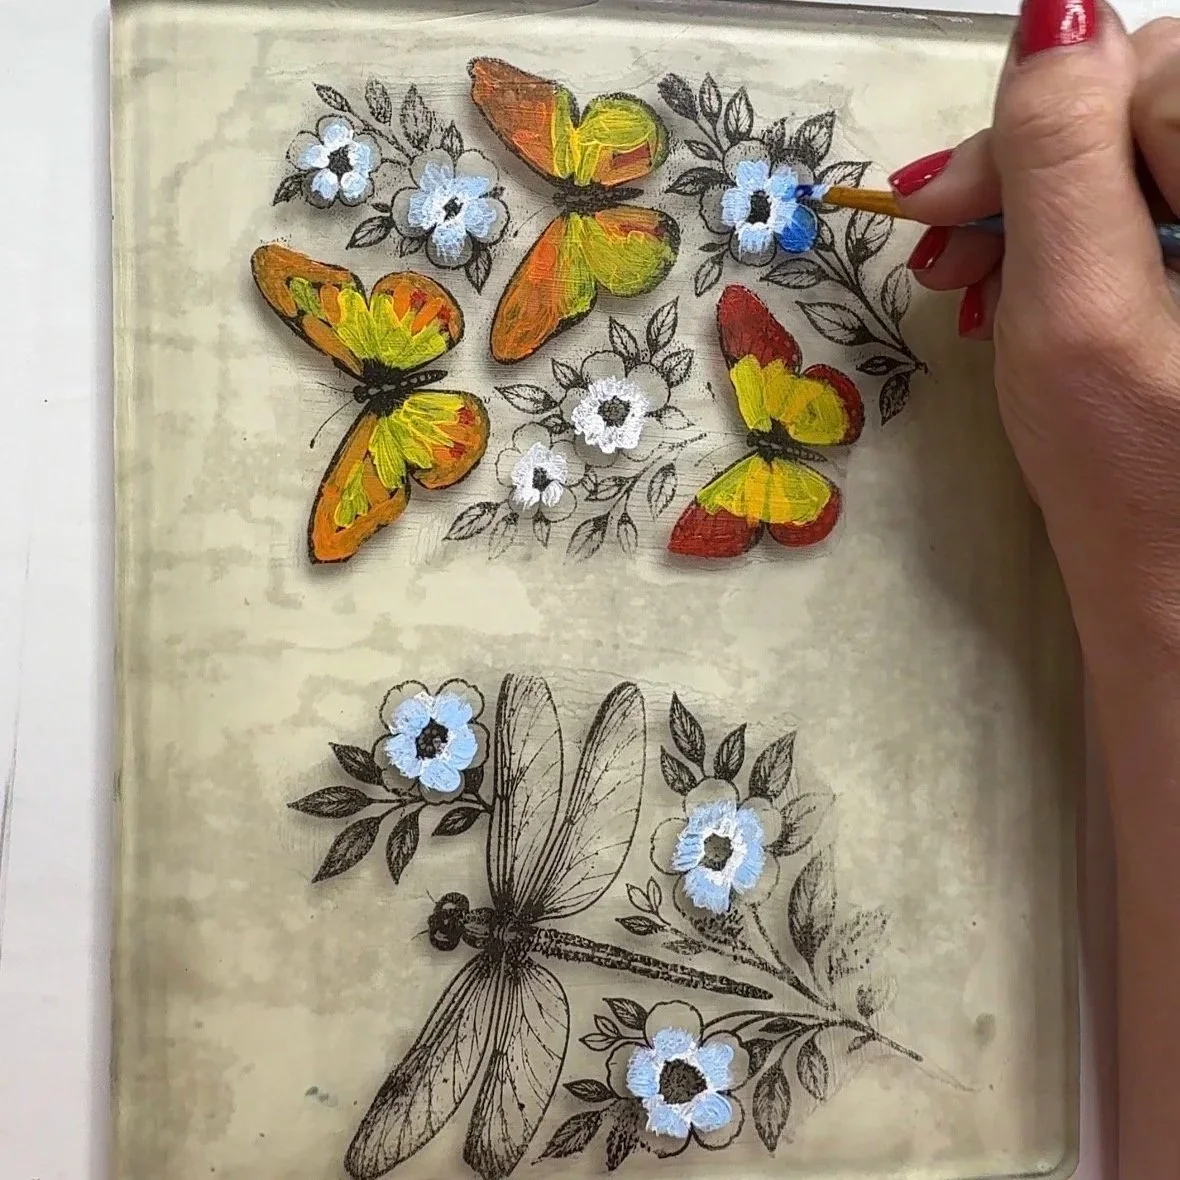
Add a top layer of paint once the design is complete. I used white over the design, then a layer of blue for the background.
Let dry.
Add another layer of Mod Podge over the entire surface to seal it.
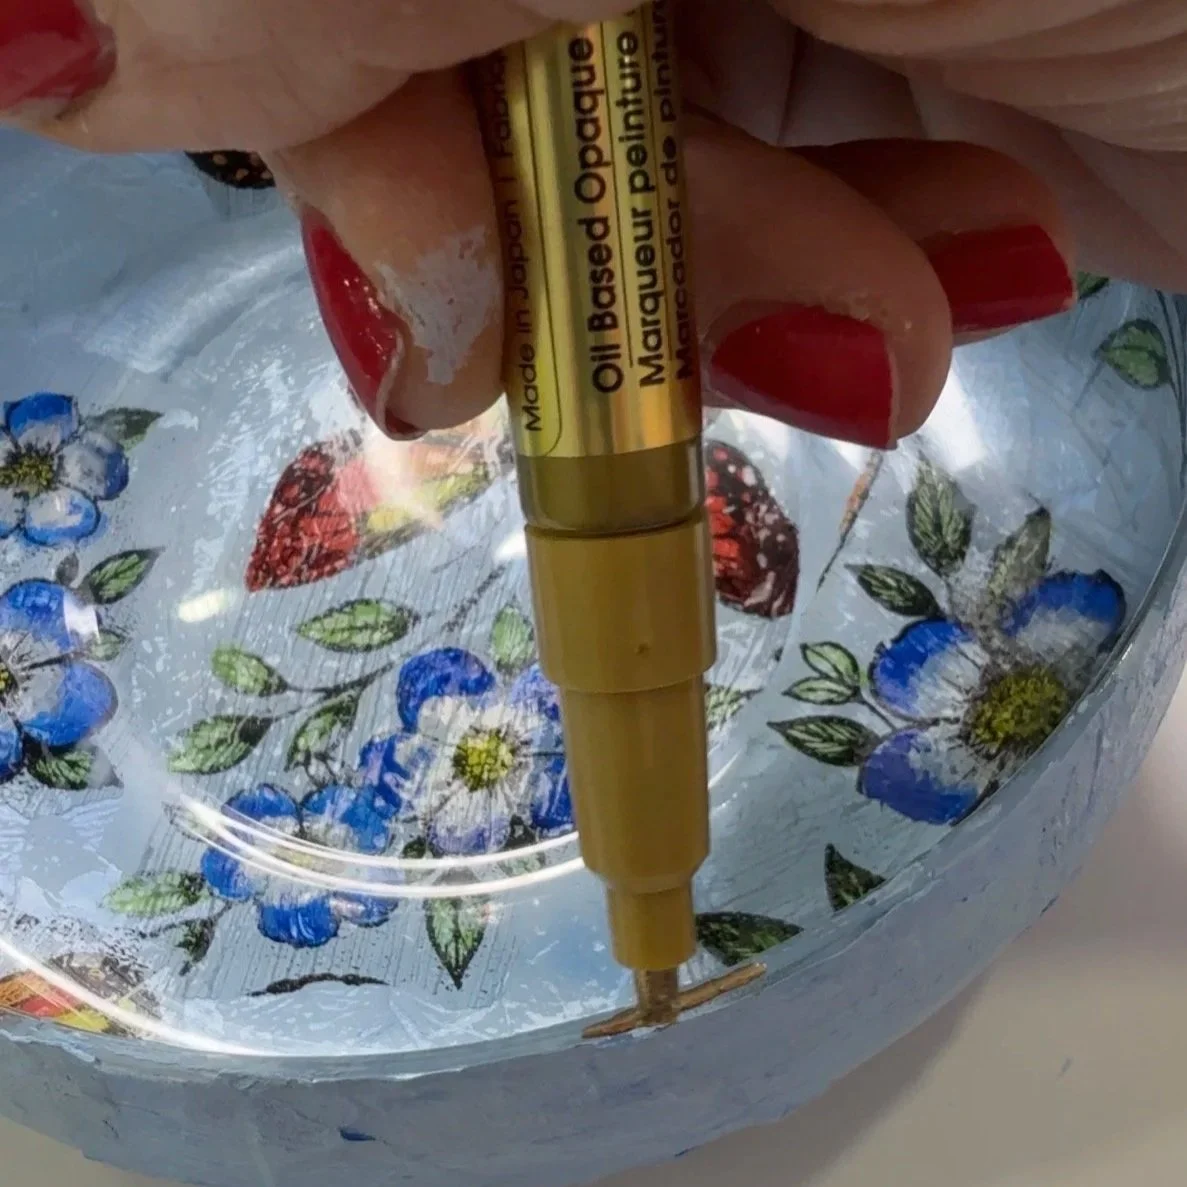
Optional: outline the edges with a paint pen for a finished look.
For more on this technique, see the full image transfer with a gelli plate tutorial.
How to Decoupage with Gelli-Printed Tissue Paper
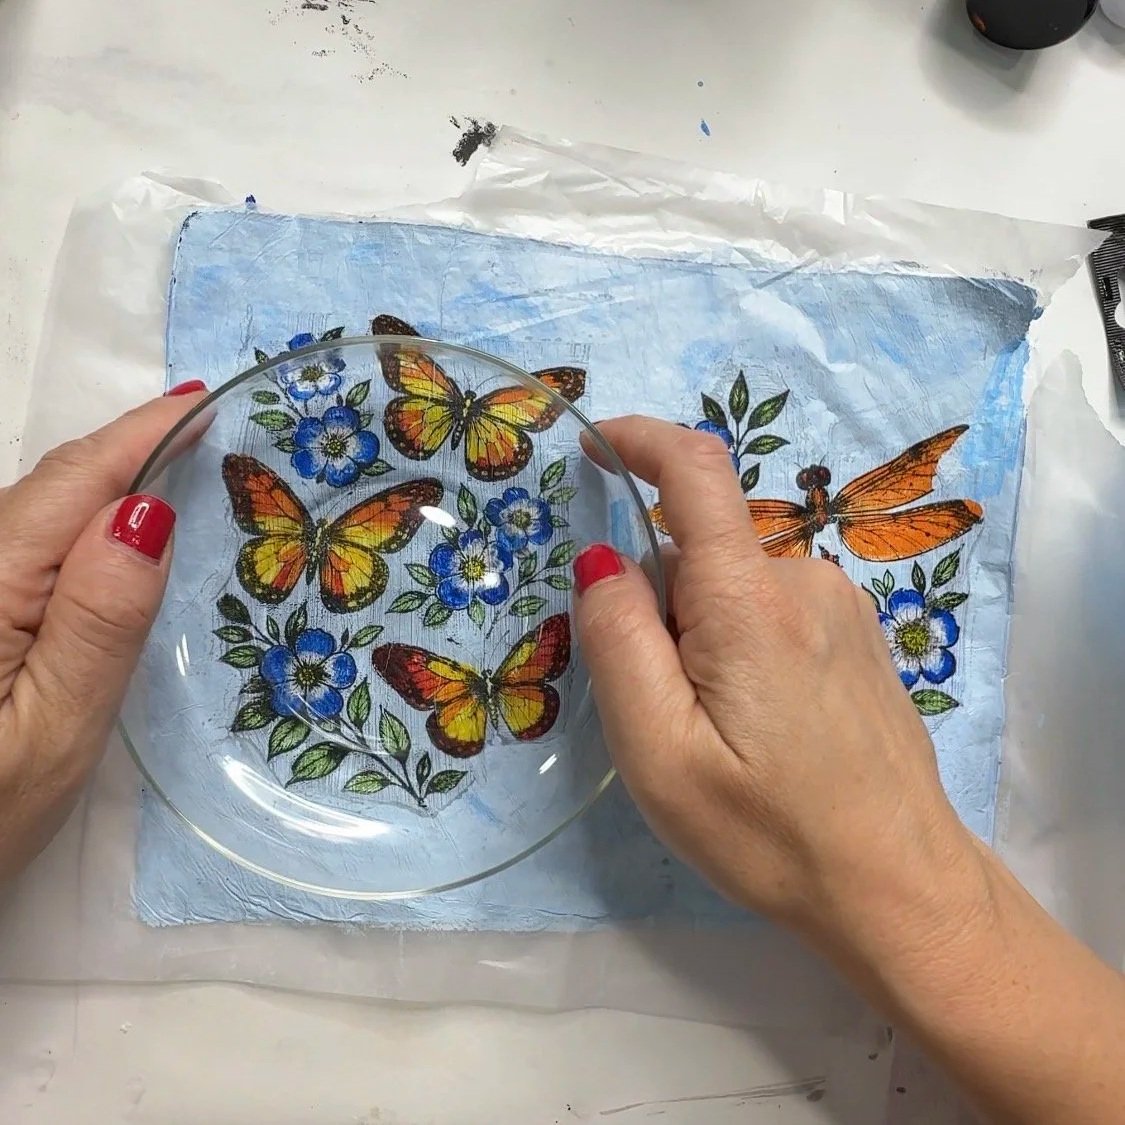
Clean the surface you're decoupaging. I use rubbing alcohol to remove dust and residue.
Tear your gelli-printed tissue paper into small pieces (roughly 1–2 inches). If you want to preserve a specific design, cut it out with scissors instead of tearing.
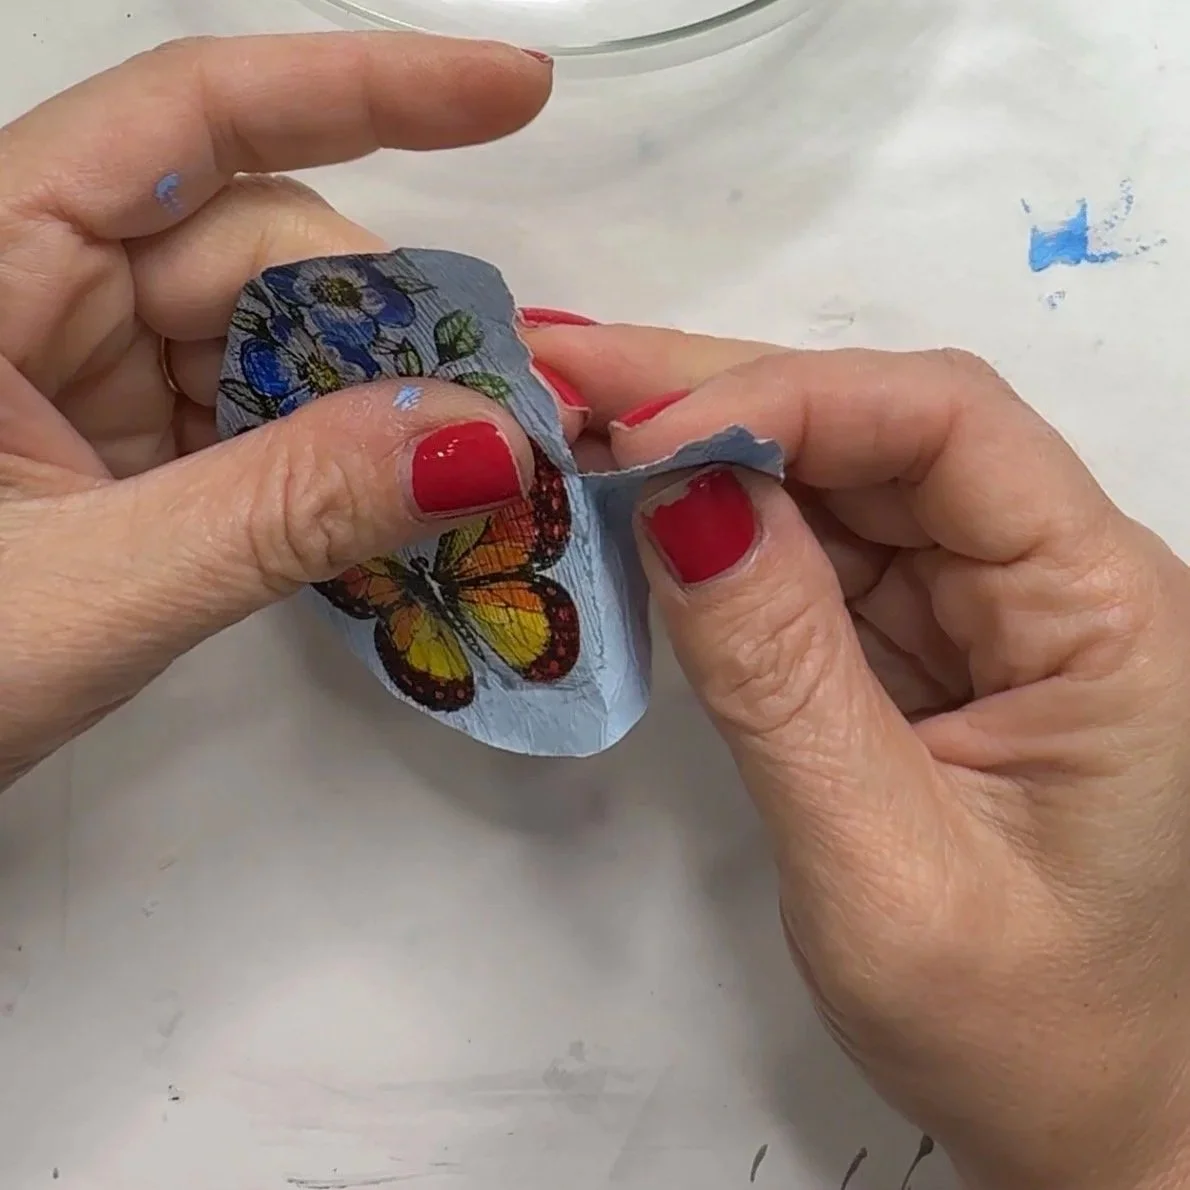
Once the surface is dry, use a foam brush to apply a thin, even layer of Mod Podge to a small section at a time.
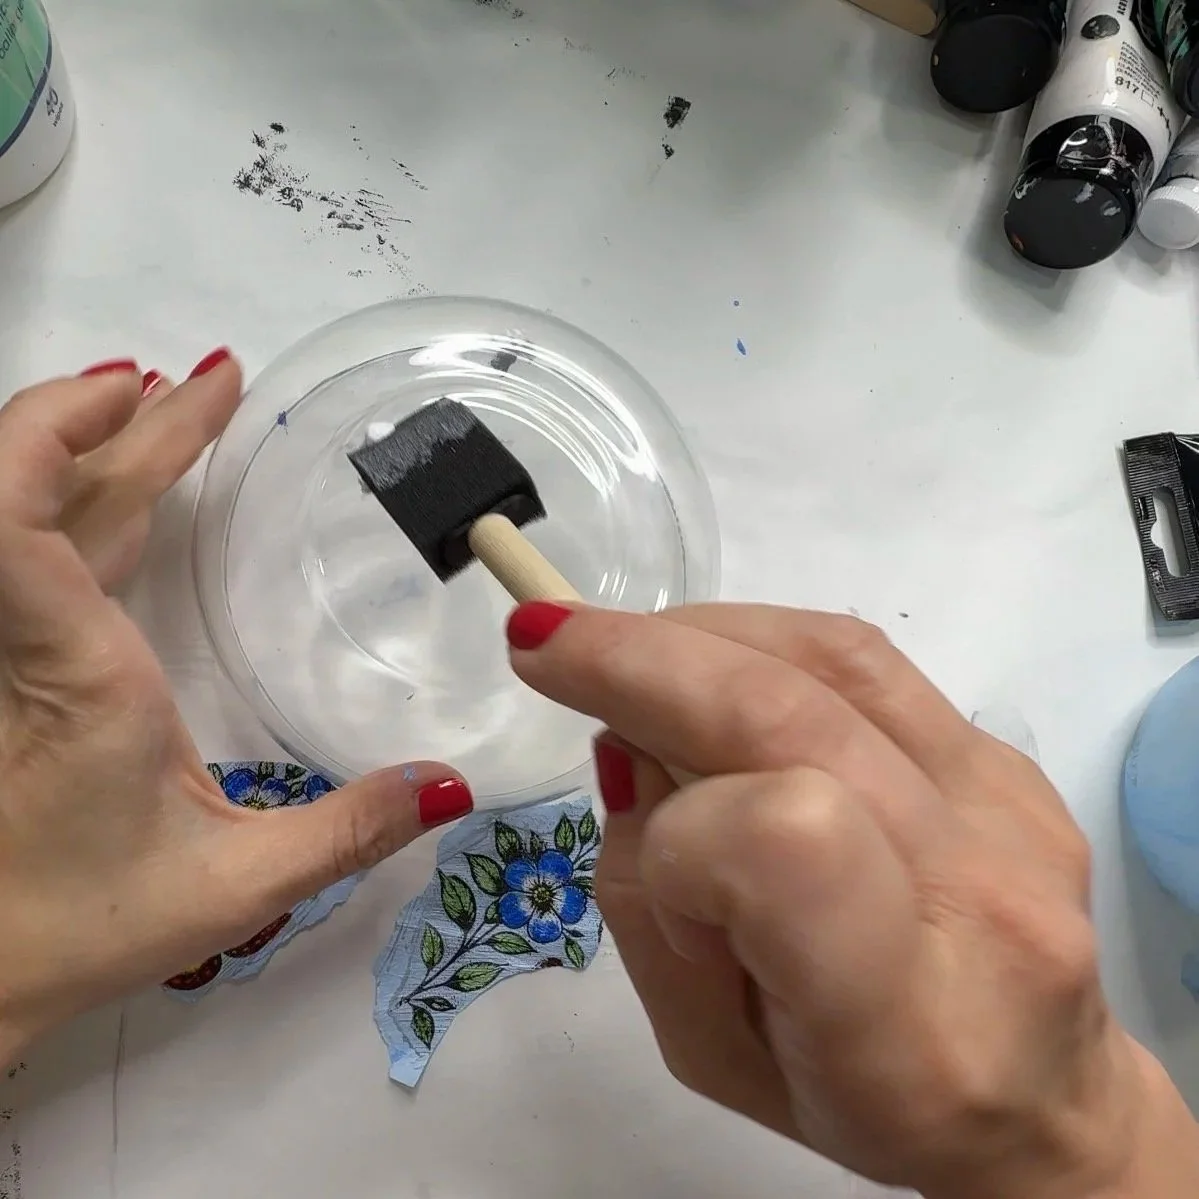
Place a torn or cut piece of tissue paper onto the wet Mod Podge.
Apply another thin, even layer of Mod Podge directly over the tissue paper.
Add your next piece, overlapping slightly with the one before it.
Continue until the entire surface is covered.
Seal with one more layer of Mod Podge over the whole piece, then let dry.
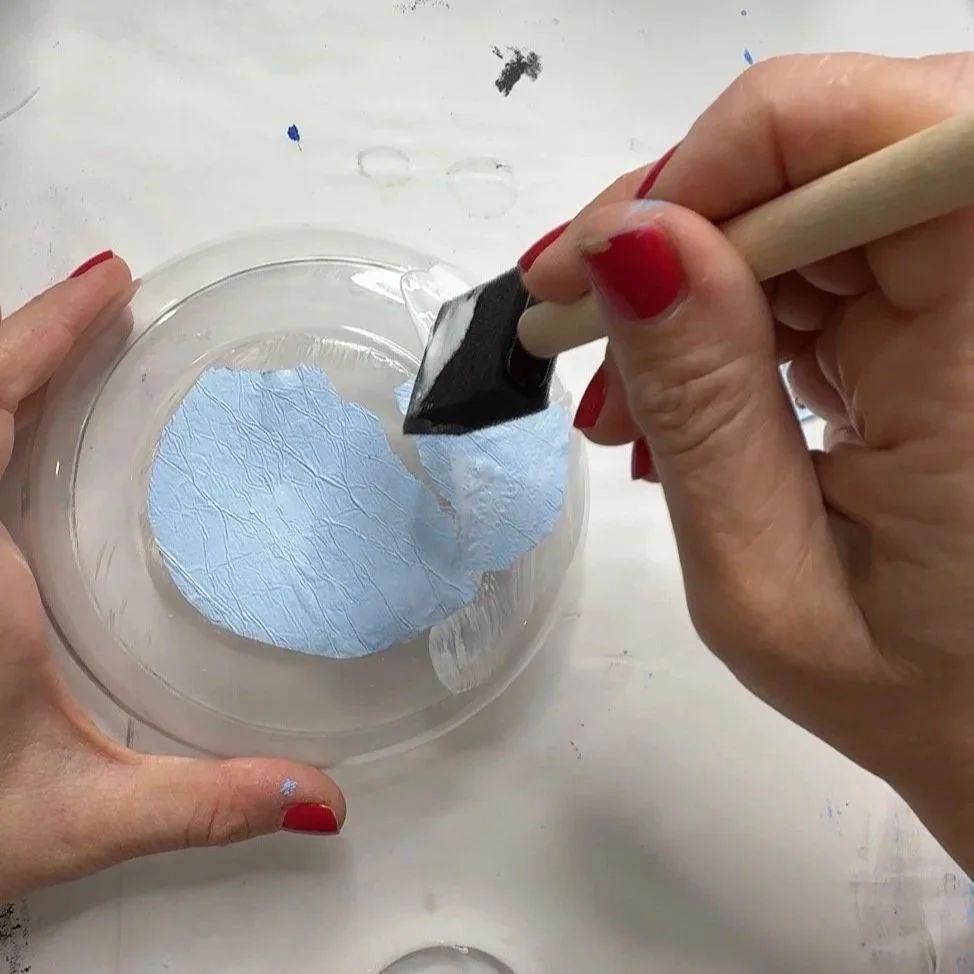
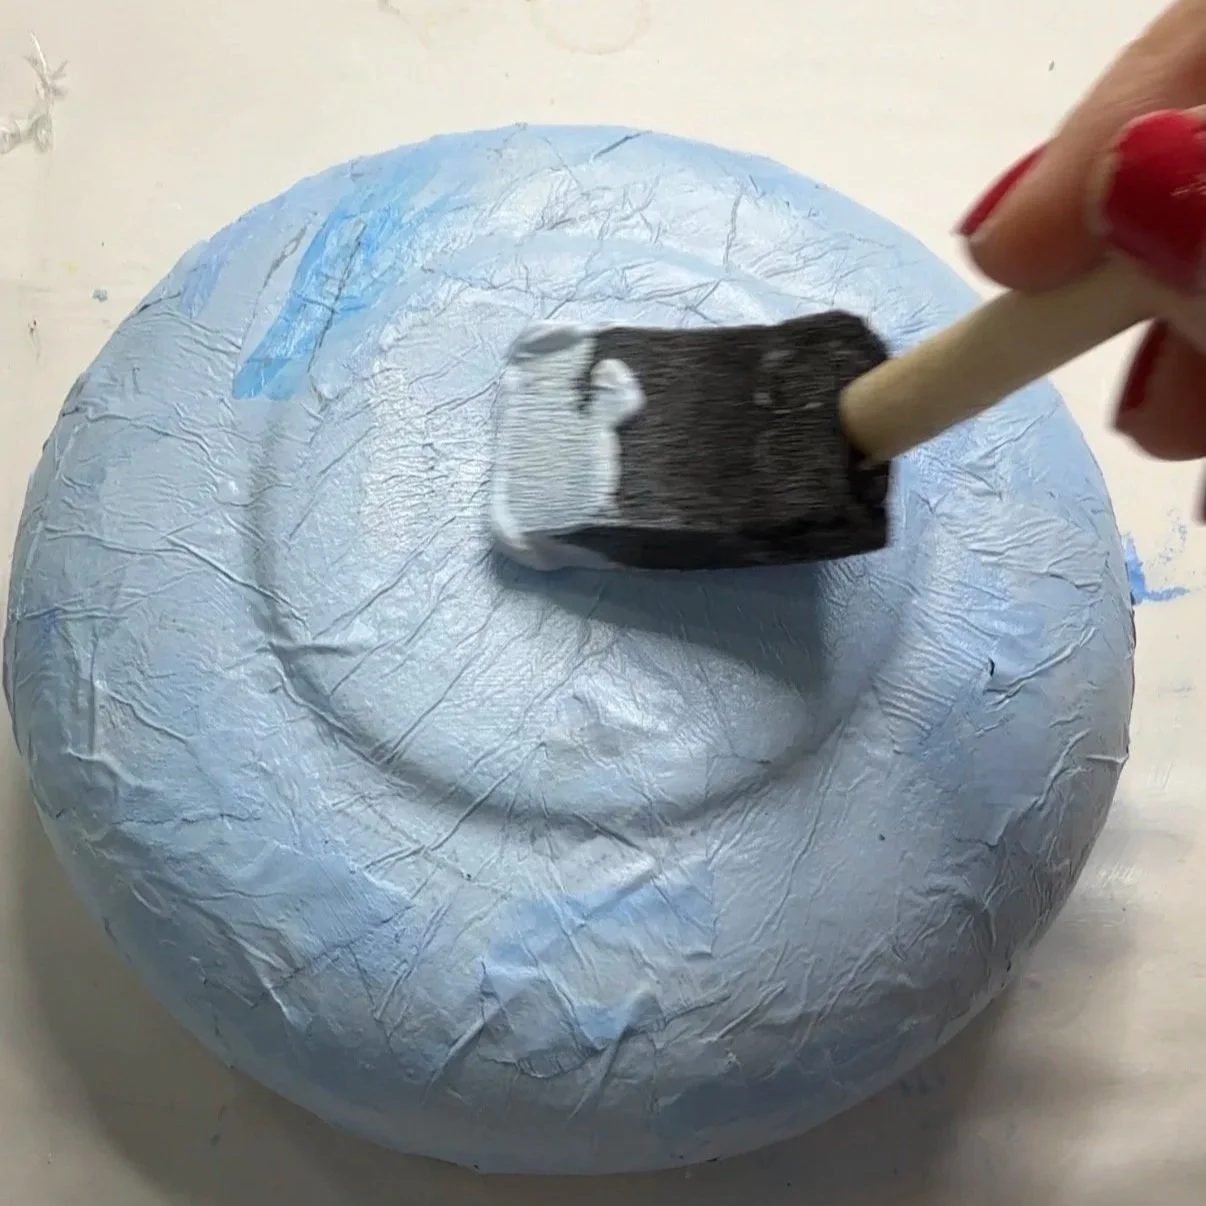
Optional: add a layer of white acrylic paint first if you want to soften or block out any busy tissue patterns underneath.
Apply a final layer of Mod Podge and let it cure for a few days.
Once fully dry, add any embellishments. I finished mine with a gold paint pen.
Best Surfaces for Decoupage
Canvas
Wood
Glass
Furniture
Terra cotta
Cardboard
Journal covers
Plastic: works with Mod Podge, but apply a thin, even layer of acrylic paint to the surface first for the adhesive to grip properly
Tip: you can decoupage to either the inside or the outside of glass. If you want the design visible through the surface (like the bottom of a bowl), apply your pieces face up on the inside. If you want the design on the outside of a vase, apply the pieces face up on the outside instead.
Mod Podge Finishing Options
Matte
Satin
Gloss
Wax
Resin
Creative Project Ideas for Custom Tissue Paper
Handmade gift wrap
Decorative boxes
Journal covers
Trinket bowls
Keychains
Furniture makeovers
Canvas art
Holiday ornaments
Lampshades
Vases
Mixed media backgrounds
DIY wrapping paper
Handmade cards
Frequently Asked Questions
Can you gelli print on tissue paper? Yes, as long as you use wet-strength tissue paper rather than standard tissue. Wet-strength paper holds up to the acrylic paint on a gelli plate without tearing, and it produces a smooth, professional-looking print once dry.
Does regular tissue paper work for decoupage? Not well. Regular tissue paper tears as soon as it contacts wet Mod Podge or paint. Wet-strength tissue paper, medical-grade paper, or decoupage-specific tissue hold up far better and are worth the extra cost.
Can you run tissue paper through a printer? You can tape tissue paper to a sheet of cardstock and run it through an inkjet or laser printer, but results vary and jams are common. Adjust your printer settings and use manual feed if you try this.
What's the difference between wet-strength tissue paper and regular tissue paper? Wet-strength tissue paper is manufactured to resist tearing when it's wet, which makes it suitable for painting, gelli printing, and decoupage. Regular tissue paper has no wet-strength treatment, so it disintegrates when it contacts water-based paint or glue.
What glue should I use for tissue paper decoupage? Mod Podge is the standard choice. It works as both adhesive and sealant. Gel medium is another good option, especially for mixed media pieces that will also be painted.
How do you keep tissue paper from tearing during decoupage? Use wet-strength tissue paper from the start, apply Mod Podge in thin, even layers rather than thick globs, and let each section dry before adding more layers on top.
Final Thoughts
Experimentation is the best way to master any technique! Allow yourself to fail, test different papers and techniques, and see what actually works for your art practice. One pack of wet-strength tissue paper can turn into dozens of completely different pieces.