
The Complete Guide to Linocut Printmaking: Techniques, Types, and How to Get Crisp, Clean Prints
I first learned how to make a linocut print in middle school. I still have my very first linocut plate and it was a carving of a bird. Thinking back to that time, it wasn't one of my favorite art forms because it was difficult and it hurt my hands. However, there are so many alternatives to actual linoleum now and I have fallen in love with the process.
I love to linocut because it both satisfying and portable. It is relatively inexpensive and the linocut plates can be used again and again and again. Win-win all around!
Whether you've tried it before or you're a true beginner, this is the guide I wished I had when I first started making my linocut prints.
Let's get started!
What Is Linocut Printing?
A linocut block is a smooth surface for carving. Linocut is, for lack of a better word, a subdivision of relief printmaking. You start out with an image, you transfer it to a linoleum or a linoleum-like surface, then you carve away all of the areas that you do not want to print.
This way, when you apply ink to the surface of the carving, the ink only lands on the peaks or the high points of the surface. This raised area transfers the ink to either paper, fabric or any other kind of surface. You can make unlimited designs and use the linoleum again and again and again. You can make multi-colored prints or single color prints. The final print is always the mirror image of the original design, so any writing will need to be carved in reverse; or mirrored.
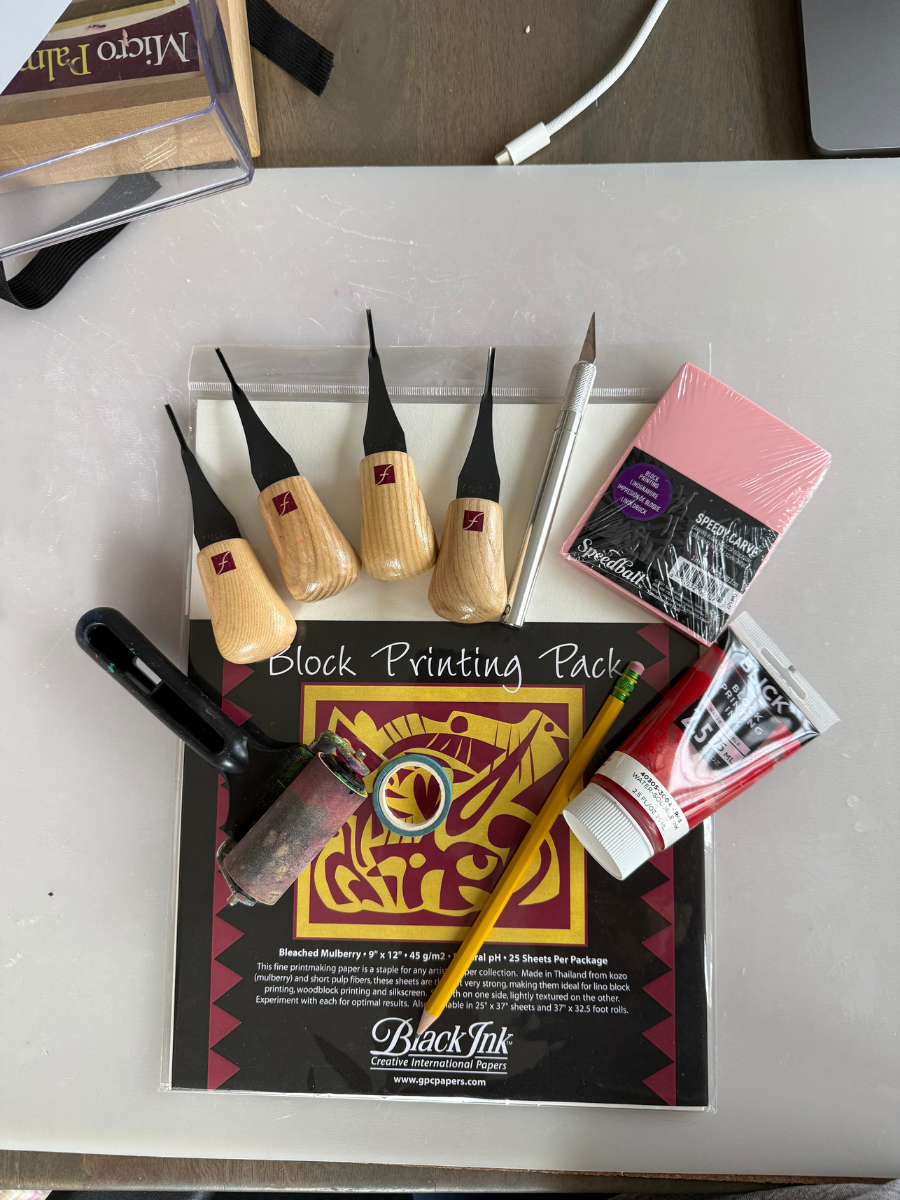
Materials needed:
These are the materials used in the process. I will go into further detail about each tool below. Keep in mind that while other artists might prefer different materials, these have worked best for my personal practice. Experiment to see what works best for you!
Ink: waterbased, water washable oil ink
Printmaking paper (very thin, fibrous paper)
Carving tools (4 needed): u shape for outlines, broader u shape for broader cuts and a wider u for widest cuts and a shallow tool for clearing away the excess material in large areas)
Smooth surface for ink rolling (glass, plastic or acrylic plates)
Bench hook: good for safety
Rags or papertowels
Acrylic paint or ink for staining the surface
Razor blade or xacto
Printing press (not necessary for beginners)
Types of Linoleum for Printing
For this guide, linoleum is the blanket term for the surface that will be carved. However, there are several different types so it is important to break down the differences between each surface.
1. Battleship Gray Linoleum
Description:
This was the original surface for linocut printing and was originally used as linoleum flooring and for the interiors of battleships (thus the name). I first learned how to cut on battleship gray linoleum. It is the industry standard for the most professional type of linocut printing. It is also the toughest to work with.
Pros:
If done right, it’s surface shows the most details
The results are crisp
The surface lasts the longest and is most durable
Cons:
Very hard to carve into - not great for beginners
Is temperature sensitive and can become brittle when exposed to extreme temperatures.
Best for: Experienced linocut artists who want crisp lines
2. Soft-Cut Linoleum (Pink or Tan Rubber Blocks)
Description:
This is a rubber-based surface and it is much easier to carve into. This is my preferred surface and the industry standard for beginners. I love using these with my middle school students. You can also use a pink rubber eraser for true beginners or if you'd like the challenge of creating very small linocuts.
Pros:
Easier to carve
Beginner-friendly
Easier on your hands and less likelihood for injuries
Can be cut into to create a jigsaw-puzzle surface for multi-colored use (I will get into this later)
Cons:
Hard to get fine, fine details
Can rip or carve too deep and ruin the cut
Best for: Beginners or those with sensitive hands
Essential Tools and Materials
To produce clean, crisp prints, quality tools matter.
Carving Tools
U-gouges (various sizes) for clearing space
V-gouges for detail lines
Bench hook (for safety and control)
Sharp tools are non-negotiable. Dull blades cause slipping and ragged edges.
Ink
Oil-based ink (rich color, slower drying, professional finish)
Water-based ink (easy cleanup, quicker drying, slightly less saturated)
Oil-based ink generally produces more even, crisp coverage.
Brayer (Ink Roller)
A high-quality rubber brayer ensures even ink distribution.
Paper
Smooth, slightly absorbent paper produces the best results.
Too textured = broken lines.
Too glossy = poor transfer.
The Basic Linocut Process
Step 1: Prepare the lino block
Using a blade, gently scrape the entire surface of the lino block. An alternative if you do not have a blade is to use some sandpaper
This preps the texture and removes any oils that might be running along the surface of the linoleum or rubber
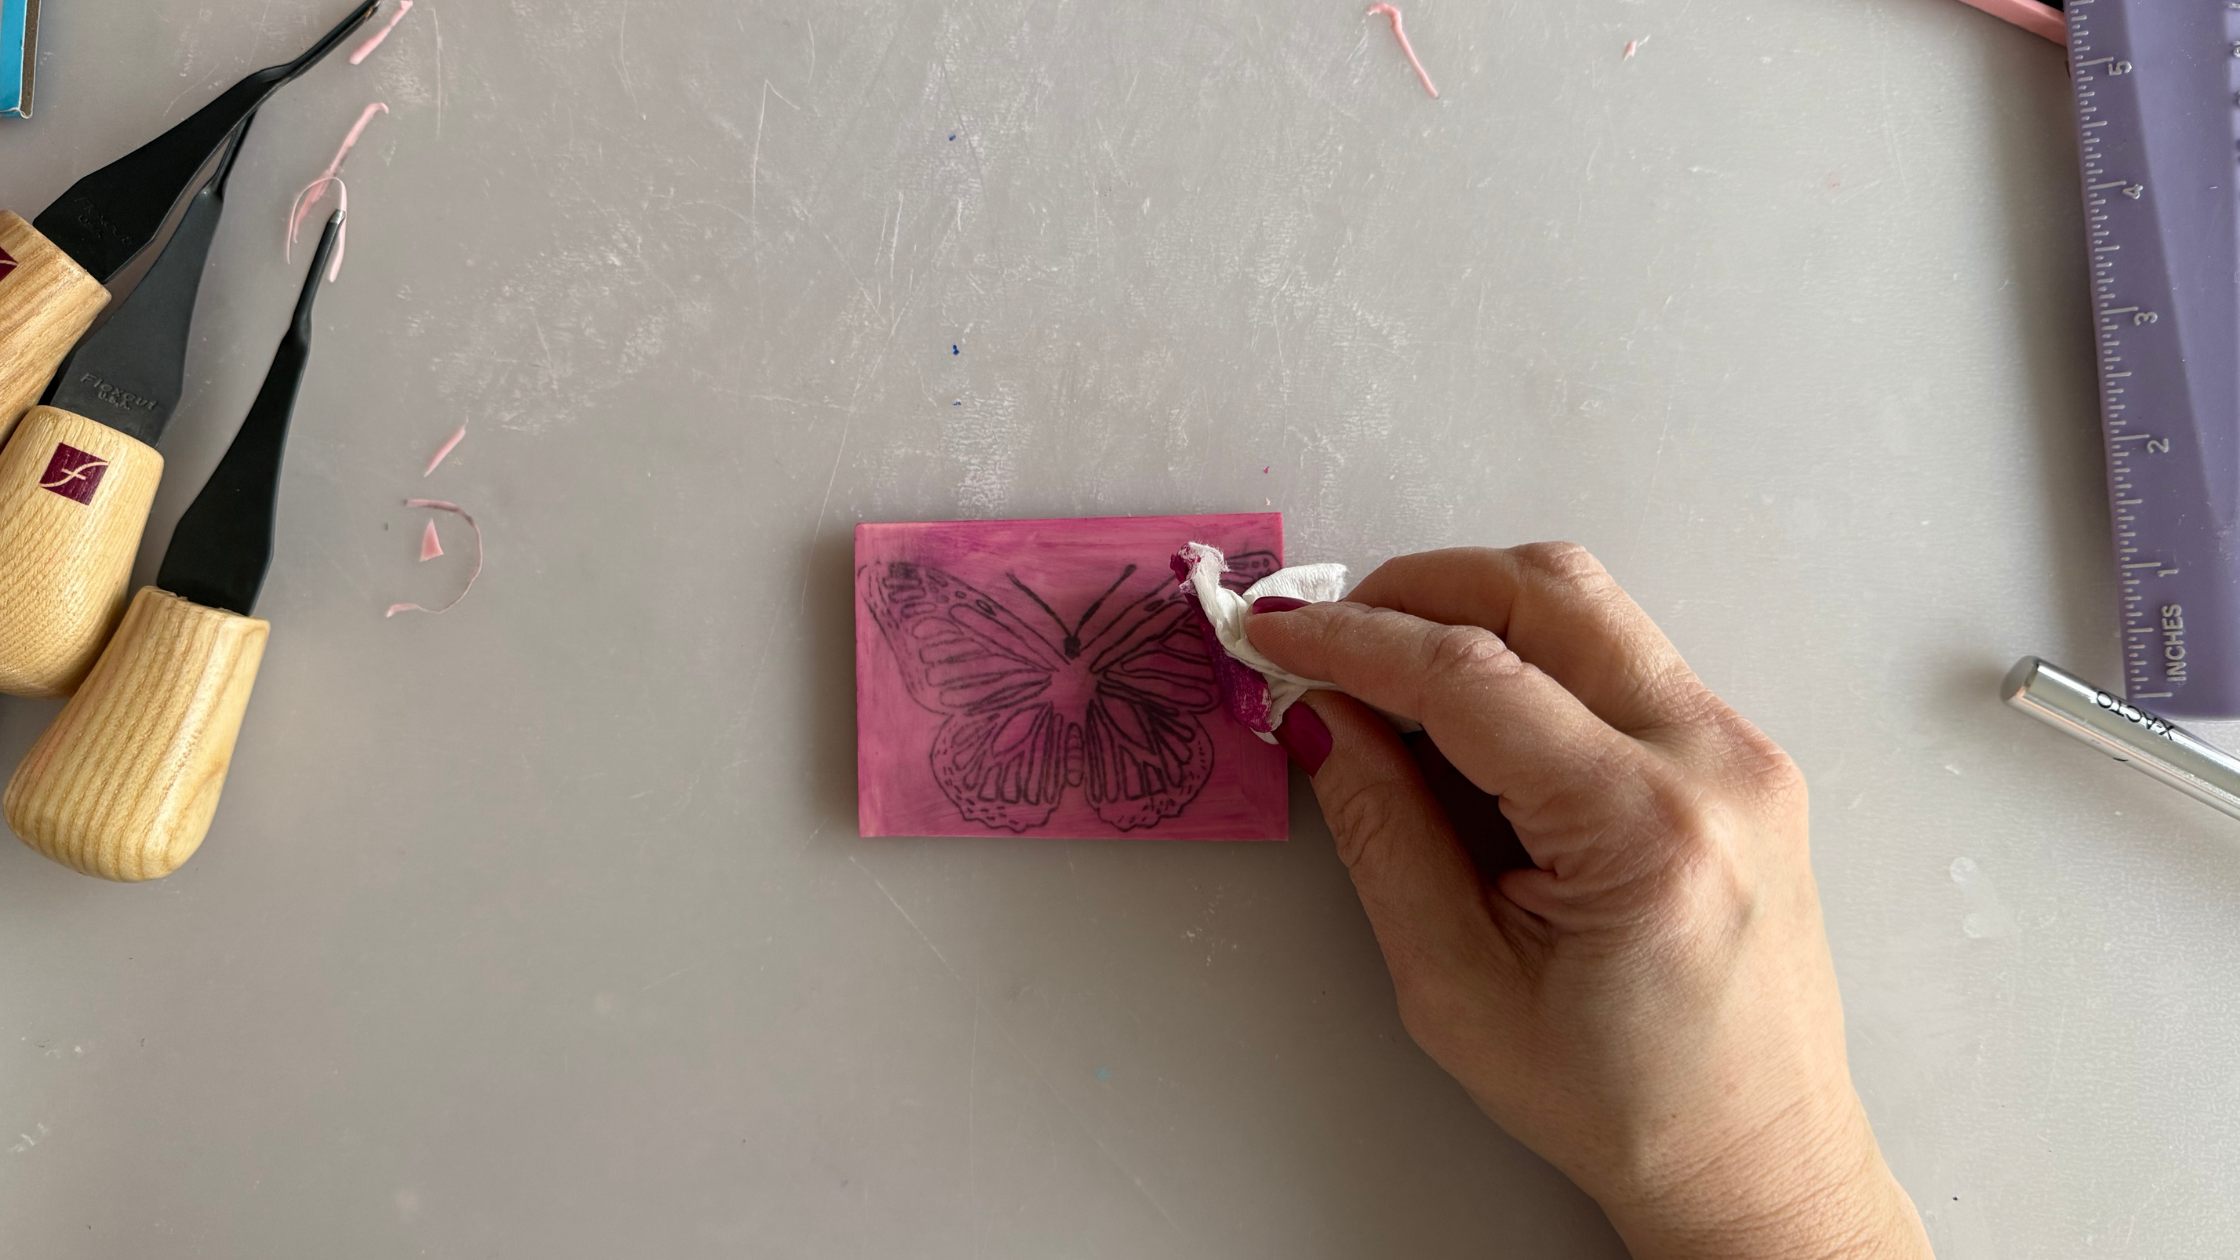
This next step is optional, but I believe that it makes the carving much easier to see. I like to apply a thin layer of either acrylic paint, acrylic ink, or sharpie along the entire surface of the linoleum, then allow to dry
Step 1: Design
Keep it high contrast.
Avoid too much tiny detail in early attempts when starting out
Remember everything prints in reverse so be mindful of how to print words.
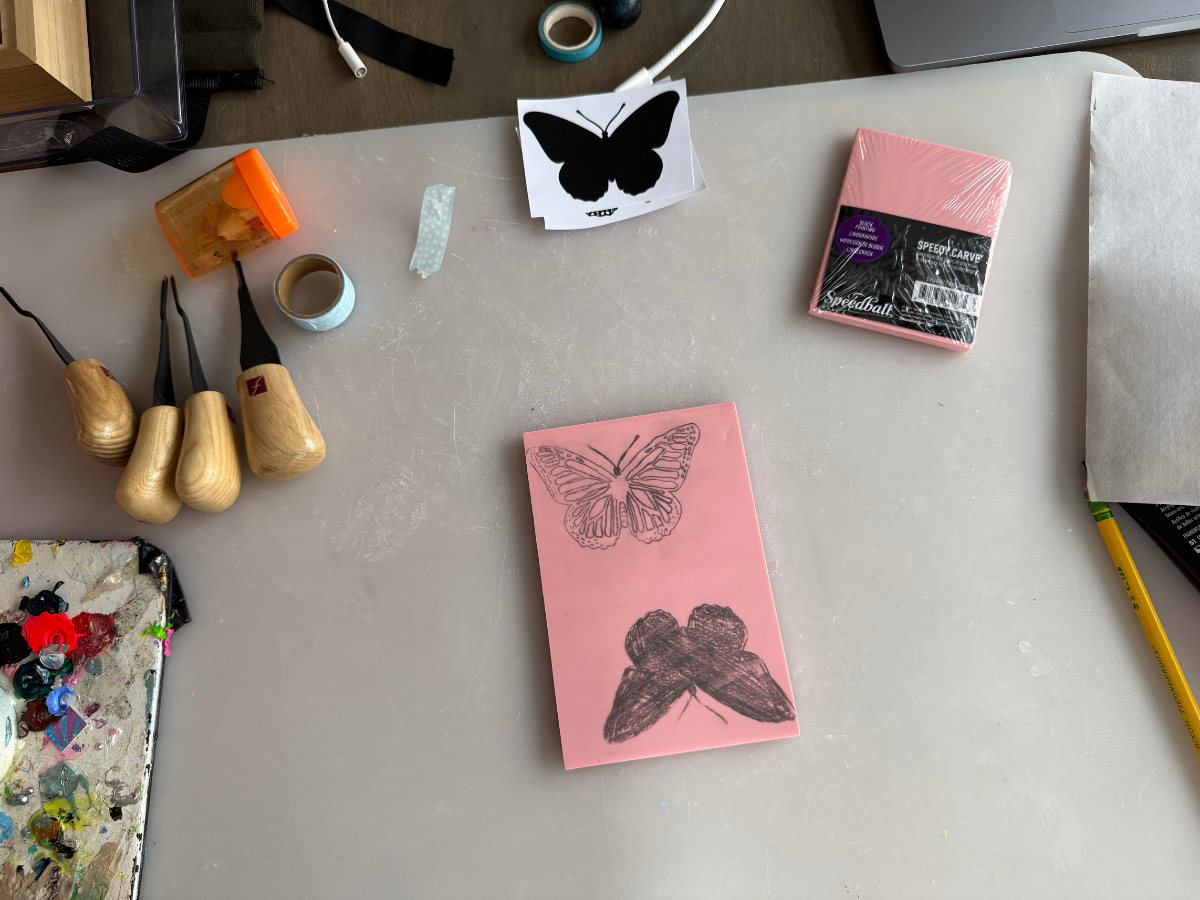
Transfer your design using graphite paper or by drawing directly on the block.
Step 2: Transfer the design (3 ways)
Option 1: Pencil transfer (my personal favorite)
Grab your softer pencil - either 3B or 4B or softer
Using tracing paper, trace the entire design
If you want shading or hatching, make sure to add that
Trace the entire design - whatever is traced can be transfered but whatever you miss will not end up transfering to the linoleum block
Swap to a 2H pencil or a harder pencil
Flip the tracing paper
Using painters tape, tape it down and reverse trace
Push hard to insure the entire image transfers
Option 2: Iron
The iron method only works with a laser printed design.
An alternative to the tracing is to use the side of your pencil and do a rubbing to transfer the design. Both techniques work
Another alternative to transferring the image to the linoblock is to print out your image onto printer paper and use an iron to make the transfer. This is good if you want something to look less hand drawn or maybe if you are transferring a design found in books or online
Place the image face down onto the lino block
Place a piece of parchment on top
Iron on medium heat for 20-30 seconds
Peel one corner to see if it worked. If not, continue in 20 second spurts
If it doesn't transfer properly, you can remove the transferred design using nail polish remover
Option 3: Transfer medium
Print an image using a laser printer
Tape the image to the linoleum, face down
Apply a thin coat of gel medium to the surface of your lino block
Apply an additional coat of gel medium focusing on the areas of the design and apply directly to the the paper
Push the paper onto the surface of the lino block
Use a credit card to insure the removal of bubbles
Leave it down for 30 minutes
Peel to reveal design
Step 2: Carving
Secure your block with a bench hook. This prevents injury and allows you to stabilize the block. I've also see artists use carpet backing to prevent slipping.
Using the tools, carve away from your hands. Keep your second hand/fingers behind the tool at all times. Remember, this is a blade and it is sharp.
I always start with using a v-gouge to outline all of the areas and then I go back in with a smaller blade and remove the excess material.
It is always best to turn the lino block rather than turning the tool or your wrist. I find that when I move my wrist, my carvings aren't as crisp.
Try to avoid shallow scrapings of the surface because then you will need to go back in and fix your work.
When carving you will have the option to either carve away the design OR carve away everything except for the design. There are a lot of reduction prints linocut techniques to try which we will cover later on in this guide,
Step 3: Inking
Once you are happy with the design, it is time to start inking. In my experience with linoleum block printing, I have had to ink and then go back and carve some more. This is a simple process but sometimes takes time.
Add printmaking ink to a piece of glass. An inexpensive way to get glass for inking is to go to a thrift shop and purchase an old picture frame and pop out the glass. You can also use a thick acrylic surface.
Using your brayer, roll out the ink evenly onto the glass.
Apply to the surface of the lino block.
Apply gently and roll in different directions to avoid under-inking or over-inking.
What inks to buy? This is sort of personal preference. You will want good quality inks. Some people prefer water-based inks while others might want oil based or more transparent colors. As you get more into woodblock printing, you will develop your own unique style and can experiment with different kinds of inks. There are loads of lovely colour mixes that you can create once you get into the process and want to bring your own character to the process.
Step 4: Printing
Take a piece of paper (good papers work best but when you are just starting out, regular printing paper works just fine).
Gently place the paper on top of the inked lino
Using your barren, move in circular directions on the backside of the paper
You can print using:
A baren (hand tool)
A wooden spoon
A printing press
Apply even pressure. Work from the center outward.
Peel slowly from one corner to reveal your print.

Types of Linocut Print Techniques
Ok, so this is where things get really fun...and sometimes complicated. I am sure that there are a lot more techniques outside of these three, but these are the most well known concepts. I have laid them out in order of least difficult to the most difficult.
1. Single-Color Linocut
This is where you will design a print with the intension of printing single colour prints. This means that you can print in any color, but only one. You will still be able to make endless prints, but only one layer. This is best for beginners.
2. Reduction Linocut
A linocut reduction print is interesting because you begin with one block similar to the first concept. You will still only use one block, but you will carve at different stages. This is also known as a suicide print because once you print each layer, you cannot go back and print that layer again after you've carved more into it. This is a multi-stage carve with a single block. Here's how it works:
Add the design to the linoleum
Using sharpies, color each section in the color you'd like to use
Start by carving away only one color
Print
Then carve away the area you've just printed
Apply the next color and then print again
Carve away what you've printed and then print another.
Always start with the lighter color and move to the darker with each layer
Personally, reduction linocuts aren't my favorite because I like to be able to use my designs over years and years and you can't with this process. However, it is good if you choose to make limited edition prints.
3. Jigsaw block (my personal favorite)
This is where you will make a multi color artwork linocuts on one block. This works better with the rubber linoleum rather than the grey, but can still work on the battleship grey if you have a sharp enough blade. Here's how it works:
Carve the linocut the same way you would carve a single color block.
Once you're finished carving, you will use a blade (I use an xacto knife) and cut apart the design by color.
Apply the different colors to each "puzzle piece."
Carefully place them all back together.
Print while the ink is still wet.
4. Multi-Block Linocut
This is a really cool process, but a very time consuming way to make a linocut print. However, this is the most common method and yields subtle differences from the previous method but you can use your lino blocks again and again. However, you will need a separate tile to carve for each of the colors you use. You will want to use different colors for each block. You can easily reprint your unique prints endless amounts of time and while it takes longer, your own design can live on for as long as you choose. You will need to register the paper carefully to insure a smooth printing process with finished pieces that line up beautifully. Let's break it down:
Transfer the same design to 2(or more) lino blocks. For this tutorial, let's use three as an example and let's assume we are using red, blue and yellow.
For the first block, carve away everything except for the areas that you want yellow
For the second block, carve away everything except for the red area.
For the third block, carve away everything except for the blue area.
Make sure the lino block designs are in the same place for each layer.
Print each layer one at a time by applying the paint or ink and use the soft rubber brayer to apply the paint to the linocut patterns.
The first print is the easiest and then you will have to make sure you are registering (or lining up) each additional layer.
Final Thoughts
Linocut printing is a very cool process because it is endless in possibilities. It is challenging to think about how things might look ahead of creating, but once you get the hang of it, it is quite satisfying! So, grab your tools and start with the basics!