
The Rock Painting Beginners Guide: Materials, Project Ideas, And Step-by-Step Tutorials [2026 Update]
featuring Guest Contributor, Aviva Rappaport

The Rock Painting Beginners Guide: Materials, Project Ideas, And Step-by-Step Tutorials
Every summer, my kids and I collect rocks near the ocean and bring them back to the house. We love to paint them and then leave them for people to find later. We always add the date and sign our names so that we can remember that specific summer.
Rock painting is a delightful blend of creativity and natural beauty, and has surged in popularity among beginners and seasoned artists alike. There's been a movement called "Kindness Rocks" where people choose a fun rock and then use acrylic paint pens to make them special. Next, they add a positive message using a few basic steps, and...poof! You've got a kindness rock.
Rock painting originated from ancient traditions and evolved into a modern art form, rock painting offers a therapeutic outlet for expression and a unique way to connect with nature. Plus...no need to spend money on purchasing a canvas. Who knew that smooth stones could sometimes be better than a canvas!
Whether you're just starting or looking to refine your skills, here’s a comprehensive guide to rock painting for beginners.
Materials for Painting Rocks:

You just need a few materials for rock painting
To embark on your rock painting journey, gather these essential materials:
Rocks: Smooth, flat stones are ideal for painting. Look for them in nature or purchase them from craft stores. Personally, I prefer to find rocks near the lake or the ocean, but they do have jump bags at both the landscaping store and the home improvement stores.
Do not use artificial stones...they look too, well, artificial!
Paint or paint pens or Acrylic Spray Paint: Acrylic paints work best due to their bold, bright colors and durability. There are a few oil based pens I like, too, like the Sharpie oil. However, there are a lot of choices when it comes to acrylic paint and we will break that down a bit further, depending on which technique you’re using for your rock.
Paintbrushes: A variety of sizes for different details and coverage.
Dotting tools: These are great if you're looking to make different sizes of dots (like a mandala) or small details that are hard to execute using a paint brush.
Sealant: Protects your artwork from the elements; choose a spray-on acrylic sealant. Check out this post to learn more about sealants.
Palette: For mixing and blending colors. A little trick of the trade...did you know that magazines make the best palettes? They are the perfect material to not seep through and repurposing them is great for the environment.
Pencil and Eraser: For sketching designs on rocks before painting. I have also used chalk, but white colored pencils work great on darker rocks.
Water and Paper Towels: For cleaning brushes and surfaces.
Preparation:
Choose Your Rocks: Select smooth rocks of various shapes and sizes. Wash them thoroughly to remove dirt and debris, and let them dry completely. Paint will not work as well on a wet rock.
Design Planning: Sketch your design ideas on paper or directly on the rocks with a pencil. This helps visualize the composition and layout before painting.
Techniques and Tips for Painting Rocks

Try out different techniques
Painting Techniques:
Base Coat: Apply a base coat of white or light-colored acrylic paint to prime the rock before your design. A base coat seals porous stone and makes every color layered on top look more vibrant. If the rock's surface is very porous or uneven, seal it first, then apply the base coat once it's dry.
Layering: Build up thin layers of paint to create depth and texture in your design. Let each layer dry fully, usually 20 to 30 minutes, before adding the next; painting over wet layers causes colors to muddy and drag.
Detailing: Use a small, fine-tipped round or liner brush for intricate lines, small rocks, and lettering, and a flat or fan brush for broader strokes and backgrounds. Smaller brushes give you more control on curved rock surfaces.
Blending: Blend two or more colors directly on the rock while the paint is still wet to create gradients and shading, a technique known as wet-on-wet blending. Work quickly, since acrylic starts to set within minutes.
Dotting: Use a dotting tool to build mandala patterns, add texture, or place fine details on smaller designs. Dip the tip in paint and press straight down for a clean, round dot; different-sized tools produce different-sized dots. For dots larger than a dotting tool allows, dip the flat end of a Sharpie in paint instead.
Hydro-Dipping: Float small amounts of acrylic spray paint or nail polish on room-temperature water, swirl gently with a toothpick to create a marbled pattern, then dip your rock straight down through the paint and lift it out the same way. Let it dry completely before sealing; every rock comes out with a unique pattern.
Tips for Beginners:
Start Simple: Begin with basic designs like geometric shapes, patterns, or simple landscapes to build confidence. Make sure as a best practice to use the smoothest flat rocks. If you find a beautiful rock in suitable shape, just run your finger across the surface to make sure the rock can be easily transformed into a decorative rock.
Definitely start with simple designs and user friendly craft paint pens. While I love posca paint pens, you can also find off-brand acrylic paint pens for your rock project.
Practice Patience: Let layers dry completely before adding more paint or details to avoid smudging or mixing colors unintentionally.
Embrace Imperfections: Each rock is unique, and slight imperfections can add character to your artwork.
Rock Painting Troubleshooting:
Common Problems (And How to Fix Them)
-
Paint won't stick to rocks that are dirty, damp, or coated in natural dust and oils. Wash your rock, let it dry completely, then apply a white acrylic base coat first. The base coat seals porous stone and gives every color on top something to grip.
Pro tip: If you're in a humid climate, I've found that baking rocks at 200°F for 20 minutes (let cool completely!) forces out hidden moisture. -
Paint pens skip when ink hasn't reached the tip yet or the rock's surface is too rough. Shake the pen with the cap on for 30 seconds, then pump the tip on scrap paper until color flows steadily before touching the rock. Store pens tip-down between uses, and warm them in your hands first if you're painting outside in cold weather.
-
Sticky sealant almost always means the coats went on too thick or the humidity was too high. Apply sealant in thin, even layers, wait 2 to 4 hours between coats, and seal on a dry day when humidity is under 50%.
-
Paint cracks when a thick top layer dries faster than the layer underneath it, and the shrinking top skin pulls itself apart. Build your design in several thin coats instead of one heavy one, letting each layer dry fully before adding the next.
-
Dull color is usually caused by thinning paint with too much water, using student-grade paint, or painting on a rough surface. Use a gloss medium instead of water to thin your paint, choose artist-grade acrylics for your focal colors, and finish with a gloss sealant to bring the vibrancy back.
-
Item descriptionYes, if the rock will live outdoors. Sealing only the painted side leaves the unpainted back and edges exposed to moisture, which can cause the rock to crack or the paint to lift from underneath over time.
-
A spray-on acrylic sealant typically protects an outdoor painted rock for 6 to 12 months before it needs reapplying, depending on sun and weather exposure. Rocks kept indoors or in covered areas can last for years without resealing.
-
Acrylic paint on rocks is dry to the touch in 20 to 30 minutes per layer, but it needs 24 to 72 hours to fully cure before sealing. Sealing too early can trap moisture and cause cloudiness or peeling.
Design Ideas

You can find inspiration everywhere for rock painting!
Themes and Inspirations:
Nature: Paint flowers, trees, animals, or landscapes inspired by the natural world.
Seasons: Capture the essence of different seasons with appropriate colors and motifs.
Mandalas: Create intricate mandala designs with concentric patterns and symmetrical elements.
Quotes: Write inspiring quotes or messages on rocks for a personalized touch. Add positive phrases to make a difference in someone's life.
Summer Rock Painting Ideas
Summer is the easiest season to paint rocks in. Warm weather encourages bold, bright colors, and beach trips and outdoor walks hand you a steady supply of smooth stones. Always start with a white acrylic base coat, it keeps every color layered on top more vibrant.
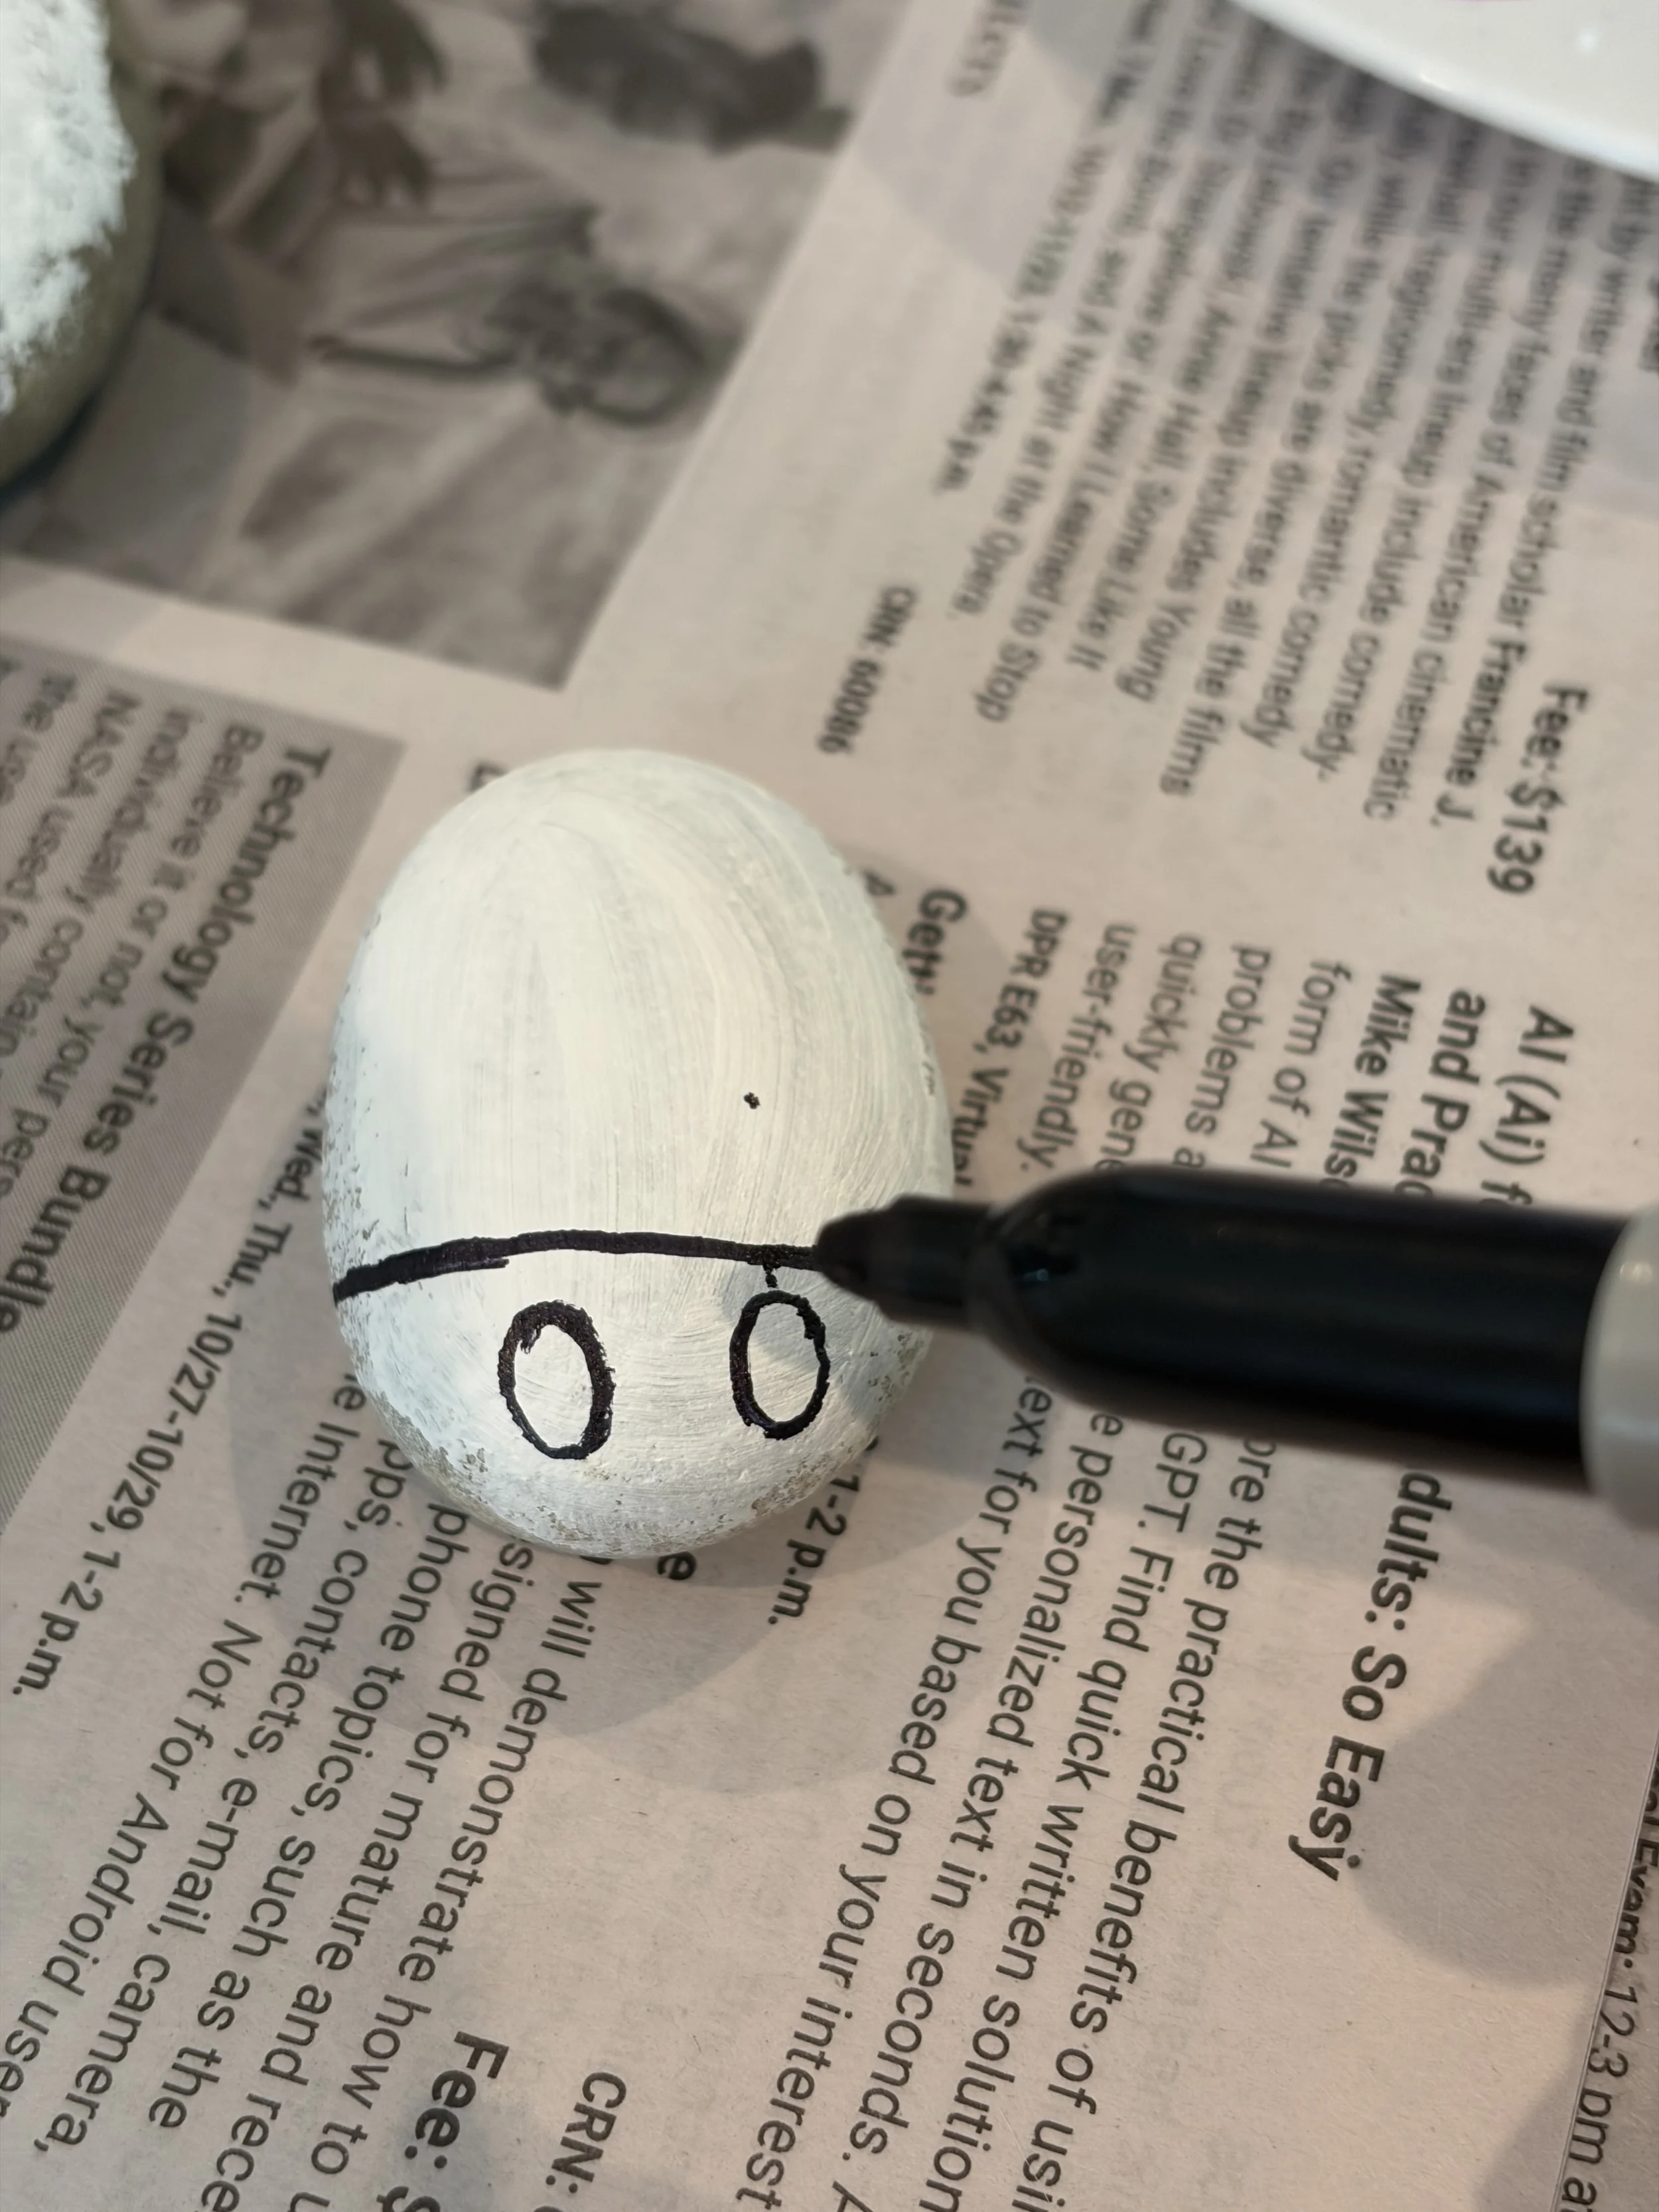
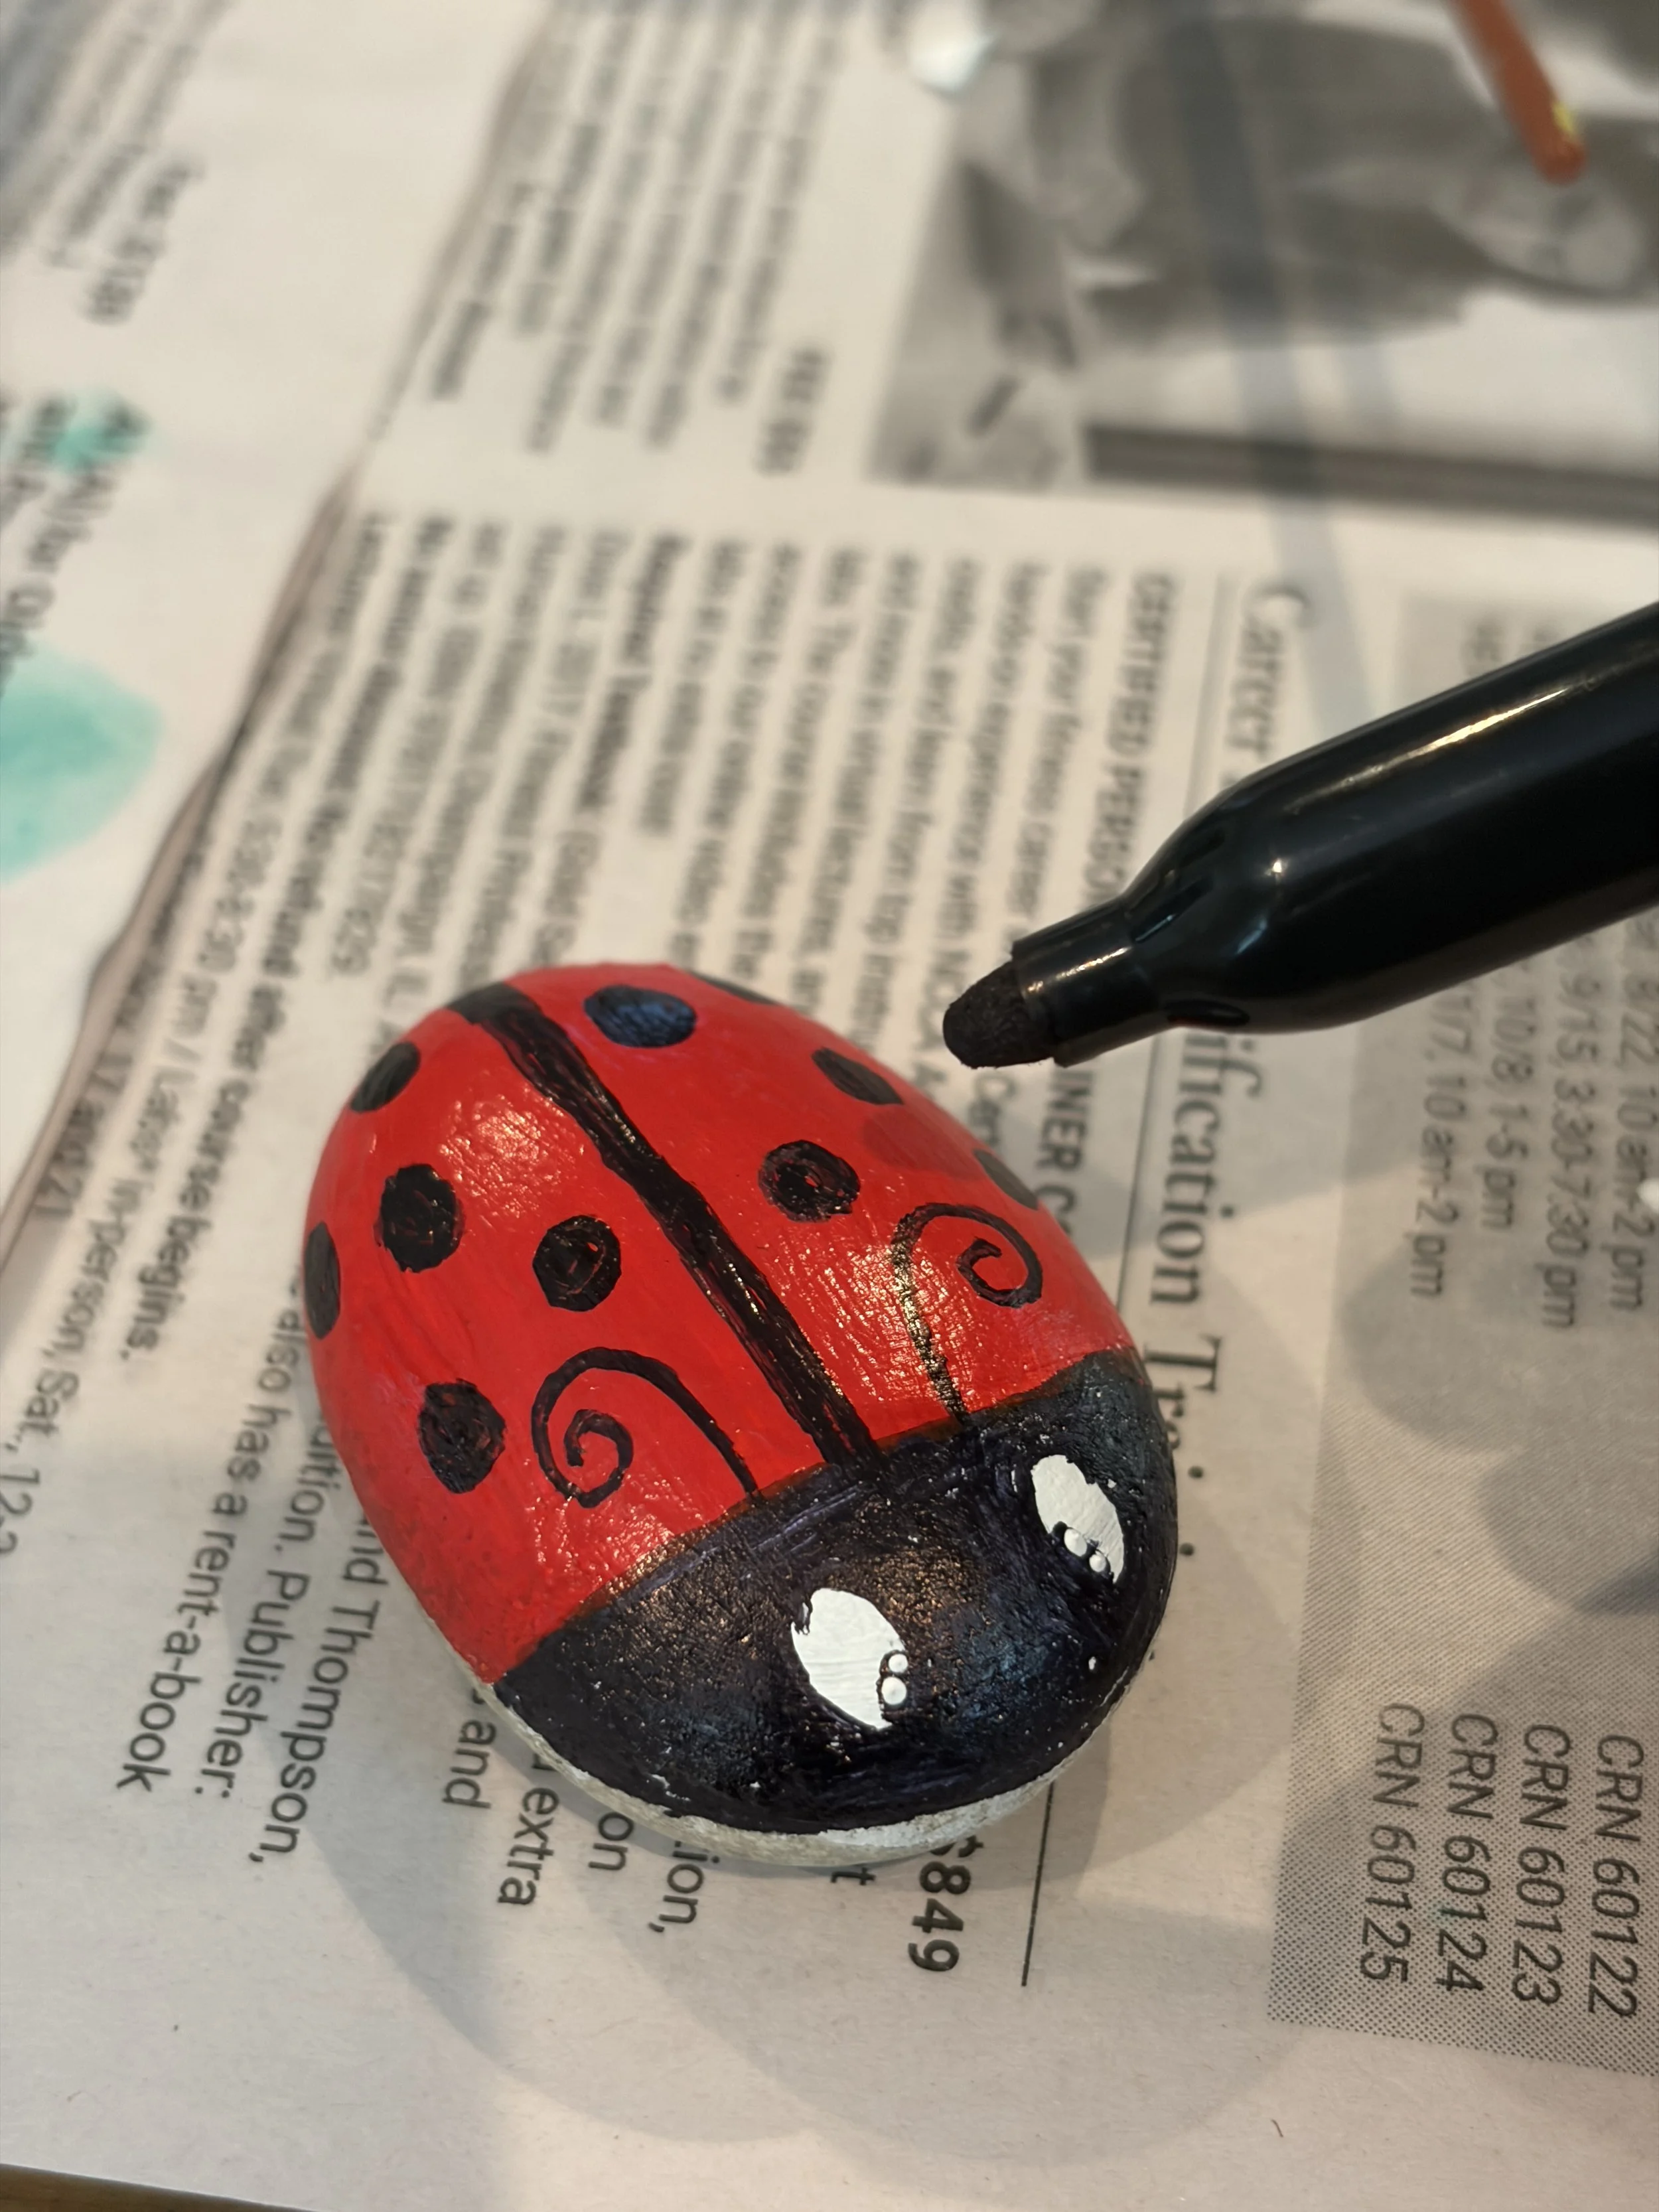
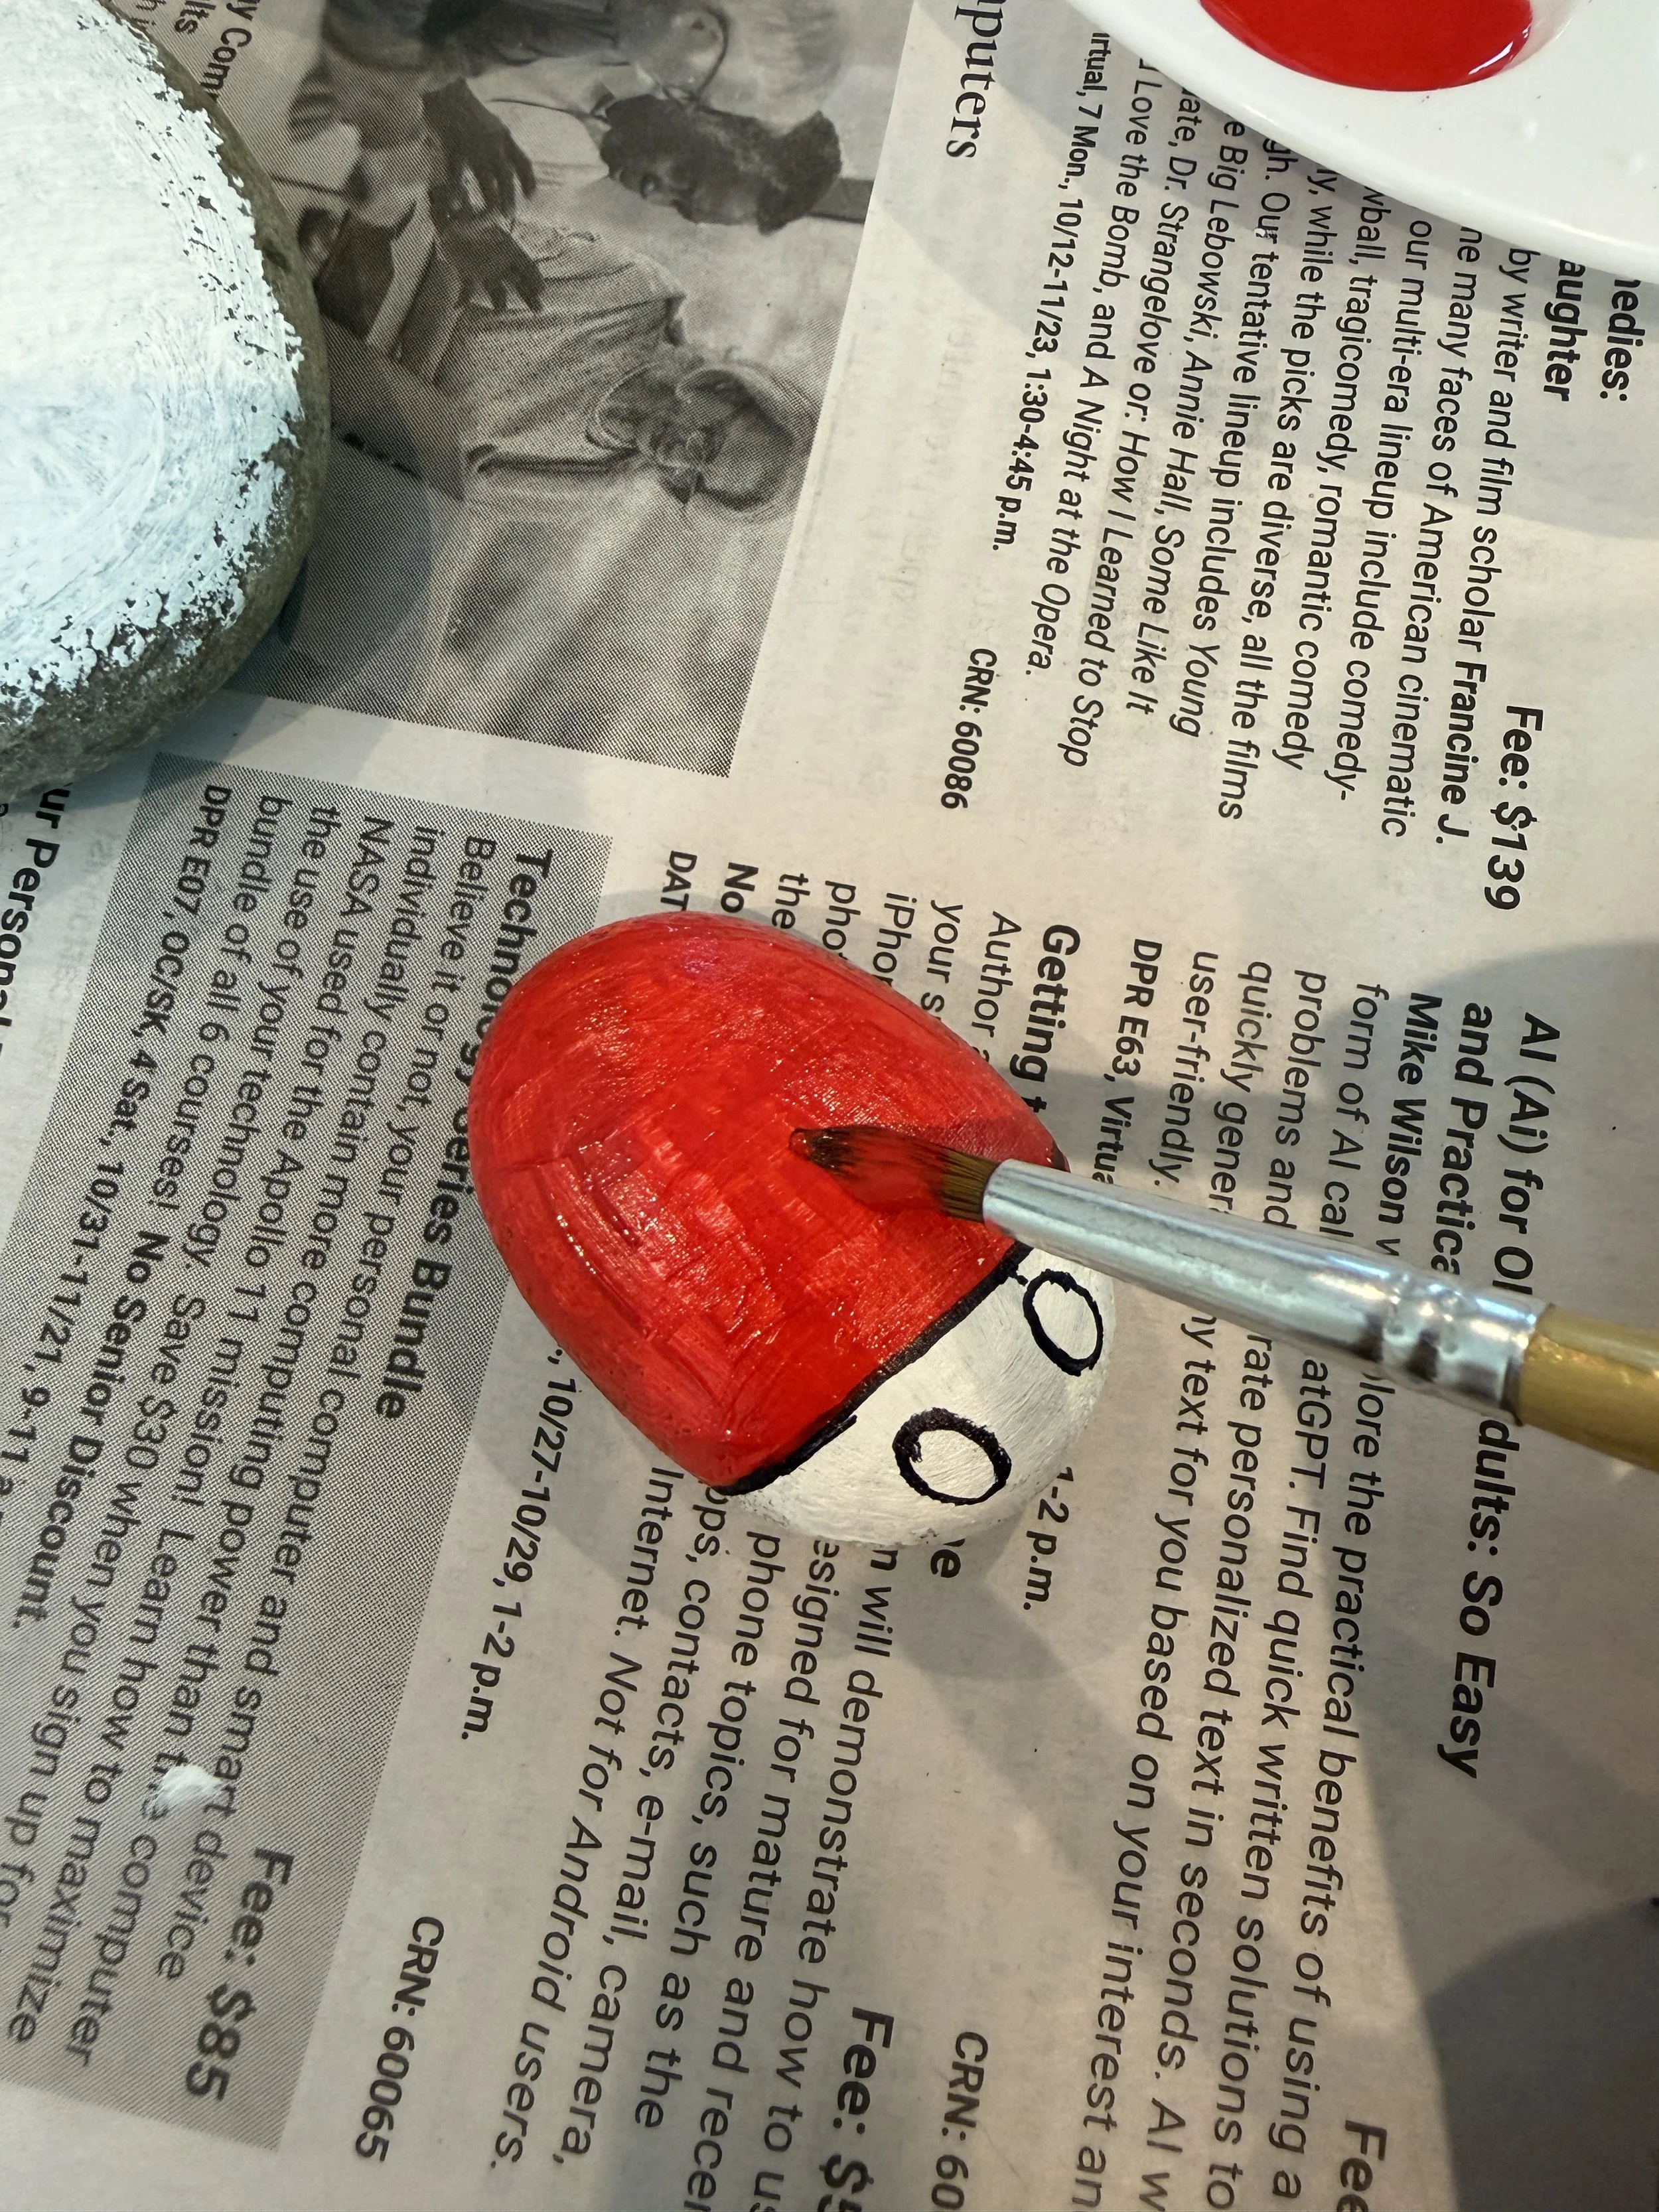
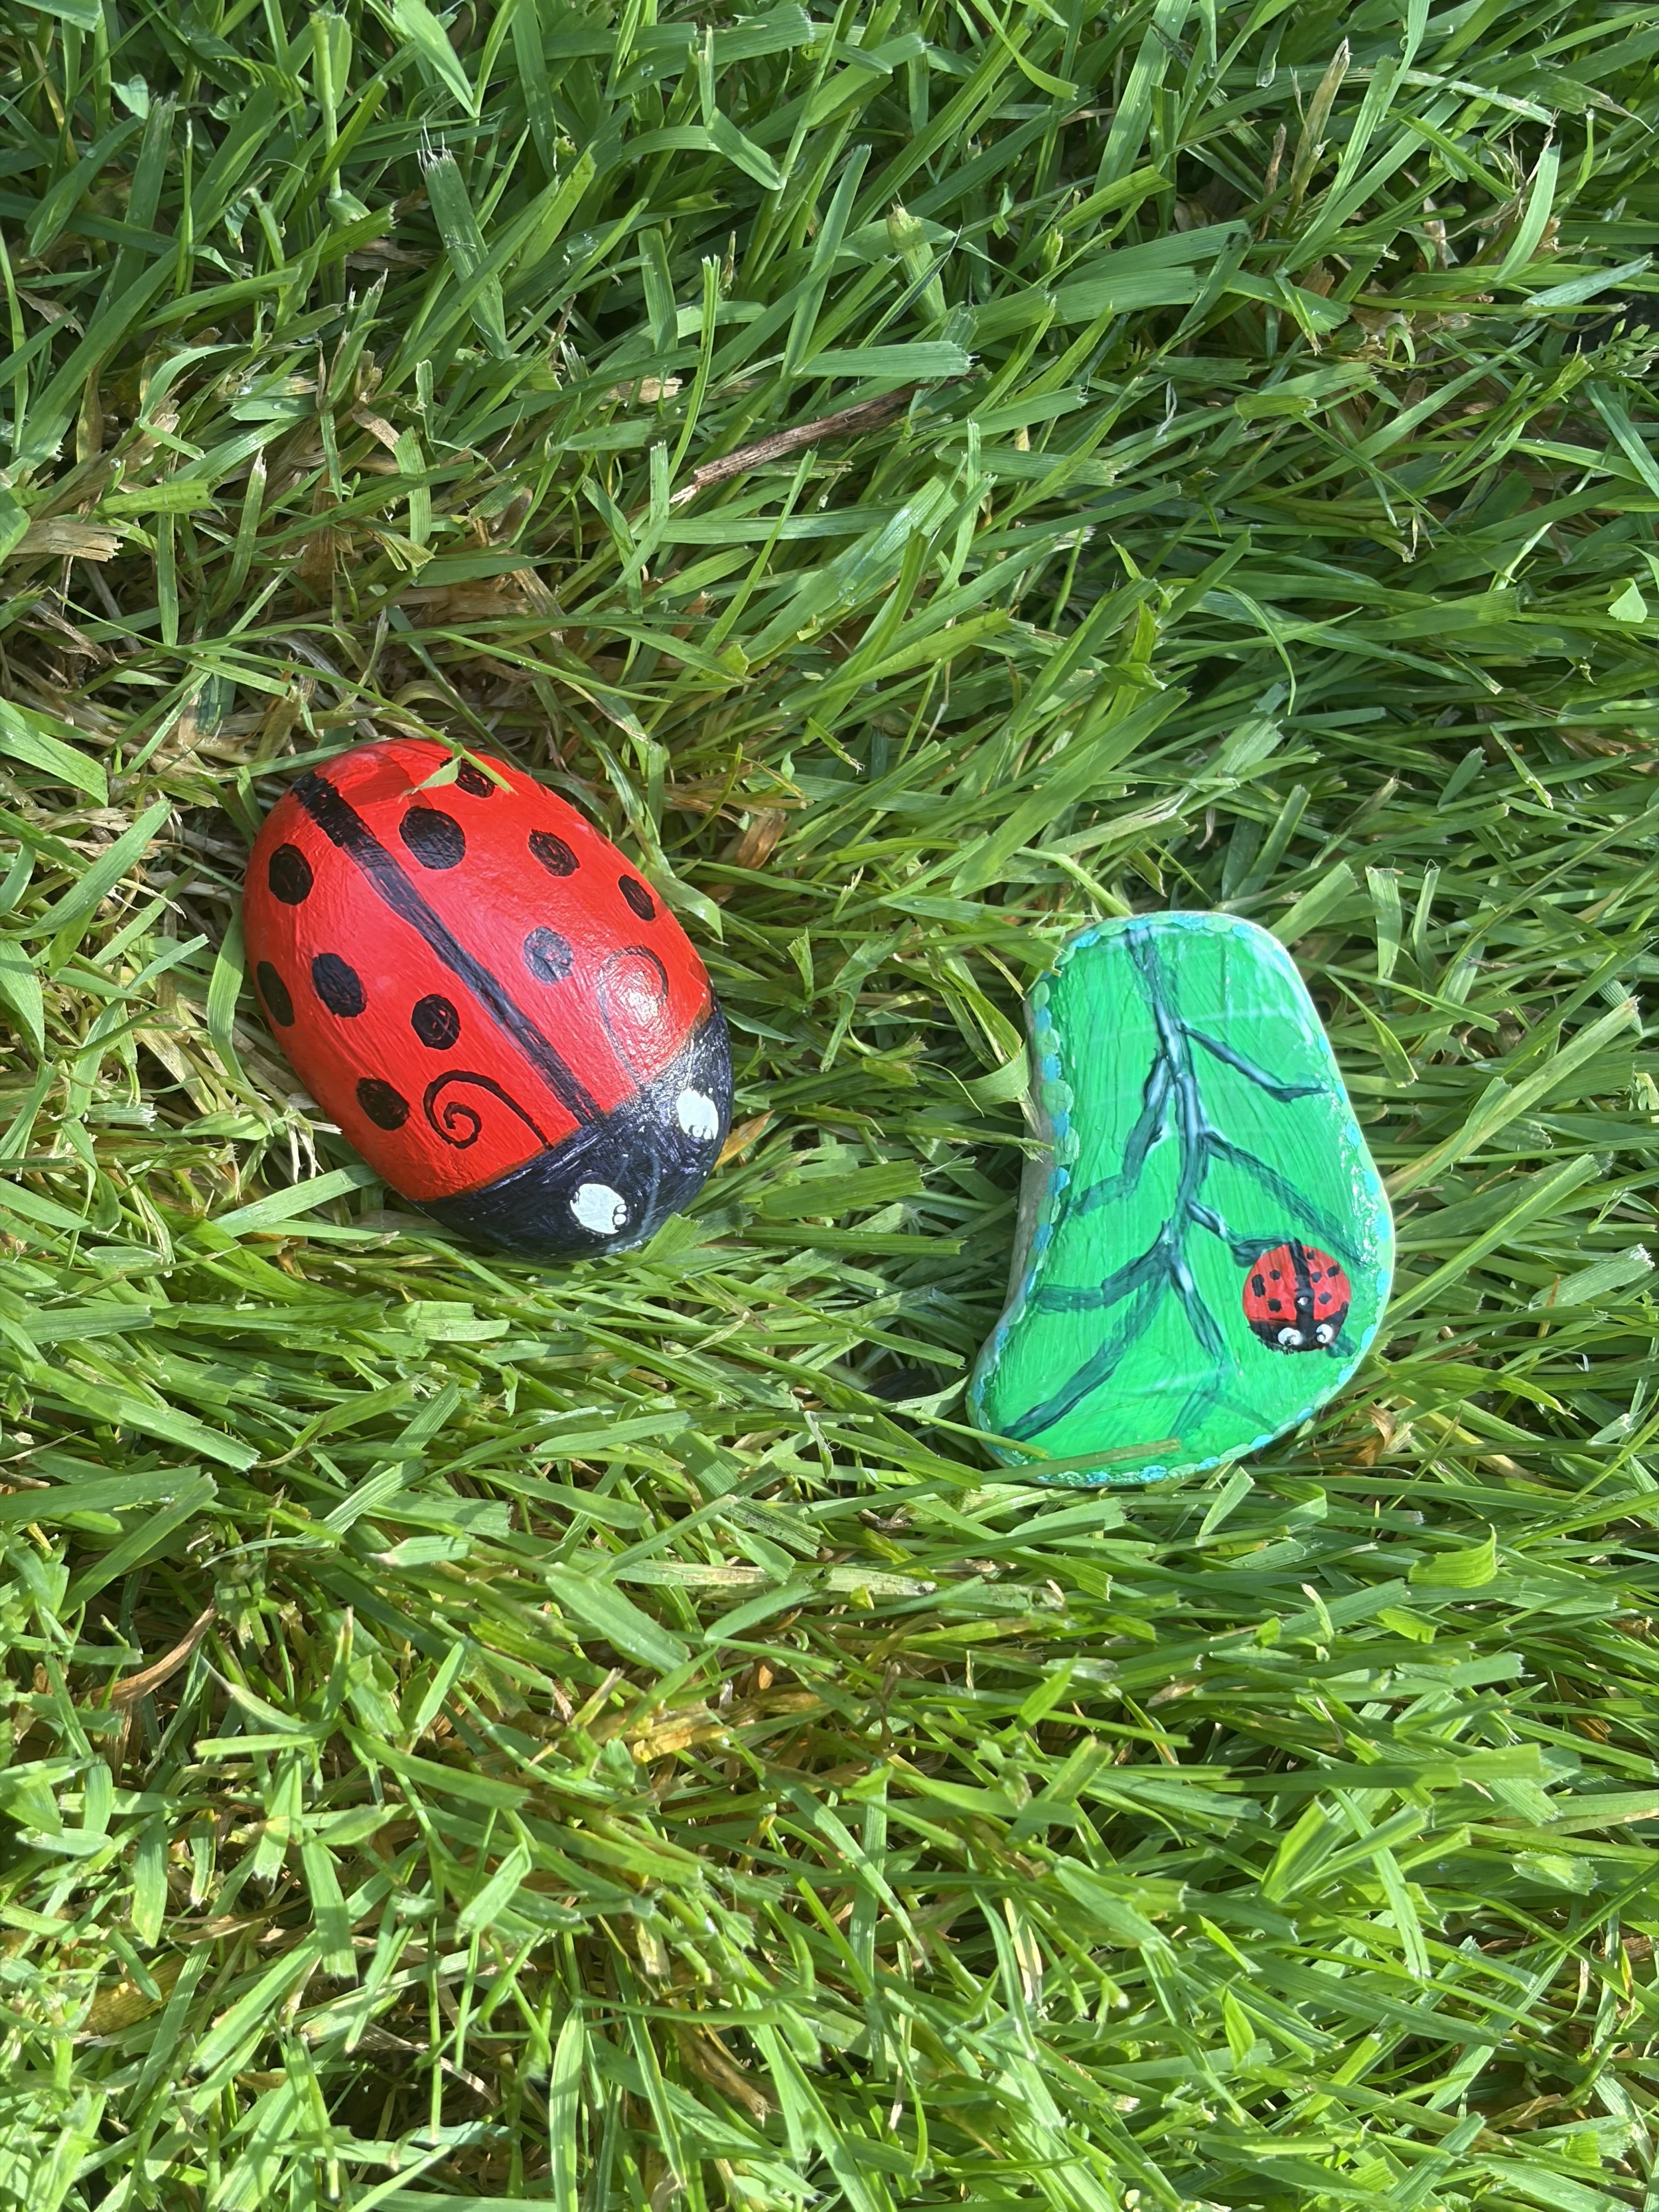
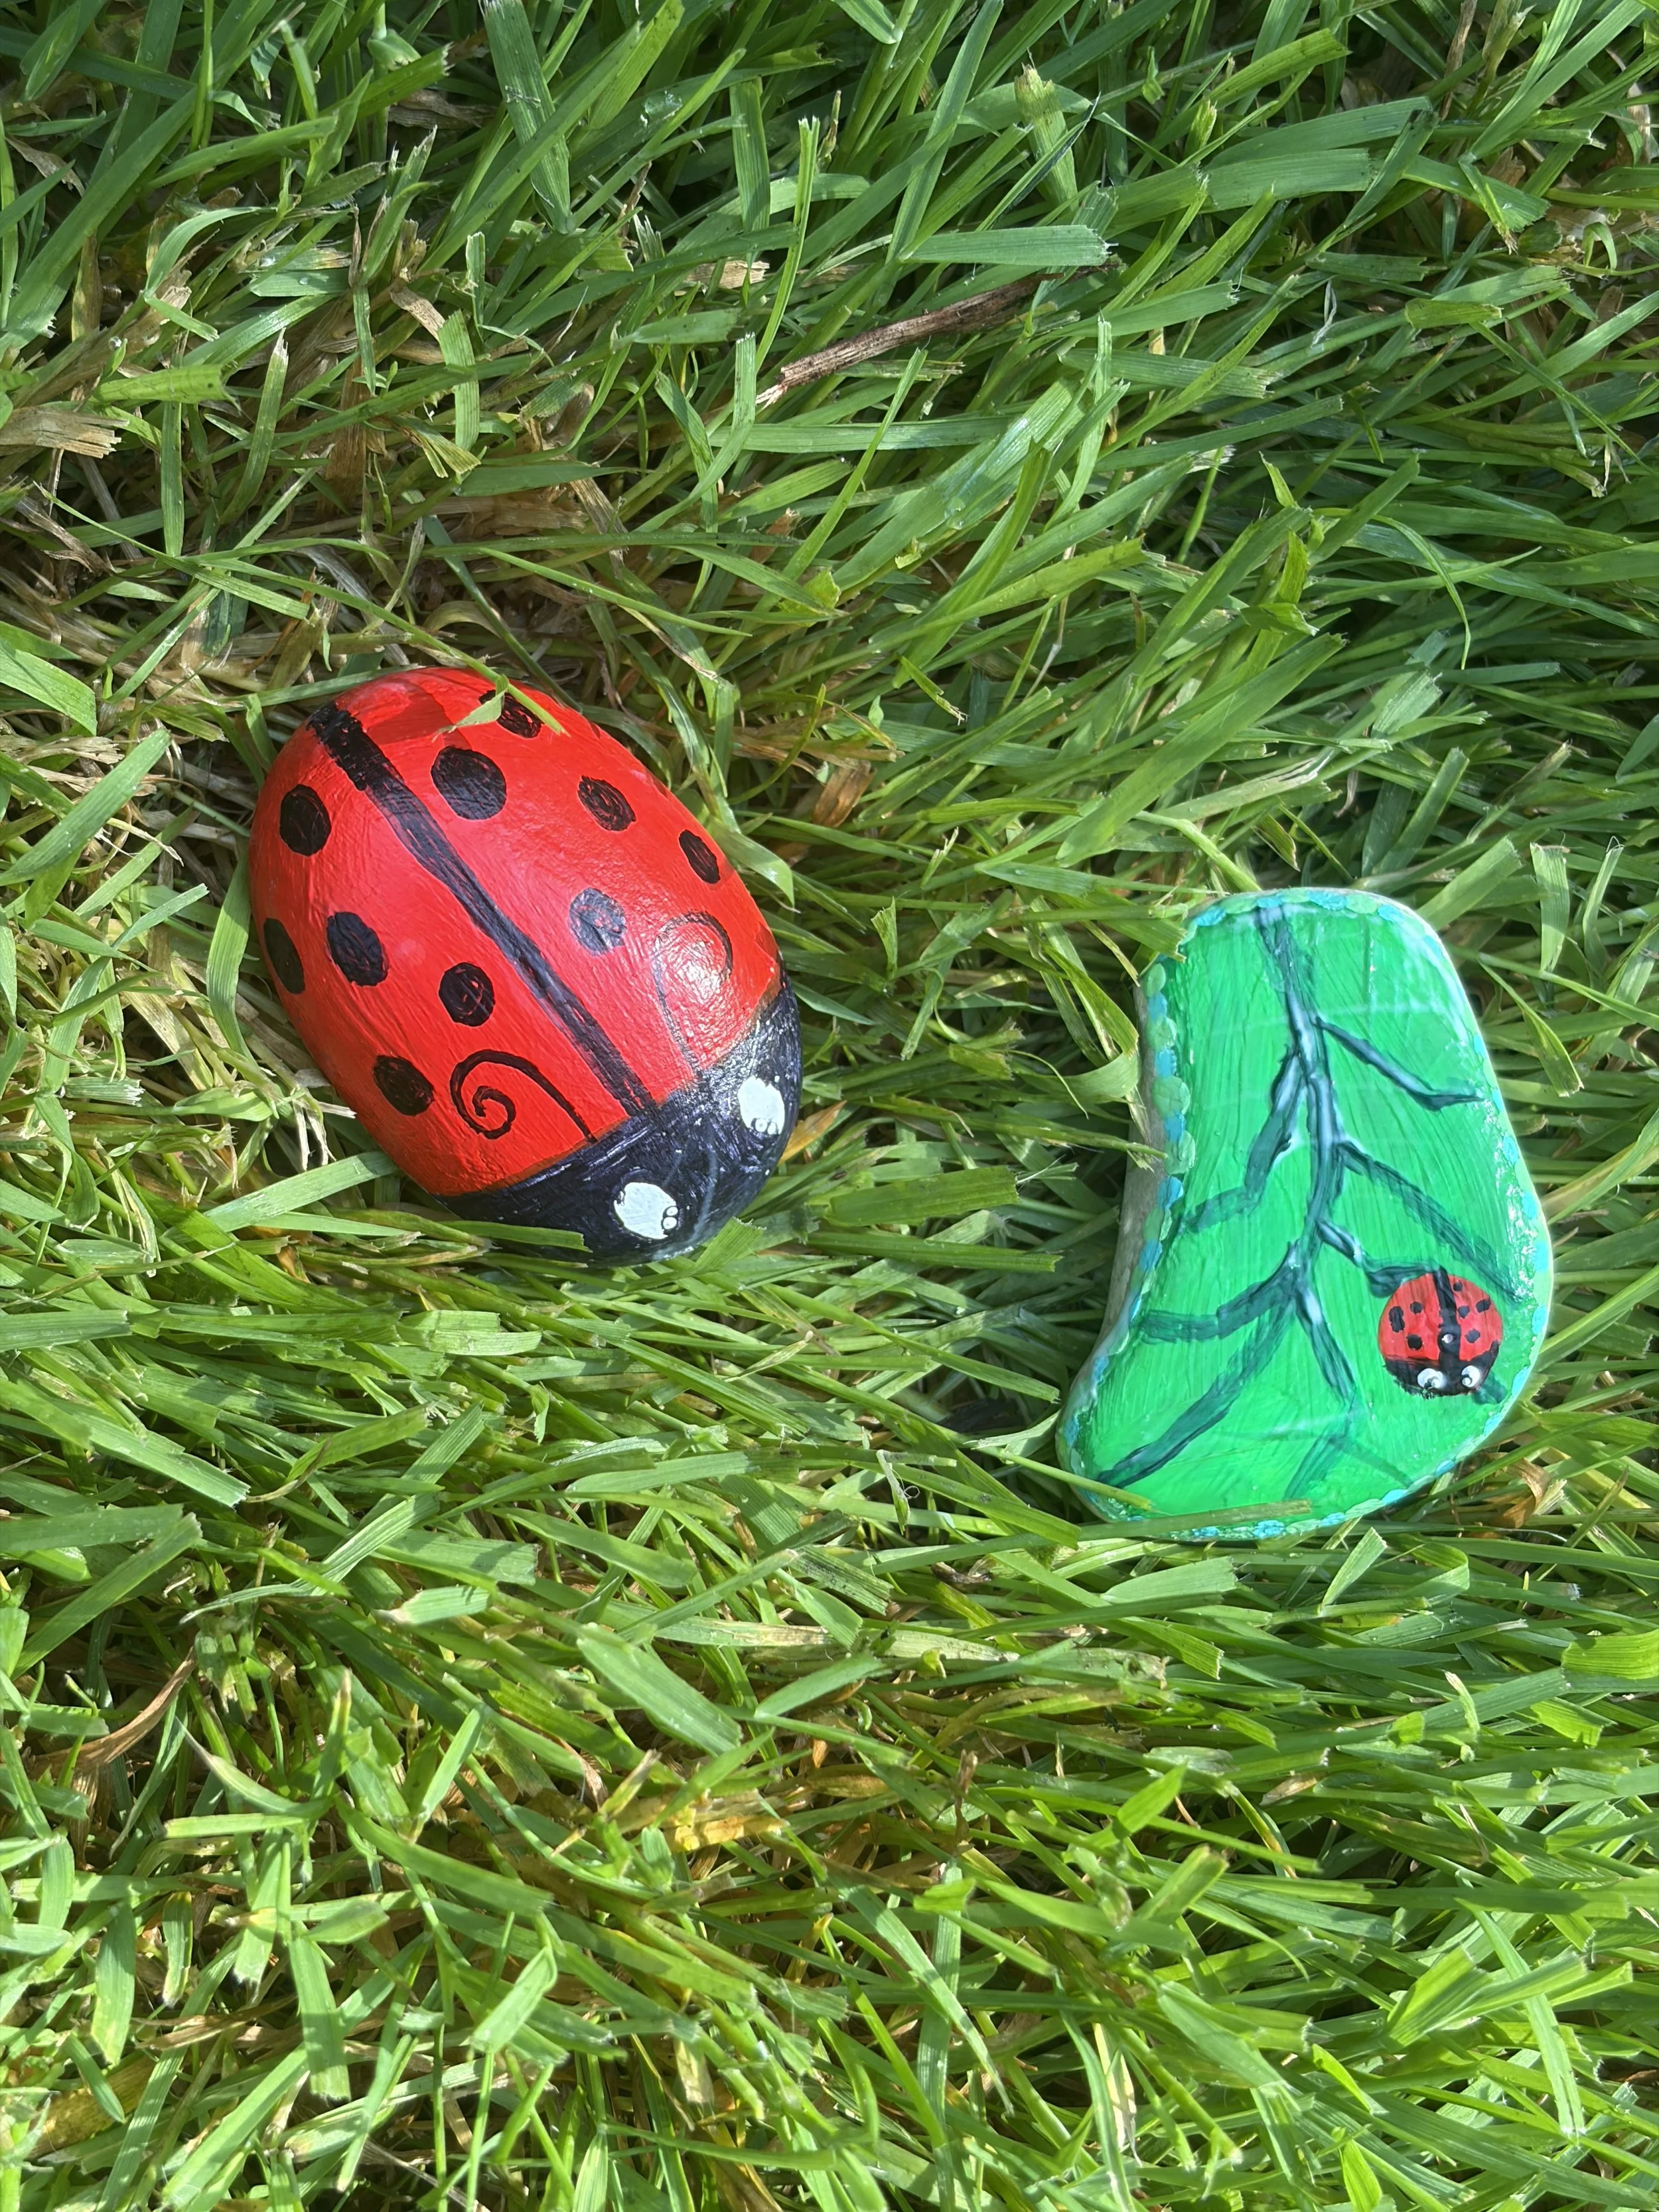
Ladybug rocks: One of the most classic beginner designs. Paint a red base coat, add a black line down the center, dot the wings with a dotting tool, and paint two small antennae. Add googly eyes for extra depth; this is also a great first project for painting on a curved surface.
Turtle rocks: Slightly more advanced but still beginner-friendly. Paint the shell first with dots or a honeycomb grid, let it dry, then add the head, legs, and tail in a contrasting color.
Watermelon rocks: Choose a rounded rock. Paint one section green, trace it with white, then fill the rest with pink or red and dot in black "seeds." For a half-watermelon look, trace the outer edge in green and the inner edge in white before filling the center.
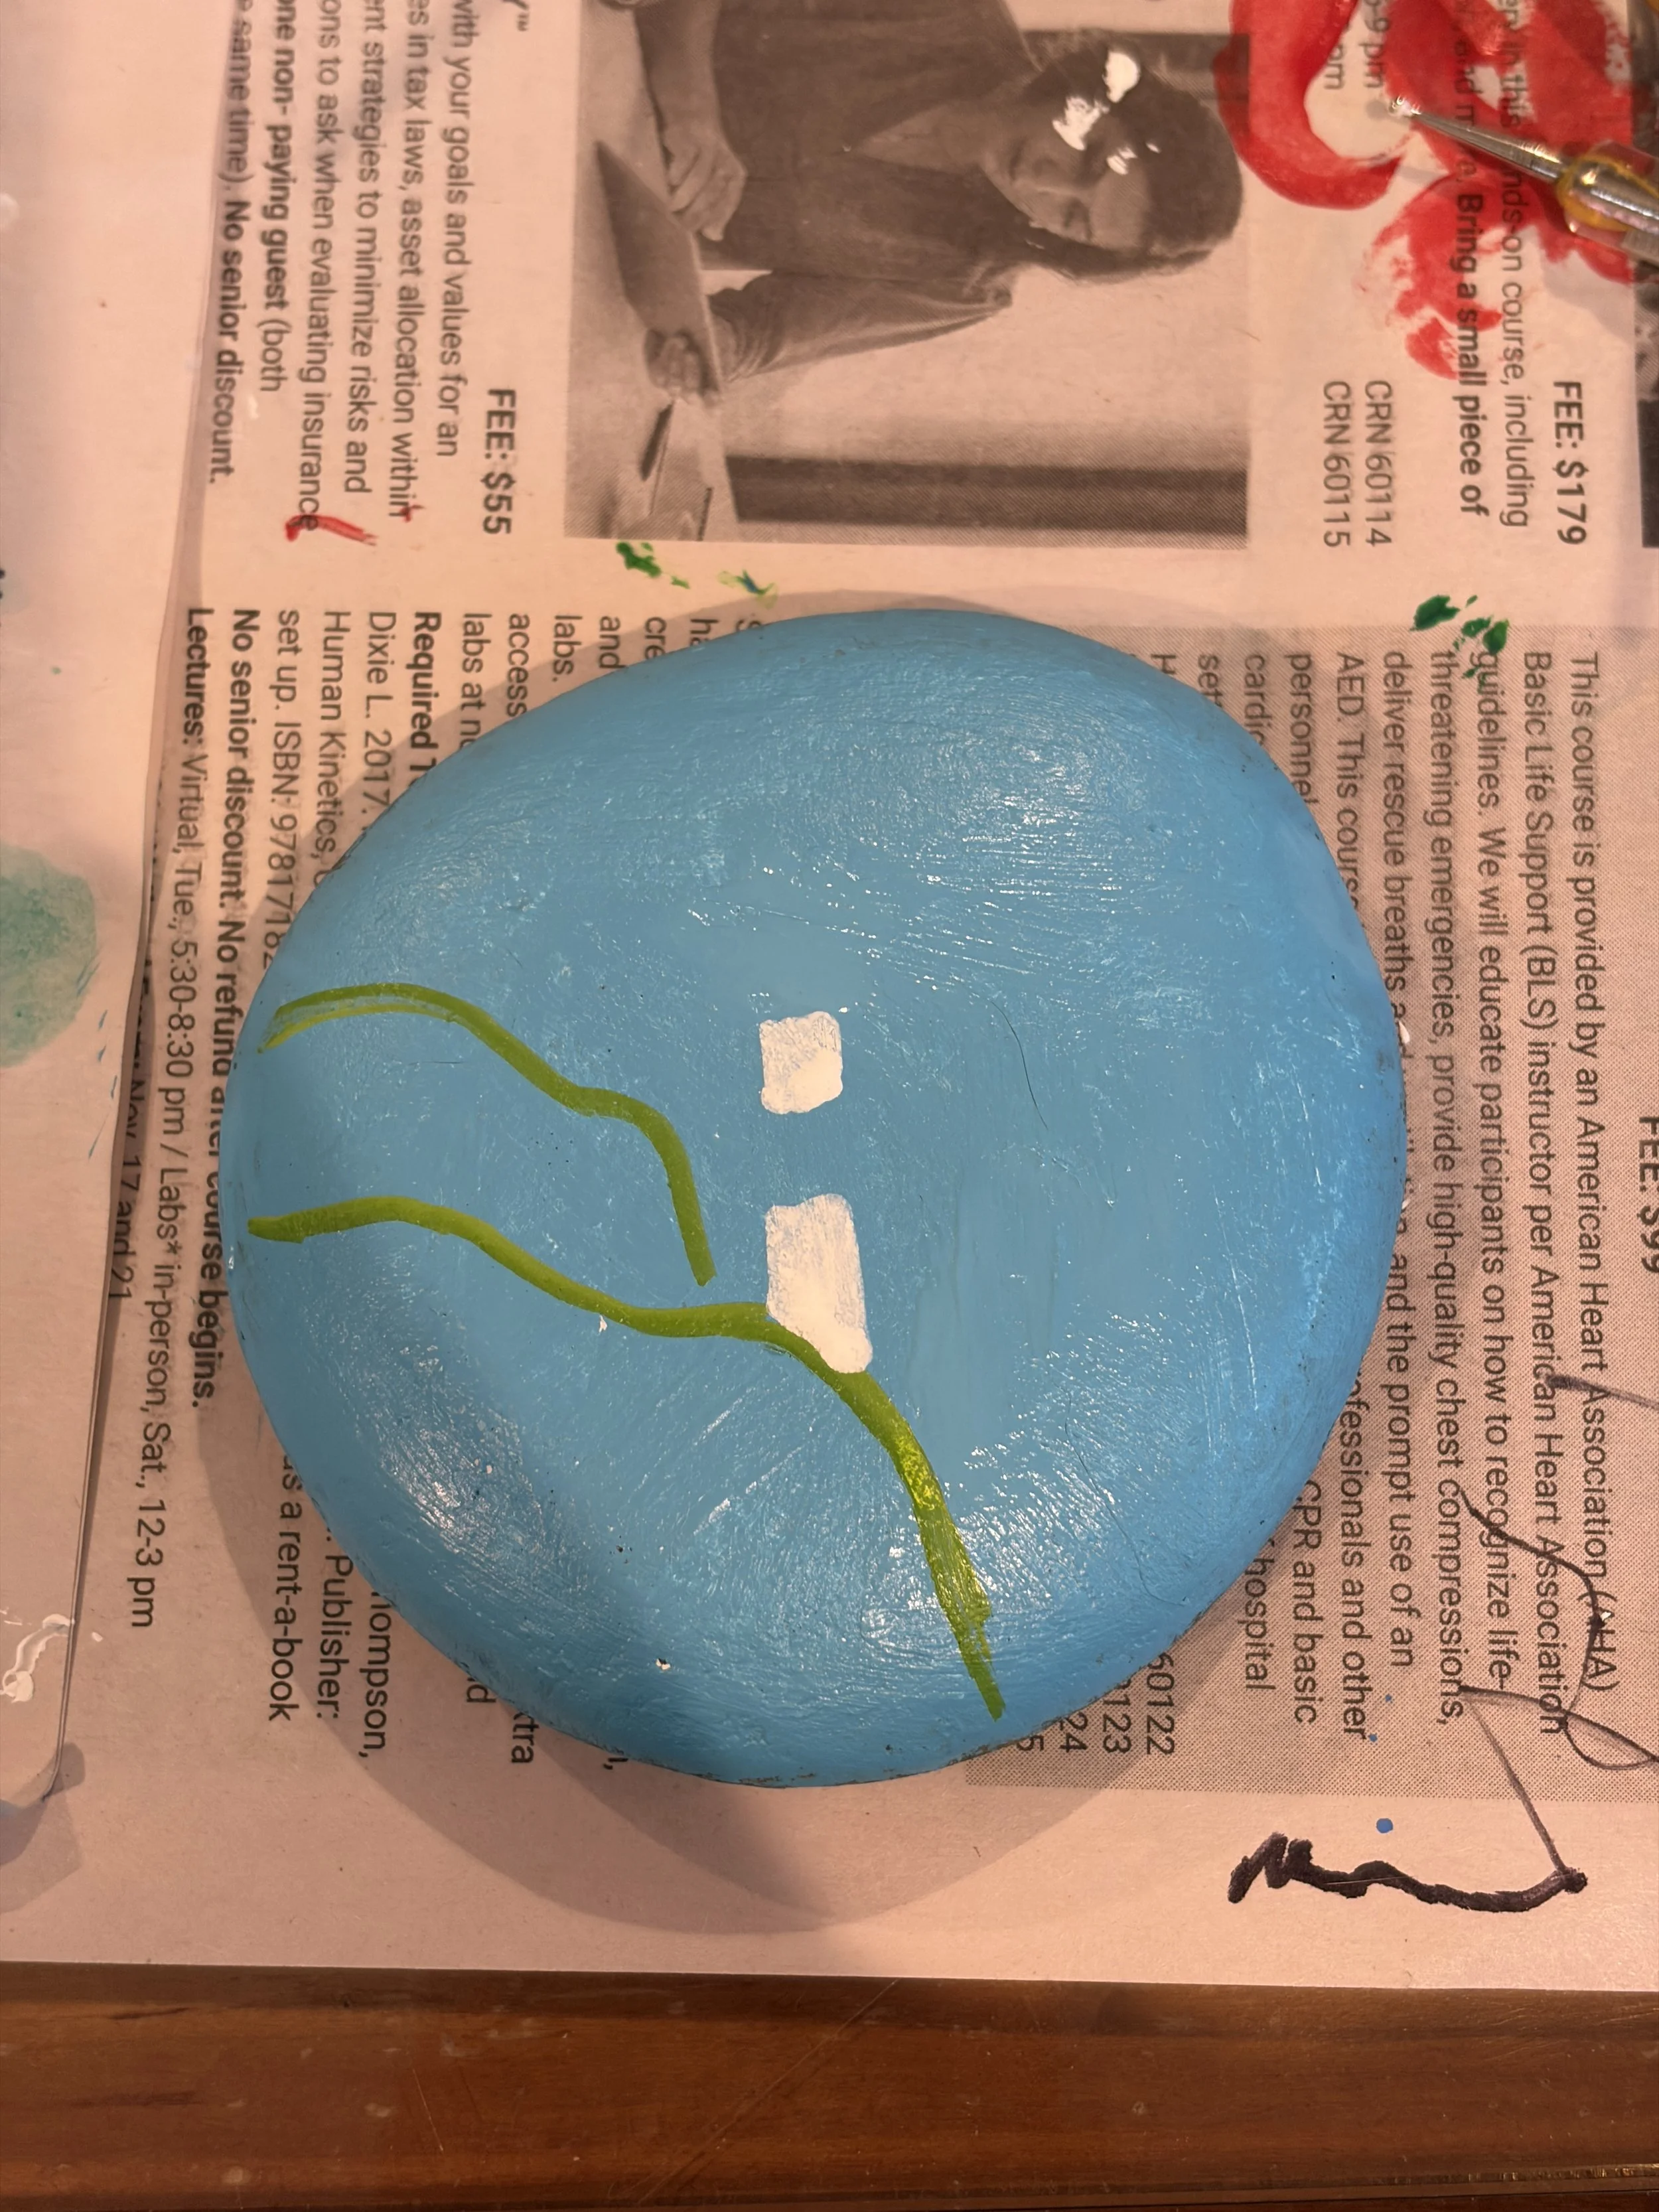
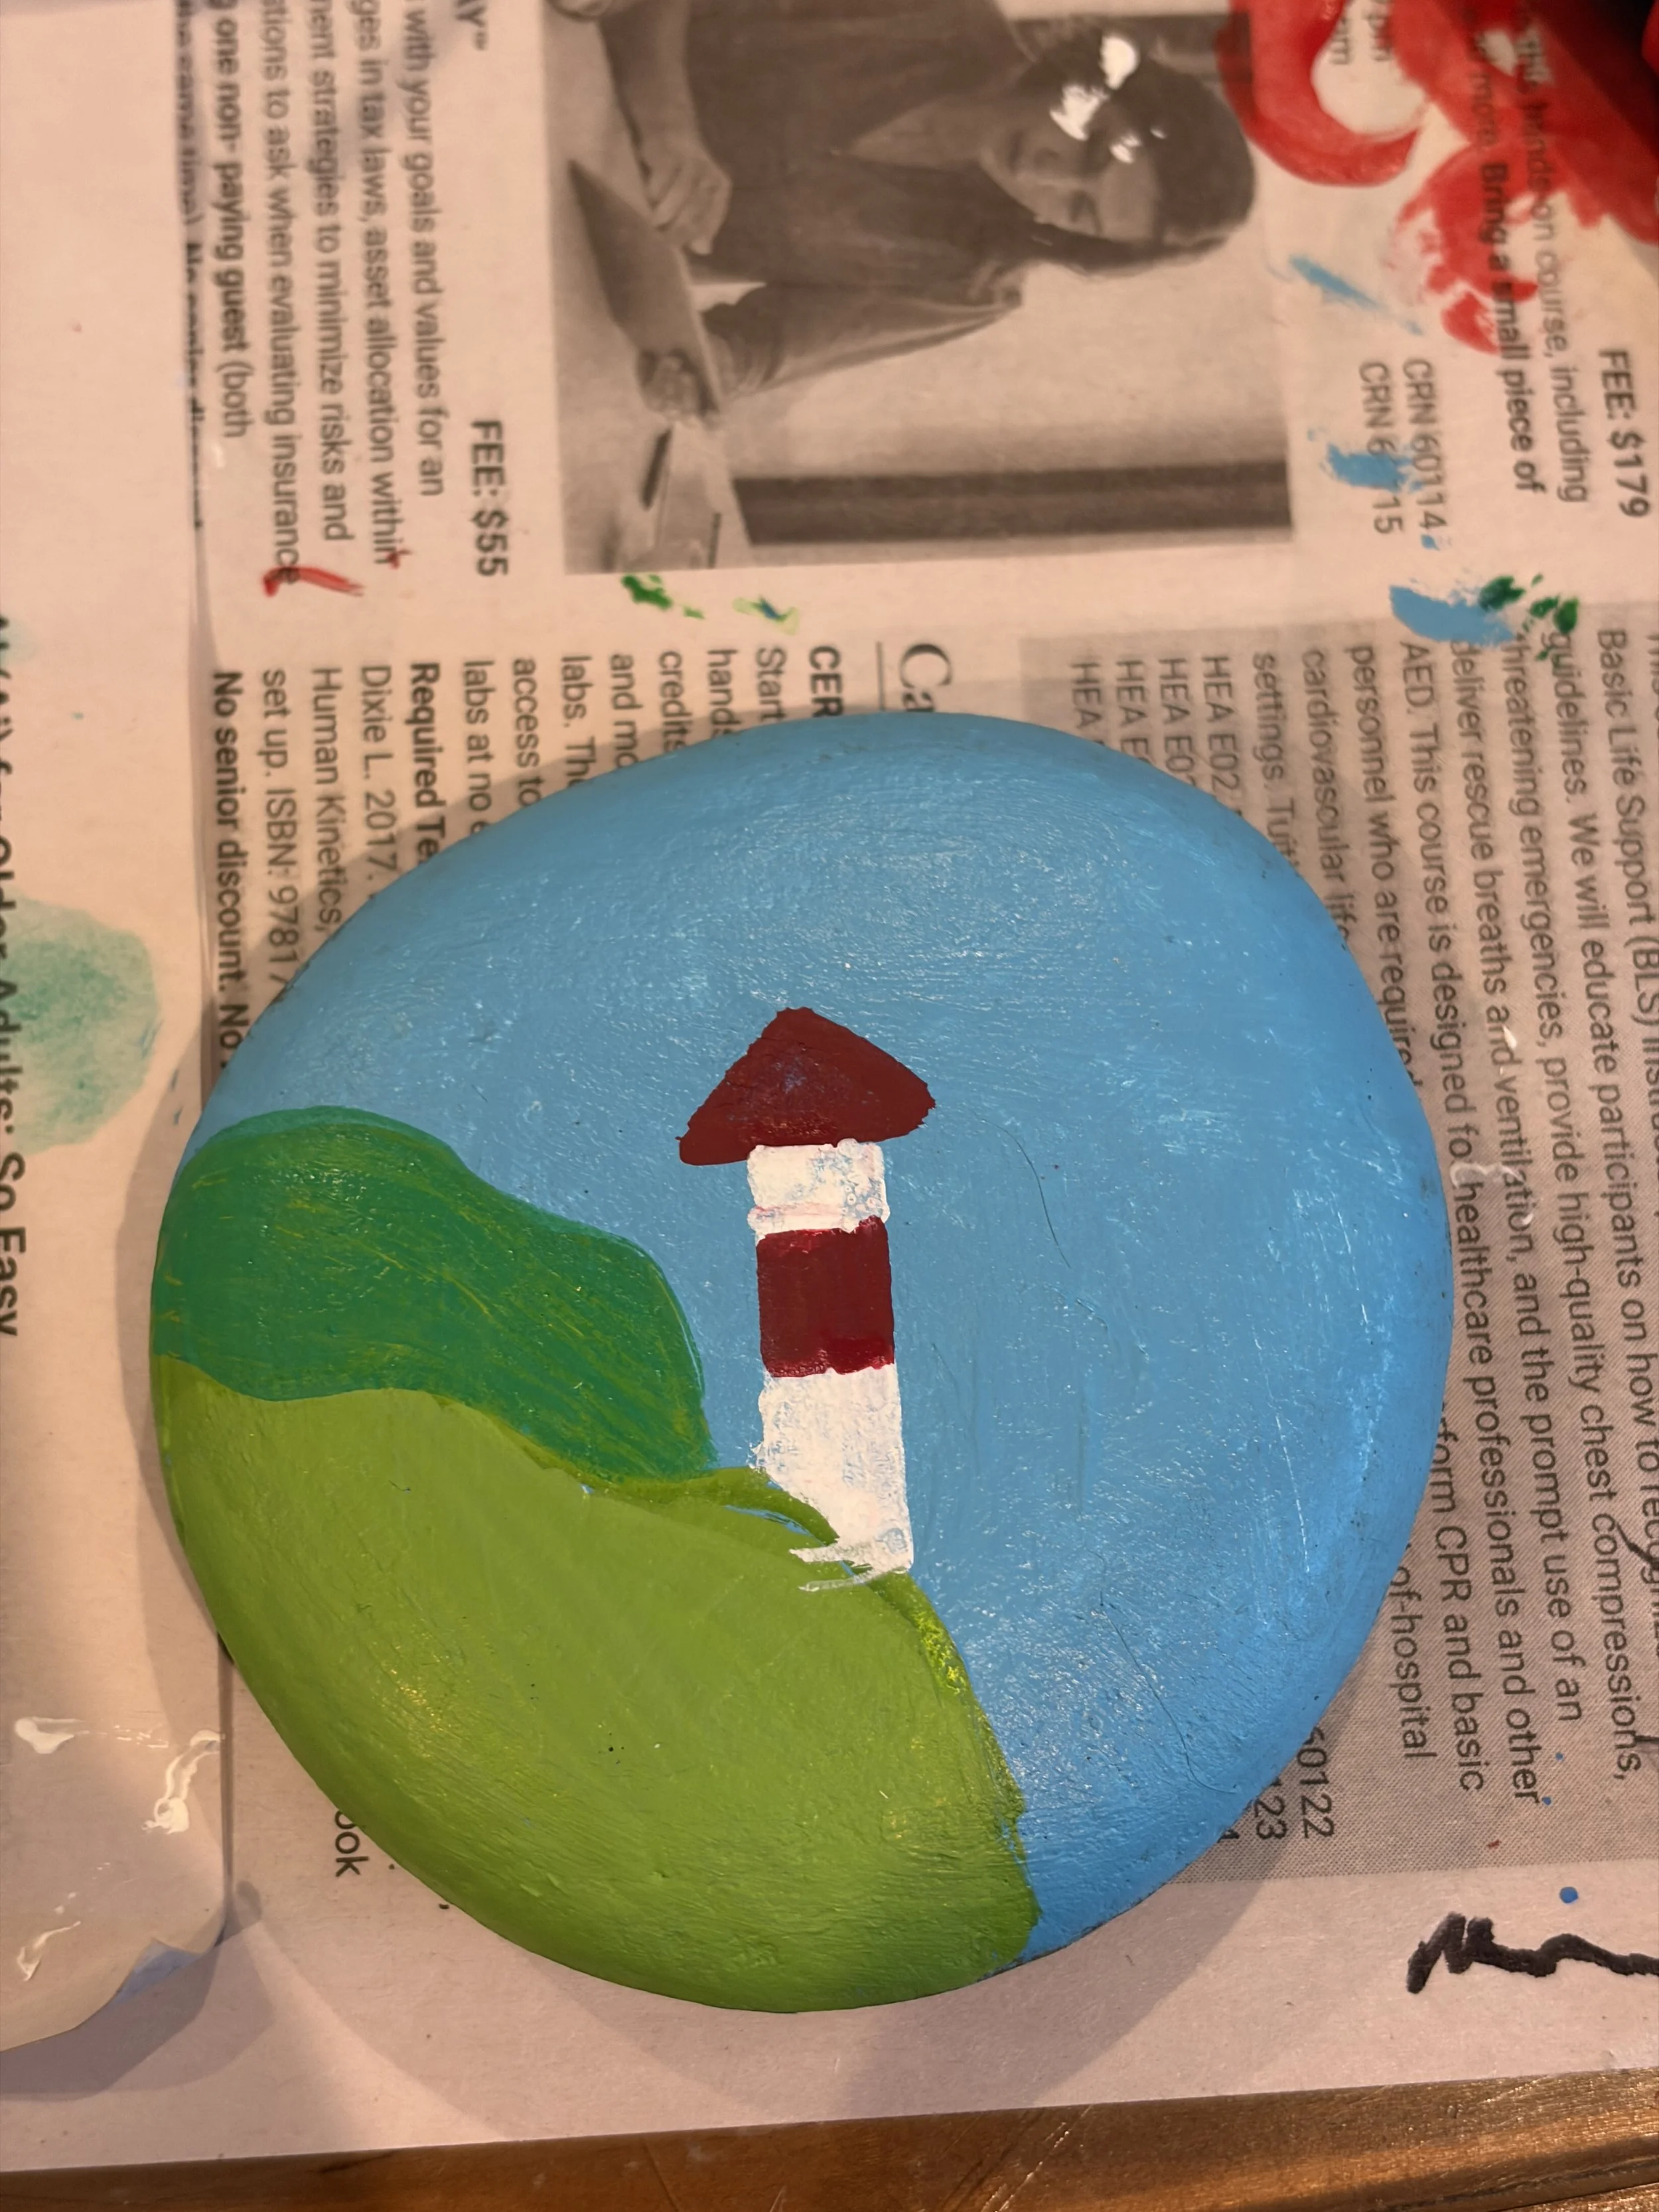
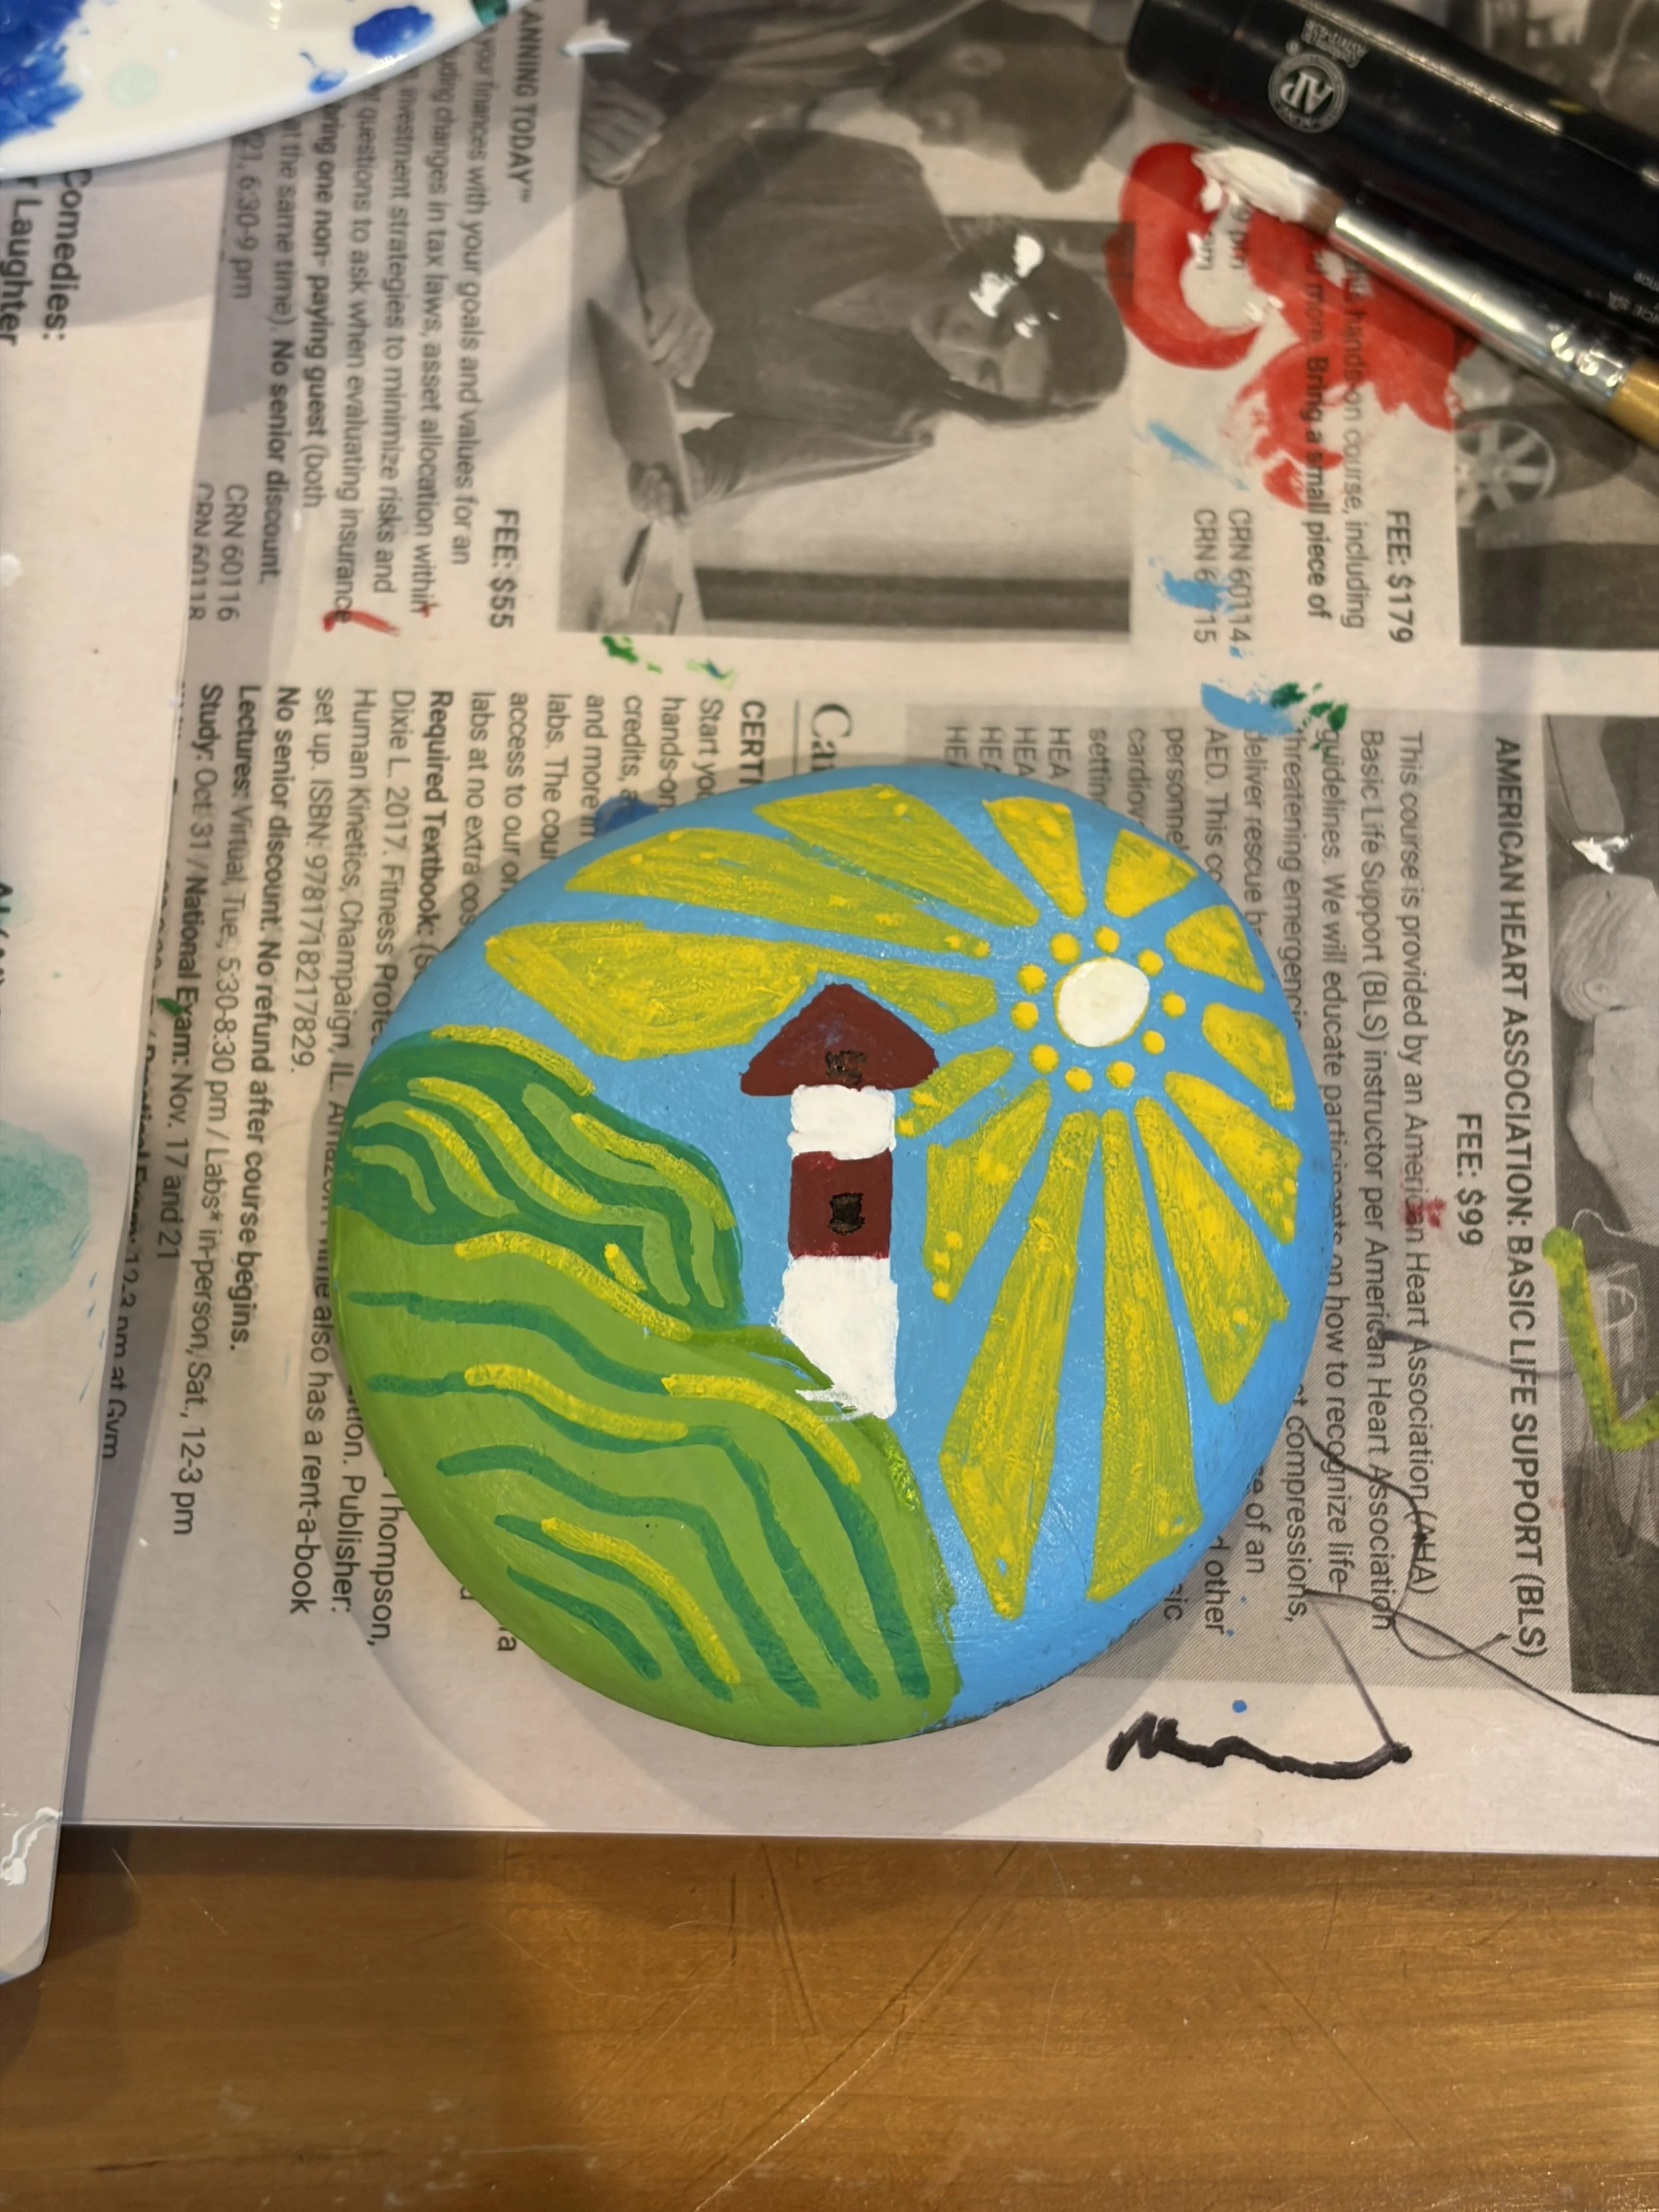
Beach and ocean rocks: Waves, shells, starfish, and mermaids are popular summer motifs. For textured, foamy waves, layer two or three shades of blue using a dry brush technique. Paint pens work well here for adding precise details over a dried base coat. I painted a lighthouse rock for my mantle this summer using this same layered approach for the waves at its base.
Garden marker rocks: Paint a plant name on a flat rock and place it in the soil next to that plant, or paint a small illustration of the herb or vegetable on a second rock to pair with it. It's also an easy way to use up smaller rocks that aren't full-design size.
Summer food rocks: Popsicles, ice cream cones, and s'mores are trending summer designs because they use bold colors and simple shapes with very little fine detail. A painted picnic set, a sandwich, pickle, carrot, and apple rock grouped together, makes a fun themed set for kids or gifts.
A few tips for summer designs specifically: these bold, saturated designs are some of the most forgiving to start with since they rely on color more than fine detail. Keep a damp paper towel nearby if you're painting outdoors, acrylic dries fast in the heat, so you'll need to rewet your brush more often than indoors. And if you're short on time to hunt for rocks, garden centers and landscaping supply stores sell smooth river rocks by the bag, an easy way to stock up for a full batch of summer projects in one sitting.
Personalization:
Gifts: Customize rocks as unique gifts for friends and family. My friend had a 40th birthday party and her husband had 40 different people make the birthday girl a rock. Each person used bright colors and then personalized them with messages of love and positivity. She keeps them in a clear glass drawer in her family room and said she loves to look at them and think of that special occasion.
Adding an inspirational message to a rock is not only a great craft, but makes people feel good. You never know when your creative idea and your beautiful designs can change someone's entire look.
Garden décor: Use painted rocks to decorate your garden or indoor spaces. If you are going to use your painted rock for outdoor use, you will want to make sure to fully seal it. You can use mod podge or other sealants.
Check out my blog post on rock sealing here. You'll love all of the different ways you can make your own garden beautiful!
Story stones: Paint rocks that tell a story or convey a specific theme when placed together.
Paper weight: I use my painted rocks all of the time when dining al fresco. I use them to weigh down the napkins so they don't blow away! I have also used the bigger and best stones to weigh down a tablecloth in my yard. I love to paint them to match the table cloth!
Need more ideas to make different kinds of rocks, even at times with a bizarre shape?
Find more cute and funny ideas for rock painting here.
Why paint rocks?
Rock painting is a great way to test out the best paints, paint markers, and all of the best rock painting supplies. Sometimes when starting a new hobby, people get overwhelmed. Especially when you've got a big canvas to fill.
However, when all you have to do is paint a small rock, this feels a bit easier and low maintenance. Also, rock painting is low frustration so if you mess up, just grab another rock and keep on going! This is why you might see small groups of people decorating all kinds of rocks.
Finishing Touches

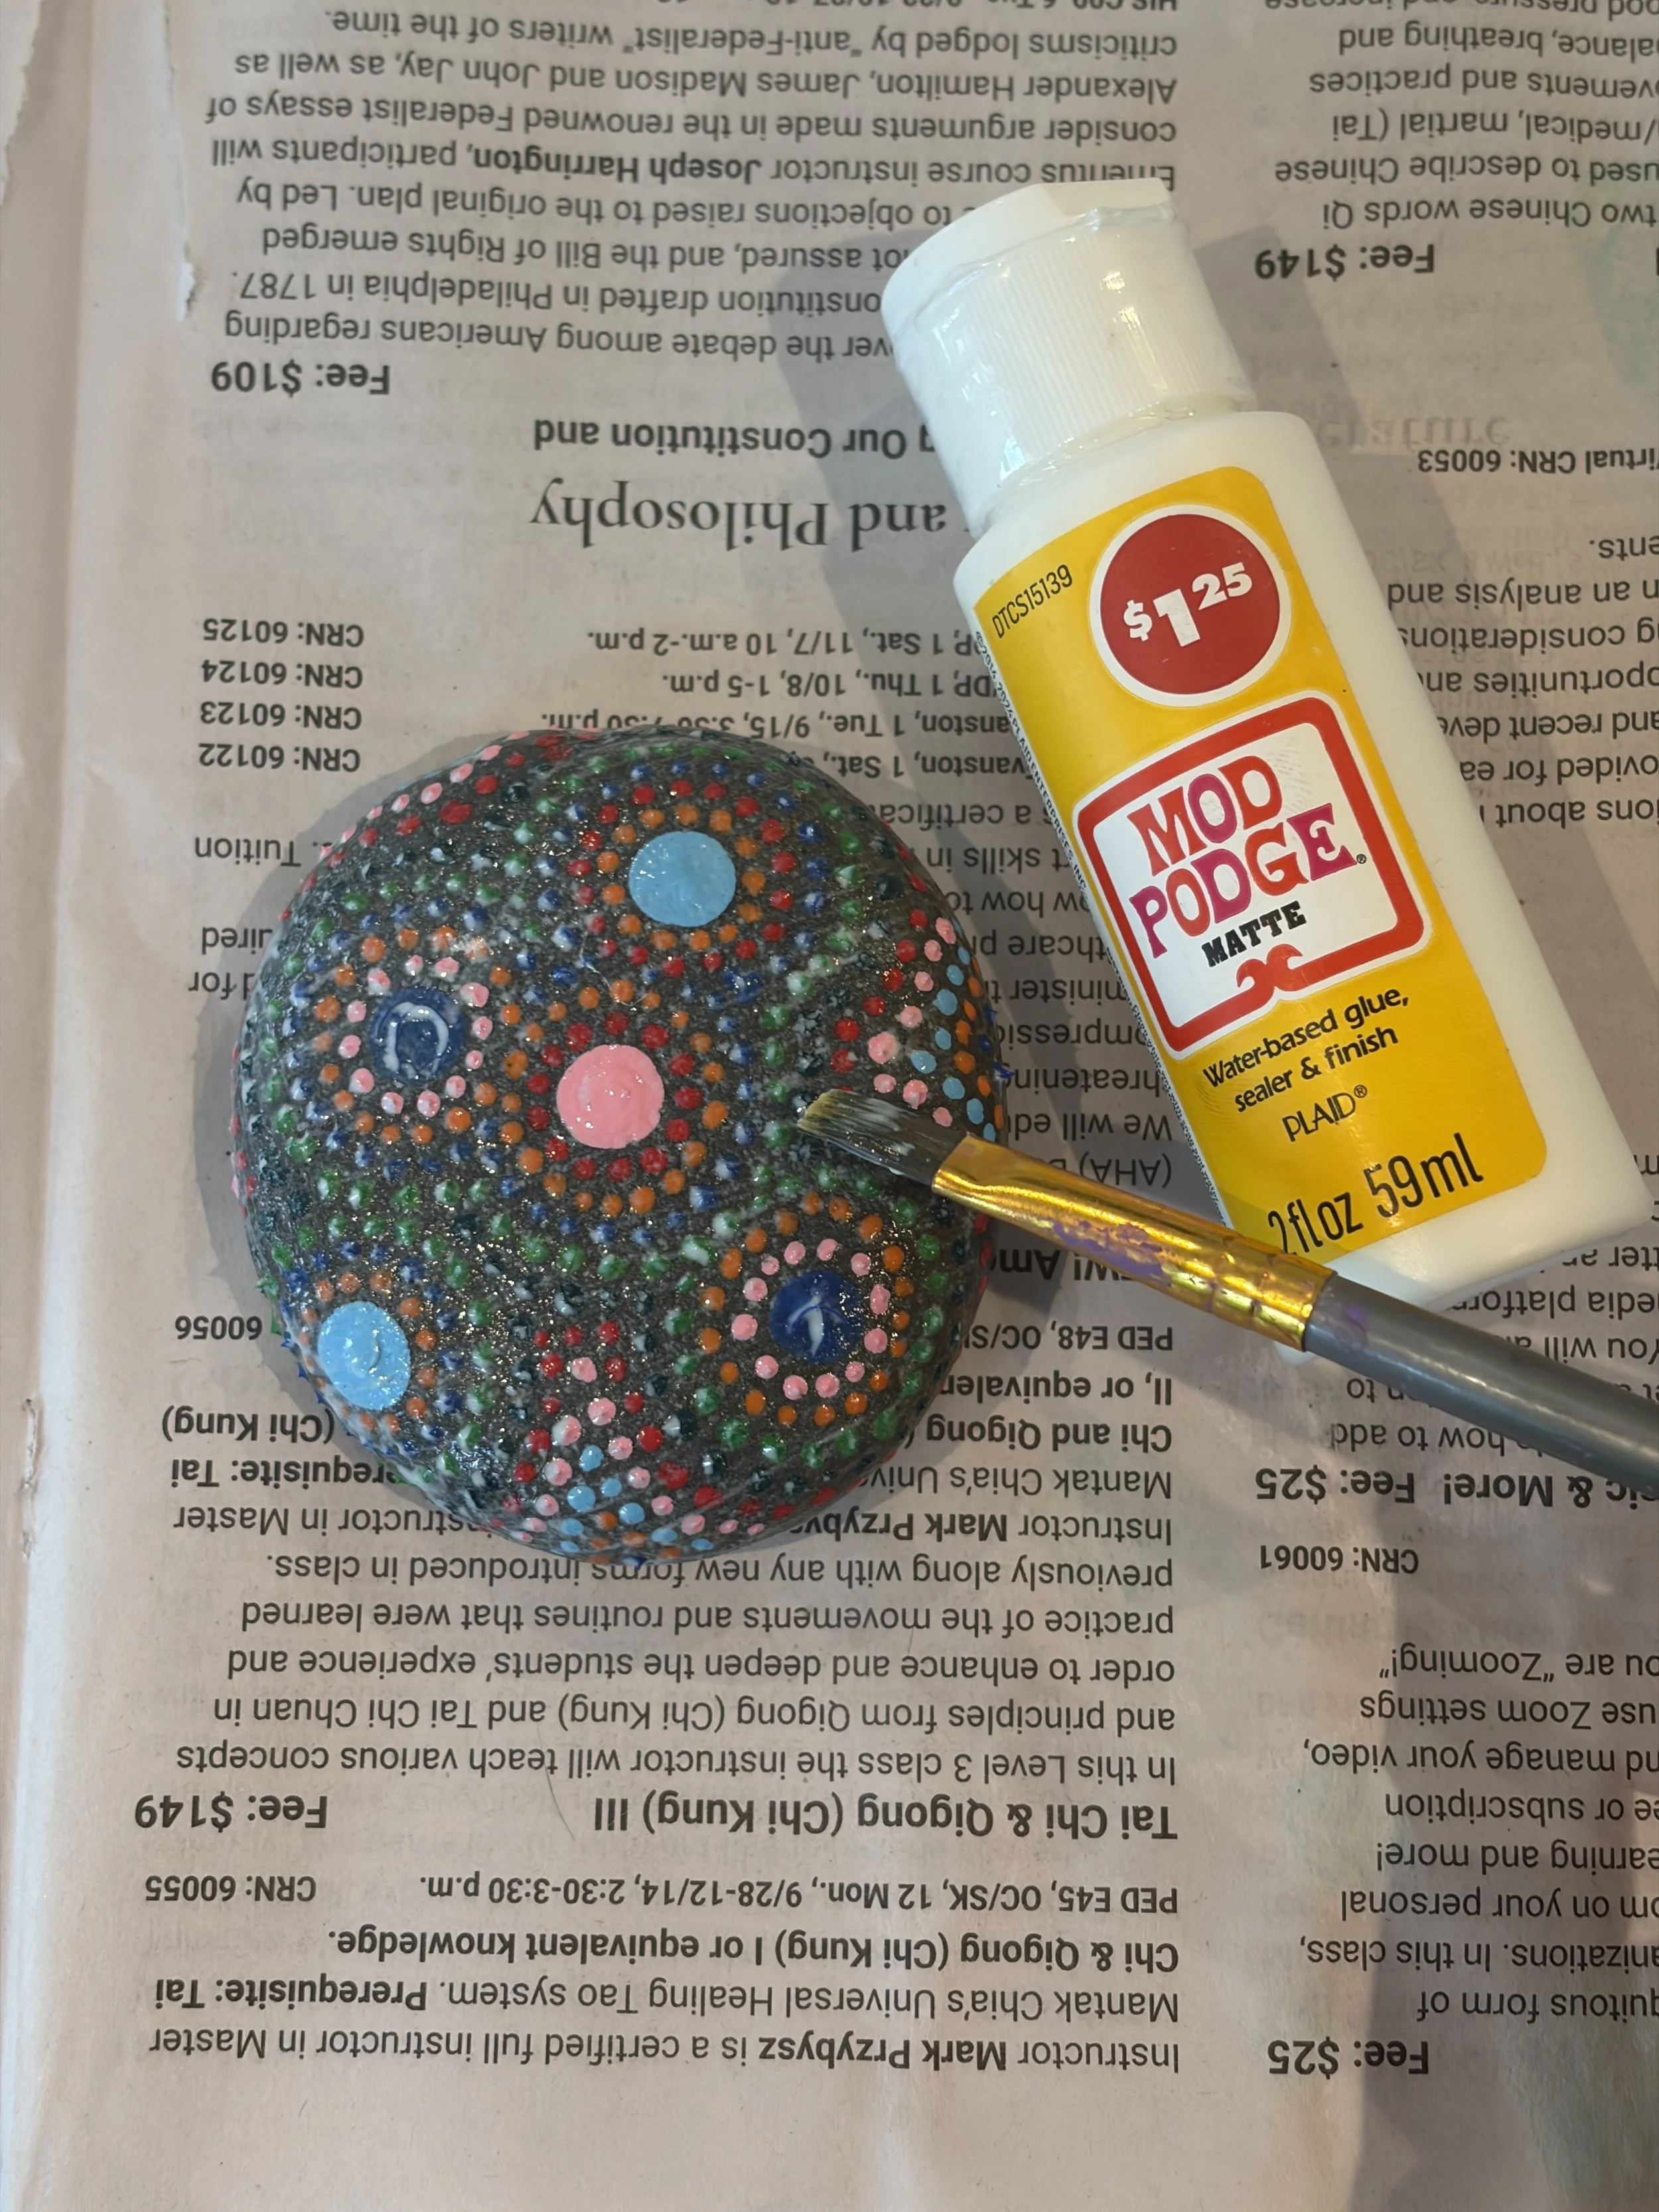
Seal your artwork with Mod Podge
Sealing and Caring for Your Artwork:
Sealant Application: When it comes to sealing rocks, the choices can be overwhelming (spray-on sealer, spray sealer, brush on sealer, etc). Once your artwork is dry, apply multiple coats of acrylic sealant to protect it from weathering and UV damage. Be sure you use your favorite sealant only on a rock that is completely dry. Follow manufacturer instructions for best results.
Display and Storage: Place your painted rocks in indoor displays or protected outdoor areas to prolong their lifespan. Avoid placing them where they will be exposed to harsh weather conditions.
Community and Sharing

Share your rock paintings with your community!
Did you know this rock painting movement has taken over all over the world? Yup! Check out some of the rock ideas below to gather people for this fun activity. The best way to bring people together is by working on a new hobby!
Joining Rock Painting Communities:
Social Media: Share your creations on platforms like Instagram or Facebook using hashtags like #RockPainting or #PaintedRocks.
Local Groups: Participate in local rock painting groups or events to exchange ideas and connect with fellow artists.
Rock Painting for Teachers:
Classroom Activities That Actually Work
As someone who's seen teachers share their rock painting wins (and fails) for years, here's what actually works in a classroom setting:
Low-Prep Kindness Rocks (30-45 minutes)
Perfect for SEL integration, character education, or end-of-year activities.
Materials per student:
- 1-2 pre-washed smooth rocks (buy bulk river rocks at landscaping stores for pennies each)
- 3-4 paint pens or small containers of craft paint
- Paper plate "palette"
- Baby wipes for cleanup
The Hook: Read "Only One You" by Linda Kranz or "The Kindness Rock" by Sonica Ellis to introduce the concept.
Management Tip: Have students sketch their design on paper FIRST. This prevents "I messed up" meltdowns and speeds up the actual painting.
Story Stones for Literacy Centers
Paint 20-30 rocks with simple images: sun, moon, tree, house, dog, cat, person, etc. Store in a basket.
Students draw 3-5 stones and write/tell a story incorporating all images.
This works for:
- Creative writing prompts
- Oral storytelling practice
- ELL vocabulary building
- Partner collaboration activities
Math Rock Manipulatives
Paint number rocks 0-20 for:
- Number recognition
- Sequencing games
- Addition/subtraction practice
- Greater than/less than comparisons
Budget Win: Rocks are free and last forever, unlike paper manipulatives that get lost or torn.
Final Thoughts
Rock painting is a joyful art form that encourages creativity, relaxation, and connection with nature. Whether you're a beginner or a seasoned painter, the process of transforming ordinary rocks into colorful artworks offers a fulfilling creative outlet.
By starting with the right materials, practicing various techniques, and exploring different design ideas, you can cultivate your skills and create beautiful pieces that bring joy to both yourself and others. So, gather your supplies, find your favorite rock canvas, and let your imagination flow as you embark on your rock painting journey!