
Polymer Clay Beginner's Guide: Everything You Need to Know to Get Started
I've been working with polymer clay for as long as I can remember. I use it in my personal art practice and in my kids' classes. It is one of the most versatile art materials on the market, and after teaching it for years, I genuinely believe every home with older kids should have some on the shelf.
Whether you want to make jewelry, miniatures, layered faux cakes, magnets, ornaments, fairy houses, keychains, or abstract art, polymer clay is a favorite because it never dries out. You do not need water, a wheel, or a kiln. All you need is a home oven with temperature settings. That portability and simplicity make it a fan favorite among artists, crafters, and art educators alike.
If you have been curious about polymer clay but are not sure where to begin, this guide walks you through everything — from choosing your first supplies to baking your first project successfully.
What Is Polymer Clay?
Polymer clay is a PVC-based modeling material that hardens in a home oven at 225–275°F. It contains no natural clay minerals — it is entirely human-engineered from polyvinyl chloride, resins, plasticizers, and pigment. It never air-dries, comes in hundreds of colors, and can be used to make jewelry, miniatures, home decor, and more.
Polymer clay was originally invented by a doll maker who wanted to create dolls that were less breakable than porcelain. She needed a clay that would not crack, would not dry out, could be painted, and could hold fine facial details. The result was a material that has become a staple for artists, teachers, and hobbyists around the world.
"Polymer clay" is a blanket term. It is sold under different brand names globally. Here in the US, well-known brands include Fimo, Kato, Sculpey, and others. Most craft stores carry their own branded versions, too. Each brand differs in firmness, color range, price point, and durability after baking. My recommendation is to test a few brands and see what works best for your hands and your projects.
One important thing to know: polymer clay is safe for human use and has no odor in its raw form.
Bake it in a well-ventilated space, and you are good to go!

Why Polymer Clay Is Perfect for Beginners
I have given a lot of thought to what makes polymer clay work so well for beginners, because it is a staple in my classroom. Here is what I keep coming back to.
Polymer Clay Is Easy to Learn
Unlike ceramics, you do not need to learn how to use a wheel or manage a drying timeline. You can work on a piece for weeks because the clay will not harden until you bake it. When I teach online kids' classes, students can work on sculptures between sessions without worrying about the clay drying out. And it doesn't dry out!
Soft clays are readily available for beginners. There are also endless project ideas with step-by-step instructions to help you get started. If you want to change the colors or add finishing touches, you can paint polymer clay after baking.
Polymer Clay Is Affordable
Individual blocks of clay can run up to $5 — smaller than a deck of cards — but you do not need much to get started. A little goes a long way, and scraps can always be saved and used later.
Polymer Clay Comes In Endless Colors
Polymer clay comes in a wide variety of colors that can be mixed together. It also comes in specialty textures like glitter and transparent. If you are just starting out, you can buy white clay and paint it after baking — you do not need a large color collection on day one. So many possibilities.
Polymer Clay Requires Minimal Equipment
Most beginners already own many of the tools they need. Nothing fancy is required, and you can use your home oven.
Polymer Clay Is Incredibly Versatile
Polymer clay can be used to make:
Earrings and necklaces
Keychains and magnets
Miniatures and sculptures
Holiday ornaments
Doll accessories
Decorative bowls and trinket dishes
Wall art and beads
Utensil holders and vases
Fairy houses
I always tell my students that polymer clay lasts forever. I still have blocks from high school, and I am in my late 40s. This is a craft that truly stands the test of time.
How to Choose the Right Polymer Clay Brand
Not all polymer clay brands feel the same. Here is a breakdown of the most common options and who each one is best for.
Sculpey Premo
Premo is the brand I recommend most often as the best all-around polymer clay.
Pros: strong after baking, excellent color selection, holds details well, good flexibility
Cons: slightly firmer than beginner-specific clays
Sculpey III
A very popular beginner option, widely available at craft stores.
Pros: very soft, easy to condition, widely available
Cons: more fragile after baking than Premo
Fimo Soft
Another beginner-friendly clay with excellent color vibrancy.
Pros: bright colors, easy to work with, durable when cured
Cons: can be slightly sticky
Kato Polyclay
The choice of many advanced artists.
Pros: extremely durable, excellent for caning and fine details
Cons: firm and difficult for beginners; not recommended for children. The hardness is frustrating for beginners, and harder clays tend to be more crumbly — most kids do not have the fine motor skills or patience to work with it.
My Polymer Clay Recommendation for Beginners
Start with Sculpey Premo or Fimo Soft. They balance ease of use with durability better than any other options on the market. As you get more comfortable, you can experiment with other brands to see what fits your style and projects.
Polymer Clay Tools and Supplies You'll Need
The good news is you do not need an expensive craft room to begin. Here is a breakdown of what is useful and what you can improvise.
Essential Supplies
Polymer clay (start with a beginner kit or a few blocks of Premo or Fimo Soft)
Baking sheet or ceramic tile
Acrylic roller (does not stick to clay and cleans easily)
Toothpicks (for adding details)
Home oven or toaster oven with temperature settings
Helpful Extras
Bead baking rack — great for baking beads without flat spots
Clay leveling guides — keeps your slabs at even thickness. I use two thicknesses: 4mm for a first slab and 3mm once the design is complete. The 3mm slab is best for jewelry; 4mm is best for miniatures and small cakes.
Circle shape cutters — for perfectly round shapes
Dotting tools — add texture and detail
Extruder — pushes clay through a tube to form elongated shapes with different inserts
Jewelry findings — jump rings, stud earrings, and eye pins for jewelry and miniatures
Liquid Sculpey — the "glue" of polymer clay. A small amount between two parts acts as adhesive when baked. Mix chalk pastel scrapings into it to add color. It is also perfect for adding frosting details to miniature cakes.
Chalk pastels — scrape into a powder and brush onto clay for color and shading
Clay texture sheets, cookie cutters, needle tool, sandpaper, acrylic paint
Household Items That Work Surprisingly Well
Many things around the house are useful when you are just getting started:
An old toothbrush — great for adding texture
Aluminum foil — bunched up for texture, or used inside sculptures for internal structure to save clay
Baby wipes or rubbing alcohol — easy cleanup between colors
Plastic wrap
Cookie cutters
Toothpicks for fine details
A baking sheet or ceramic tile for the oven
When I teach workshops, I tell everyone that a little clay goes a long way. Because it is sold by weight and can be expensive, polymer clay is not typically used for large-scale sculptures. Save every scrap — it never goes bad and can always be used as filler inside beads or to bulk up sculptures.
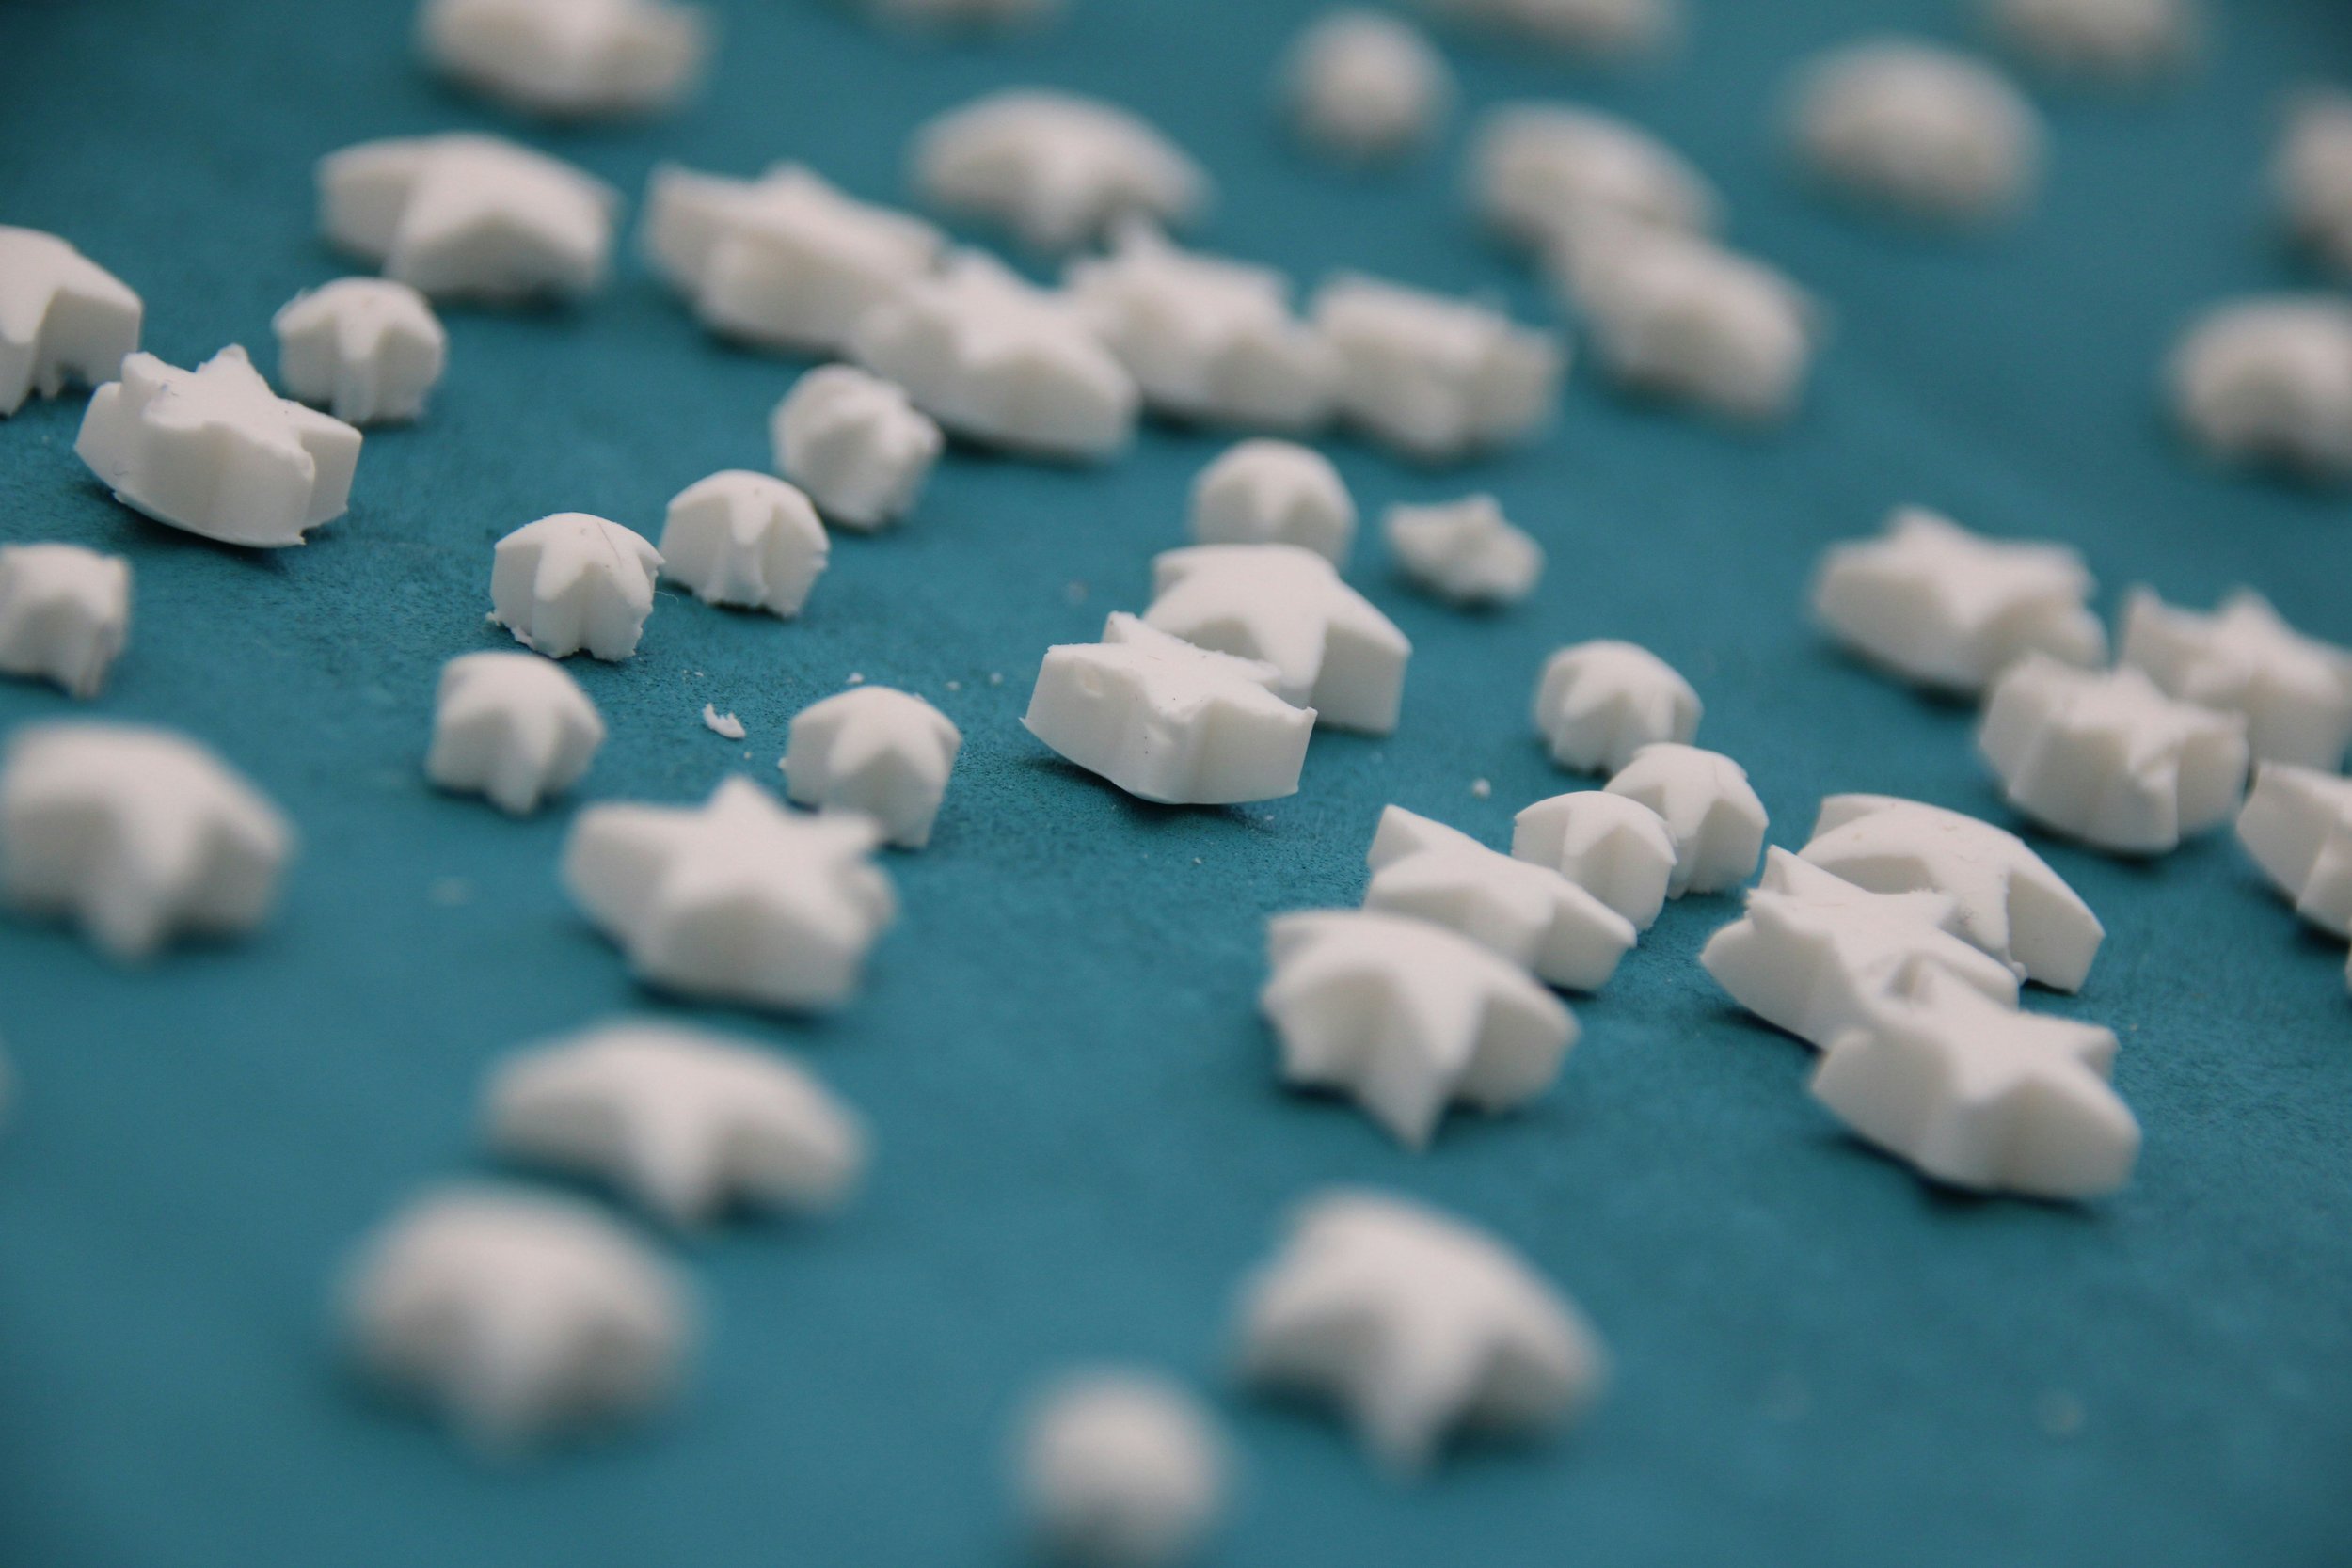
How to Condition Polymer Clay
Conditioning polymer clay means working it with your hands until it becomes smooth, flexible, and ready to sculpt. It activates the polymers in the clay and prevents crumbling. You should condition every block of clay before working with it.
Fresh clay straight from the package can be stiff and crumbly. Think of it like kneading bread — you need to warm it up and work it before it cooperates.
How to Condition Clay
Cut off a small piece.
Warm it in your hands.
Roll and fold repeatedly, twisting and ripping as you go.
Continue until the clay is smooth and flexible, with no cracks when bent.
Warmer hands condition clay much faster than cold hands. If you have worked the clay for a while and it has become too soft to hold details, pop it in the freezer for a few minutes. It will firm back up quickly.
The amount of conditioning needed varies by brand — some brands are much stiffer out of the package than others.
Why Conditioning Polymer Clay Matters
Properly conditioned clay:
Creates stronger finished pieces
Holds fine details better
Reduces cracking during and after baking
Creates smoother surfaces
Reduces air pockets
Skipping conditioning is one of the most common beginner mistakes. You’ll be so glad you took the time… it makes a real difference in the quality of your finished piece.
Setting Up Your Polymer Clay Workspace
Polymer clay picks up everything — lint, dust, and hair will find their way onto your clay if you are not careful. The best time to remove those annoyances is before baking, using a lint-free cloth and some rubbing alcohol. But prevention is easier than cleanup.
Before starting:
Clean your work surface thoroughly.
Wash your hands with dish soap — not hand soap. Dish soap cuts through the greasy residue that polymer clay leaves behind. Standard hand soap does not do a good job.
Keep food away from your workspace. Especially Cheetos.
Use a smooth surface like a ceramic tile, glass, or silicone mat.
Wipe all your tools clean with a baby wipe. I get color contamination from my rolling pins nine times out of ten if I skip this step.
Best Work Surfaces for Polymer Clay
I have worked on a kitchen table, a wooden table, a ceramic tile, and more. My favorite is a 12" x 12" white ceramic tile — it is smooth, easy to clean, handles blades without damage, and can go straight into the oven. Dollar Tree sells placemats that work well too, and they are portable.
Do not use paper towels or tissues to clean tools. They leave tiny fibers in the clay. Use baby wipes or alcohol wipes.
Professional polymer clay artists wear gloves to keep projects completely lint-free.
Does Polymer Clay Stain?
Yes, it can — and it depends on the brand and color. Red clay is the worst offender. If you are working with red, do not go straight to white clay afterward or you will end up with pink clay. To prevent cross-contamination, wipe your hands between colors or keep a scrap piece of white clay nearby. The white clay will actually absorb the red stain as you work it — a handy trick.
How to Store Polymer Clay
Polymer clay comes wrapped in special plastic, and it does not react well with all household plastics. Some containers will melt or cause the clay to become gooey. Here is what works:
Aluminum foil — my go-to. Wrap each block tightly and it is good indefinitely.
Ziplock bags — also fine for storage.
Avoid Tupperware — the chemical reaction can make clay gooey and hard to work with.
Once clay is wrapped in aluminum foil, it lasts for life. I genuinely have blocks that are decades old and still perfectly usable.
Best Baking Surfaces
Bake your clay on a ceramic tile, parchment paper, aluminum foil, or a baking pan. You can also loosely tent a piece of foil over beads or sculptures to protect them from direct heat exposure.
How to Bake Polymer Clay
Polymer clay bakes in a home oven at 225–275°F (107–135°C) for approximately 15–30 minutes per ¼ inch (6mm) of thickness. Each brand has its own recommended temperature — always check the package.
In my experience, 225°F is the safest starting temperature because the clay almost never burns. Most people bake at 250–275°F. Start lower on your first run and adjust as you get comfortable with your specific oven.
Typical Baking Temperatures by Brand
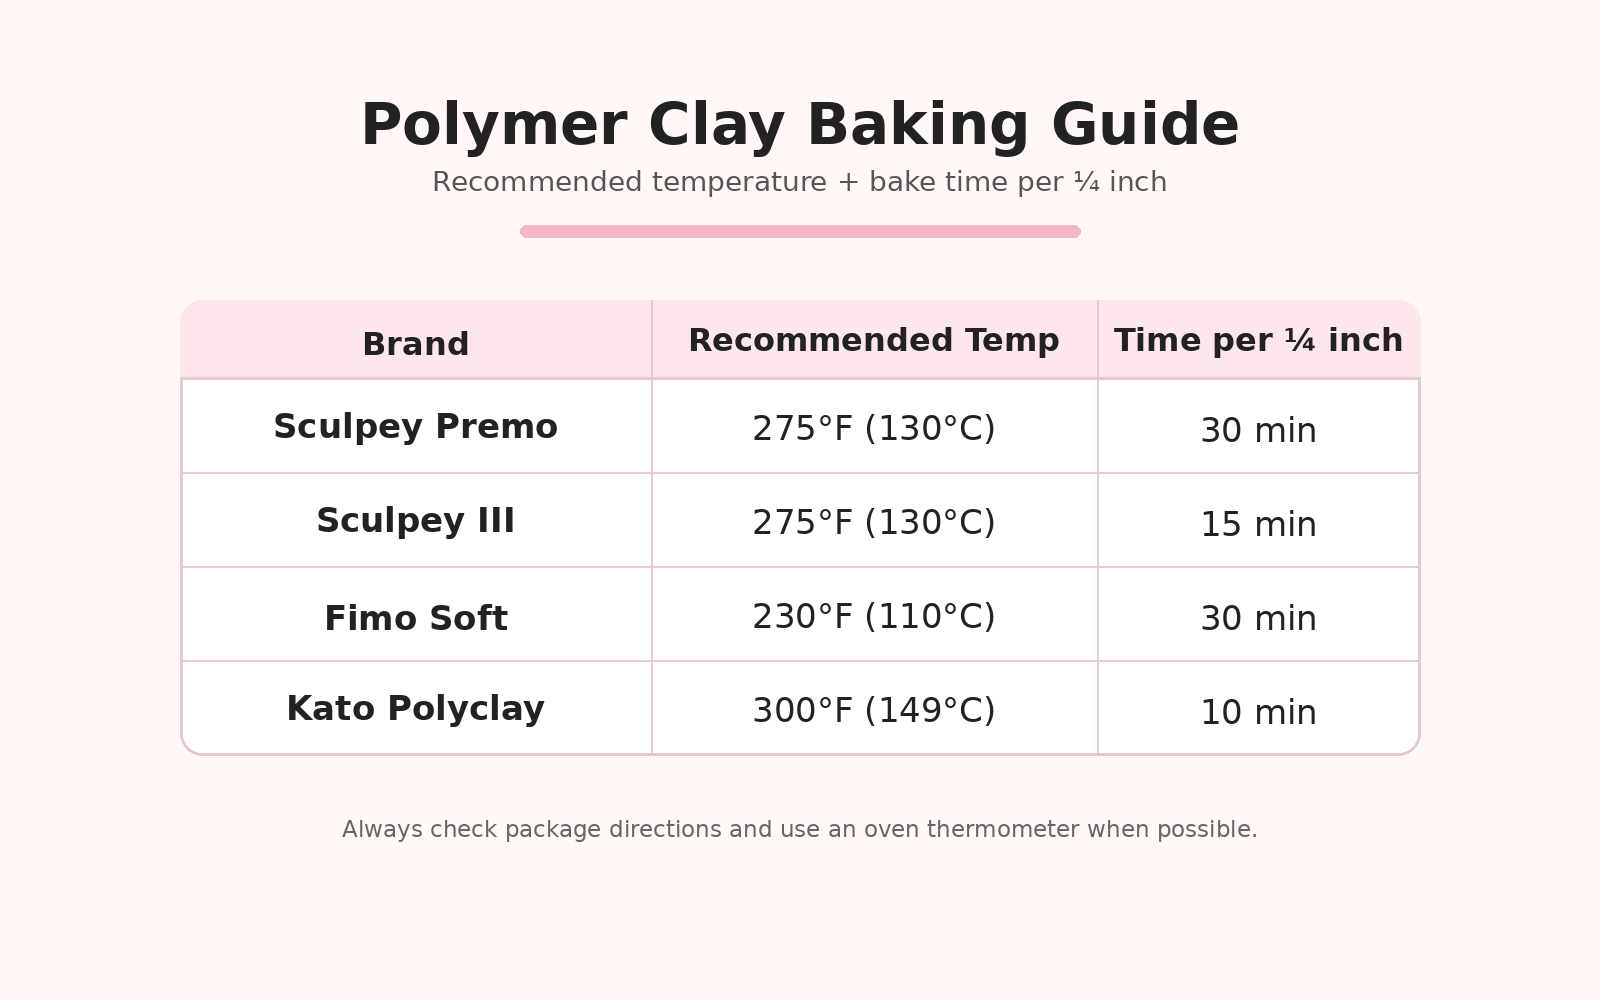
Don’t forget to check your specific package — these instructions are subject to change.
Why Oven Temperature Matters for Polymer Clay
If your oven is too cool:
Polymer clay remains weak and breaks easily
If your oven is too hot:
Polymer clay can burn (the smell is awful... trust me, I speak from experience)
Discoloration or darkening occurs
One of the biggest mistakes I see is mixing up the hundreds digit. If your package says 240°F and you bake at 340°F, you will have a very bad smell in your oven. An oven thermometer is genuinely one of the best investments you can make for polymer clay work.
Tips for Baking Polymer Clay Successfully
Use parchment paper. It prevents shiny spots on the bottom of your pieces.
Tent with foil. Cover projects loosely with aluminum foil to prevent browning on the tops and sides.
Use an oven thermometer. Home ovens run hotter or cooler than the dial says.
Allow your polymer clay to cool completely. Polymer clay continues to firm up as it cools. Do not judge strength immediately after removing it from the oven. It takes about 24 hours to reach full hardness.
Do a test chip first. Before baking a finished project, bake a small test piece. After it has cooled for 24 hours, try to bend it. If it breaks, it was underbaked. If it bends slightly without breaking, it is good to go. I do a test piece whenever I try a new brand or use a new oven.
Can You Rebake Polymer Clay?
Yes. If a piece was not baked long enough, you can put it back in the oven. You can also add fresh clay to a baked piece and rebake. In fact, many artists work in stages this way to build strong internal structures before adding surface details.
Can You Bake Polymer Clay in a Home Oven?
Yes. Just keep a window open for ventilation. While a dedicated toaster oven for clay is ideal (I prefer having one), your home oven works perfectly well.
Common Baking Mistakes with Polymer Clay
Cracking
Causes: poor conditioning, underbaking, or stress points in the design
Fix: condition thoroughly, bake fully, and avoid thin fragile connections in your design
Fingerprints
Cause: handling the clay too much before baking
Fix: smooth surfaces with your fingers or use rubbing alcohol on a cotton swab before baking
Burnt Clay
Cause: oven running hotter than the dial shows
Fix: use an oven thermometer and tent pieces loosely with foil
Weak or Brittle Pieces
Cause: underbaking
Fix: follow baking time recommendations and verify oven temperature with a thermometer
Basic Polymer Clay Techniques
Before you attempt complicated polymer clay projects, start by practicing these fundamentals. They are the foundation of almost every polymer clay project you’ll tackle.
Rolling
Acrylic rollers work best with polymer clay. For even slabs, use leveling guides on either side of the roller (official guides, popsicle sticks, chopsticks, or anything that represents your target thickness all work are all great options). Once you have rolled out a slab, you can use special shaped cutters to cut out earrings, ornaments, and decorative pieces.
Ball Shapes
My favorite technique for consistent beads: roll out an even slab using your leveling guides, then use a small cookie cutter to cut out circles of identical size. Roll each circle into a ball. Because they all started from the same even slab, every ball will be exactly the same size. #protip
Coils
Roll clay into snake-like ropes. You can use the same cookie-cutter slab technique to get consistent snake sizes. Coils are useful for coil pots, trinket dishes, animal sculptures, and decorative borders on slabs.
Pinching
Shape clay using your fingers. This seems simple, but it truly is a fundamental sculpting skill. Tools like a ball tool help when your fingers alone cannot get the detail you want.
How to Mix Colors
One of the best things about polymer clay is that you can create any color by mixing. The more you twist, roll, and work two colors together, the more cohesive the blend becomes. For a marbled effect, mix only partially.
Basic color recipes:
Red + Yellow = Orange
Blue + Yellow = Green
Red + Blue = Purple
White lightens any color
Add dark colors to light, not the other way around
Mix small test amounts first until you hit the shade you want. Many artists keep color recipe cards so they can recreate favorite shades later.
Creating Texture
The possibilities for texture are endless! You can press or roll clay directly onto surfaces like:
Lace, fabric, or burlap
Leaves or bark
Stamps and buttons
Sandpaper
Fondant rollers and clay texture plates
You can also create texture using things like dotting tools, toothbrushes, toothpicks, or by pressing small pieces of ripped clay onto a slab surface. Experiment and see what you love. The only limit is your creativity!
Easy Polymer Clay Projects for Beginners
Starting with simple projects builds confidence and teaches you the fundamentals before you tackle more complex work. These are the projects I teach on repeat year after year.
Miniatures
Use your imagination — a snail, turtle, donut, monster, or layered cake are all great starting points.
Avoid making any parts too thin or they may break off after baking.
Bake on parchment paper at 225–275°F for 15–20 minutes.
Let cool completely before handling.
Beads
Choose colors and roll them into a small ball, whatever size you want your final bead to be.
Add small pieces of contrasting colors to the surface and roll back into a smooth ball.
Use a skewer to make a hole through the center.
Bake on parchment paper at 225–275°F for 15–20 minutes.
Let cool completely.
Pro tip: Use a bead baking rack so beads don’t develop flat spots on the bottom.
While you’re practicing making beads, check out this fun beaded keychain tutorial.
Marbled Pens
Remove the ink cartridge from a Bic Round Tip pen (Note: I have only tested this on Bic Round Tip, other pens may melt).
Roll each clay color into a ball about the size of a gumball, then roll each into a snake.
Twist all the snakes together, roll into a ball, then use your acrylic roller to flatten to about ¼" thick.
Place the pen on the clay and roll until it is fully covered, leaving the tip hole open.
Smooth the surface and add any optional texture details.
Bake on parchment paper at 250–275°F for 15–20 minutes.
Let cool completely before reinserting the ink cartridge.
Click here for my full step-by-step breakdown of this fun project.
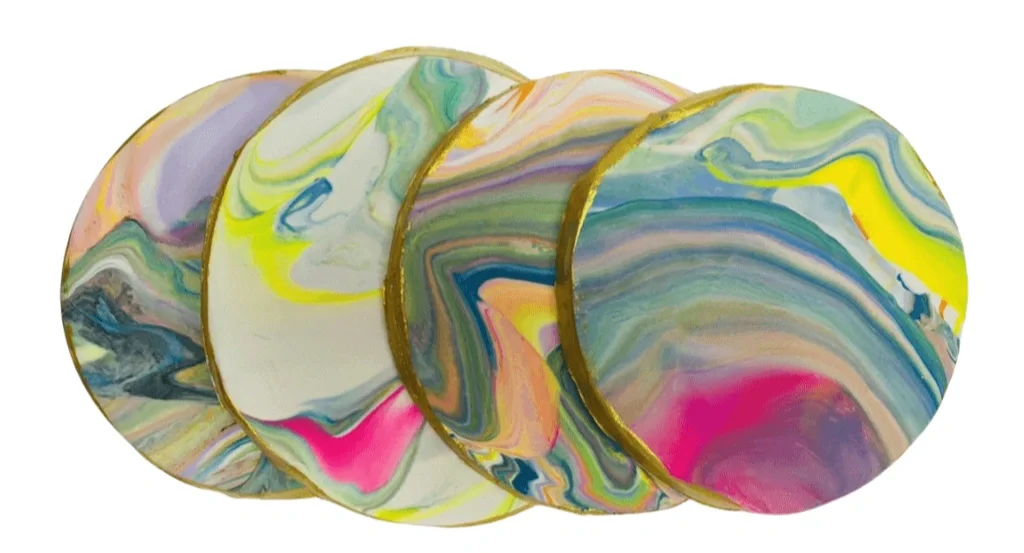
Coasters
Roll each clay color into a gumball-sized ball, then roll each into a snake.
Twist all the snakes together, roll into a ball, then flatten with the acrylic roller to about ¼" thick.
Use a cup or circle cutter to cut out the round coaster shape.
Bake on parchment paper at 250–275°F for 15–20 minutes.
Let cool completely, then paint the edges with acrylic paint.
Click here for my full step-by-step marble polymer clay coaster tutorial.
Finishing, Sanding, and Sealing
After baking and cooling, a few finishing steps can make your pieces look professional.
Sanding
Use fine-grit sandpaper and work your way up gradually:
Start with 400 grit
Move to 600, then 800, then 1000 grit
A Dremel tool also works well for sanding and drilling.
Polishing
For a natural shine without glaze, buff the surface by hand with a soft cloth or use a rotary tool for higher gloss. Many artists prefer buffing over applying glaze because it produces a more organic finish. Different brand glazes yield different results, so experiment before committing to one.
You can also add shine by applying a layer of clear UV resin, which doubles as a strong glue alternative.
Should You Seal Polymer Clay?
No, sealing polymer clay is not required. Polymer clay is waterproof and durable once properly baked and cured. Consider sealing only if you want to protect painted details, protect surface treatments, or add a glossy finish.
If you do seal, use products specifically labeled as compatible with polymer clay. Some sealers cause a chemical reaction and will make the surface tacky.
Can You Paint Polymer Clay?
Yes! Acrylic paint works beautifully on baked polymer clay. I use it for fine details that are too small to sculpt, like eyelashes, facial features, tiny patterns. Paint pens and Sharpies also work on baked clay.
You can also mix acrylic paint directly into unbaked clay. Roll and twist to distribute the color, or place clay and paint in a ziplock bag and knead through the plastic.
Can You Add Pigment or Glitter to Polymer Clay?
Yes. Similar to working with slime, you can mix powders, pigments, chalk pastel powder, and glitter into raw clay before baking. You can also brush these onto the finished surface before it goes into the oven.
Can You Glaze Polymer Clay?
Most polymer clay brands sell a glaze or varnish if you want a shiny final finish. If you prefer matte, skip this step entirely.
Can You Repair Broken Polymer Clay?
You can glue baked polymer clay pieces with Loctite gel. But before reaching for glue, try this: add a small piece of fresh clay over the break and rebake. The new clay bonds with the old during baking.
For thin or fragile pieces that keep breaking, add an internal structure before covering with clay. A toothpick or small piece of aluminum foil inside a sculpture creates a strong core. Very thin pieces are inherently more brittle, so building structure first is always the smarter approach.
Making Polymer Clay Jewelry
Polymer clay jewelry has exploded in popularity because it is lightweight, completely customizable, and relatively inexpensive to make.
Popular styles of polymer clay jewelry include:
Arch earrings
Floral earrings
Statement necklaces
Geometric shapes
Terrazzo-inspired designs

Interested in trying your hand at DIY polymer clay jewelry? Here are my favorite tips:
Use a strong brand like Sculpey Premo, avoid Sculpey III for jewelry because it is a bit more fragile.
Avoid very thin pieces that could snap at connection points.
Sand edges after baking for a clean, professional look.
Use quality jewelry findings. Cheap jump rings and earring posts really do matter.
Ready to get started making polymer clay jewelry? Don’t miss this list of 37 polymer clay earring designs - so much inspiration!
Safety Tips for Working with Polymer Clay
Polymer clay is considered safe when used properly. Here are a few tips you should follow when working polymer clay:
Do:
Wash hands after crafting with dish soap
Follow baking temperature instructions carefully
Use dedicated craft tools when possible (rather than kitchen tools)
Bake with good ventilation, a window open is perfect
Do not:
Exceed recommended baking temperatures
Use or eat burned clay
Leave baking clay completely unattended
Store clay near food
Frequently Asked Questions About Polymer Clay
Can polymer clay air dry? No. Polymer clay does not air dry under any circumstances. It only hardens when baked in an oven at the correct temperature. I have had packs of polymer clay since high school that are still perfectly soft and usable.
Can I bake polymer clay more than once? Yes, and many artists use this intentionally. You can bake a base structure, add more clay, and bake again — repeatedly. This is a great technique for building complex projects in stages.
Is polymer clay waterproof? Yes, once properly baked and cured, polymer clay is waterproof. That said, I would not leave polymer clay sculptures outdoors permanently.
Can kids use polymer clay? Yes. I recommend polymer clay for kids in 3rd grade and up. Younger children typically do not have the fine motor strength to condition the clay well, which leads to frustration. Firmer brands like Kato are not suitable for children at all.
How long does unbaked polymer clay last? Properly stored polymer clay can stay usable for years — even decades. Wrap it in aluminum foil or store in a ziplock bag and keep it away from heat and direct sunlight.
What is the best polymer clay for beginners? Sculpey Premo and Fimo Soft are the top beginner recommendations because they balance softness with durability after baking. Sculpey III is very soft and easy to condition but more fragile once baked. Avoid Kato Polyclay as a beginner — it is too firm and requires significantly more conditioning effort.
Do I need a special oven for polymer clay? No. A regular home oven or toaster oven with temperature settings works well. Just use good ventilation and keep the oven temperature accurate. Many dedicated clay artists use a separate toaster oven, but it is not required to get started.
What happens if you overbake polymer clay? The clay will burn, darken, and produce a very unpleasant smell. If it bakes too hot, it can also discolor and become brittle. An oven thermometer helps prevent this. Always start at the lower end of the temperature range when working with a new oven.
What happens if you underbake polymer clay? Underbaked clay is weak and brittle. It will snap or crumble rather than bending slightly. If this happens, put it back in the oven — polymer clay can be rebaked.
Can you mix different polymer clay brands? Yes, different brands can be mixed together. The result will have characteristics somewhere between the two brands. This can be a useful way to adjust the firmness or finish of a clay.
What is the best surface to work polymer clay on? A ceramic tile is my favorite — smooth, easy to clean, handles blades well, and can go directly into the oven. Silicone mats and inexpensive placemats from the Dollar Tree also work well.
Why does polymer clay crumble? Crumbling usually means the clay has not been conditioned enough. Work it more in your hands until it becomes smooth and flexible. If it still crumbles after extended conditioning, the clay may be old or a very firm brand that needs more patience.
Ready for some Polymer Clay project inspiration??
Once you have the basics down, there are a lot more polymer clay project ideas to explore: