
Rolled Gelli Print Leaf Art - Easy DIY Fall Craft
If you’re looking for a beautiful DIY fall craft idea that doubles as classroom art or cozy home decor, this rolled gelli print leaf project is one of my favorites. It’s simple, colorful, and makes a stunning piece to frame or even turn into a garland.
Whether you’re an art teacher, a crafter, or just love experimenting with prints, this DIY fall leaf craft never disappoints.
Materials You’ll Need for Rolled Gelli Print Leaves
Materials:
Gelli prints in lots of colors
Paints (to make the gelli prints)
Heavy duty paper or cardstock
Pencil
Leaf template
Shadow box
Scissors
Gelli Print Supplies:
Paints (to make the gelli prints)
Thin paper
Brayer
How to Make Gelli Prints
(If you’re new to gelli printing, check out my Beginner’s Guide to Gelli Printing for tips).
Make a bunch of colorful prints using your gelli plate.
Use the thinnest, cheapest printer paper you can find because it rolls better than cardstock.
Experiment with bold colors, they’ll really pop once rolled.
Step-by-Step Instructions: Rolled Gelli Print Leaf Craft
Step 1: Cut the Gelli Prints
Choose a nice balance of colors. Bold, bright colors work beautifully.
Cut pages into fourths (8.5 x 11 sheets work well).
Save one longer strip (half a page) for the spine of your leaf.


Step 2: Roll the Paper
Starting at one end of a strip, roll it loosely around a pencil.
Don’t wrap too tightly, you’ll need to slide the pencil out.
Step 3: Secure with Glue
Before finishing the roll, add glue with a glue stick.
Make about 25 paper “straws” (or more, depending on your leaf size).


Step 4: Draw Your Leaf Template
On heavy cardstock, draw a big leaf outline with a spine down the middle.
Step 5: Apply the Rolled Prints
Glue the long roll to the spine first.
Add rolls on either side at an upward diagonal, mimicking real leaf veins.
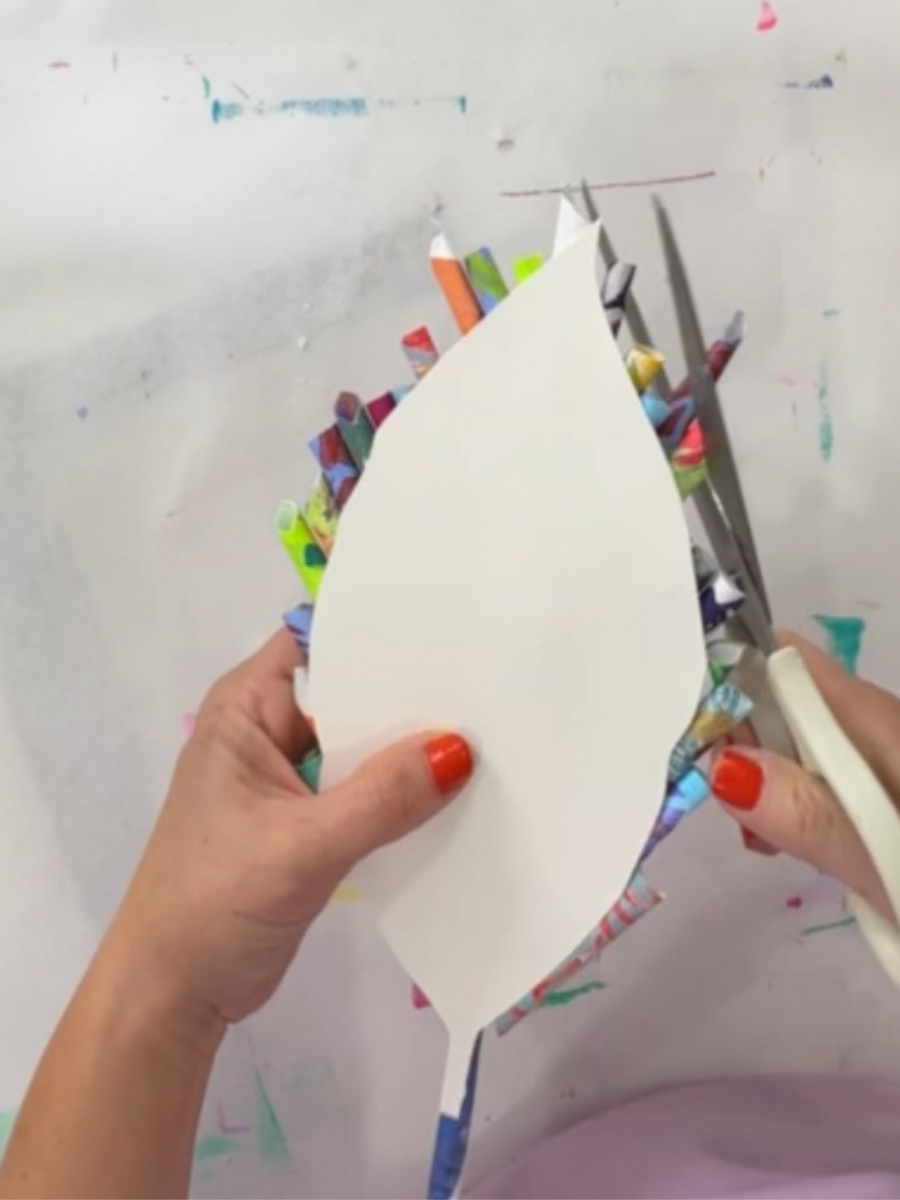
Step 6: Trim the Leaf Shape
Once dry, trim around the outline for a neat finish.
Re-glue any rolls that may start to loosen.

Step 7: Frame Your Art
Use hot glue to attach the leaf to the backing of a shadow box.
Display as framed wall art or string several together for a DIY fall leaf garland.
Why You’ll Love This Fall Craft
Beginner-friendly – perfect for kids, classrooms, or first-time gelli printers.
Versatile decor – display in a frame, use as wall art, or make a festive garland.
Seasonal appeal – ideal for fall, Thanksgiving, classroom bulletin boards, & more!
This is one of my absolute favorite fall leaf craft ideas. It’s colorful, easy, & always turns out beautifully. If you try it, I’d love to see! Tag me on Instagram @artbeat_box.
More Fall Crafts You’ll Love 🍂
If you enjoyed this DIY fall leaf craft, check out these other fun projects to enjoy this fall:
DIY Pom-Pom Pumpkins – cozy, fluffy pumpkins made from yarn.
Dollar Store Pumpkin Makeovers – 37+ creative ways to decorate foam pumpkins on a budget.
DIY Leaf Relief – another beautiful fall leaf project using texture & paint.