
How to Print an Ombre Effect on Your Gelli Plate
One of my favorite things to do on a gelli plate is to create an ombre' effect. I have always loved the way colors blend together and there's no faster or easier way to create this other than using a gelli plate. Doing an ombre' on a gelli plate using a brayer and then transferring the paint creates one of the smoothest color blends I've seen with any art medium. And, as you know, I like to experiment with lots of different mediums!
Doing an ombré is easy and can be layered with stencils, stamps, textures and transfers. Let's break it down!
Here’s a simple step-by-step for how to create a smooth ombré effect on your Gelli plate:
Before we get started, let's go over the materials you'll need:
Paint

Golden Acrylic (this specific one)
Paper (this is my go-to favorite paper) or you can use watercolor cardstock, but I do not find that it works as well for gel printing
Double handled brayer (it is more expensive, but I am obsessed)!
Stencils (you can also make your own or make one using a cricut machine)
Masks (anything from paper shapes, masking tape or things like feathers or foliage)
Textures
Pick 2–3 colors that work well together

While I am not asking you to study the color wheel, think about which colors might blend seamlessly into the next. For example, I probably would not choose purple and green. So instead of the color wheel, think about the order of colors in the rainbow. Also, choose bright colors because they look vibrant. You can use more neutral, muted colors, but I would stick with bright for your first print. Here are some colors that will blend nicely.
Choose colors that will mix nicely together — like:
Red + Yellow
Pink + Yellow
Pink + Orange
Yellow + green
Blue + Yellow
Blue + Pink
You can use three colors, too. I would recommend, again, thinking about that rainbow to avoid muddy looking prints.
Squeeze paint onto your gelli plate

Grab your first color and squeeze a dot or a blob of paint to the top of the gelli plate and to the bottom (same color) of the plate vertically. For example, if I am adding pink paint, be sure it is pink on the top left side of the plate and also pink on the bottom left side of the plate.
Repeat the same process for the second color. So, if you are using yellow, for example, you will want to put a small blob of paint on the top right side and then again on the bottom right. Do not overlap the colors. The brayer will do the work for you!
Helpful hint: When applying your blobs, be sure that they are no larger than the size of a chocolate chip. Too much paint does not work as well.
Roll the paint using a standard brayer*

Start at the top left of the gelli plate and roll the brayer over the pink ink. Roll the brayer from the top of the gel plate to the bottom. Be sure to lift the brayer when you get to the bottom of the plate and do not roll back up until you have lifted the brayer. This is because it will start to remove the paint that you've already applied. Move the brayer up and down until it looks like it is smooth.
Gradually move the brayer to the right until the right side of the brayer is touching the yellow paint. Continue to go up and down and lift the brayer each time you reach the bottom of the plate.
Continue to move from left to right and then back slightly to the left again.
Let the brayer pick up the colors and gently blend them where they meet. You will see the effect begin to emerge after several rotations of the brayer. Do not overly bray the paint. A few up and down and left to right should be enough to see the emergence of the ombre effect.
Helpful hint:
Roll with a light hand at first to keep the colors blending smoothly.
If you want to do a different effect, you can rotate the gelli plate and do another round horizontally. I find that horizontal is more difficult if you have a smaller brayer, However, with a larger brayer, this can easily be achieved in either direction.
Pull your print
Gently place your paper onto the gelli plate.
Using the palms of your hands, rub the paper from behind. I like to use a barron, but this is totally optional.
Be sure to add pressure to the middle but also to the edges.
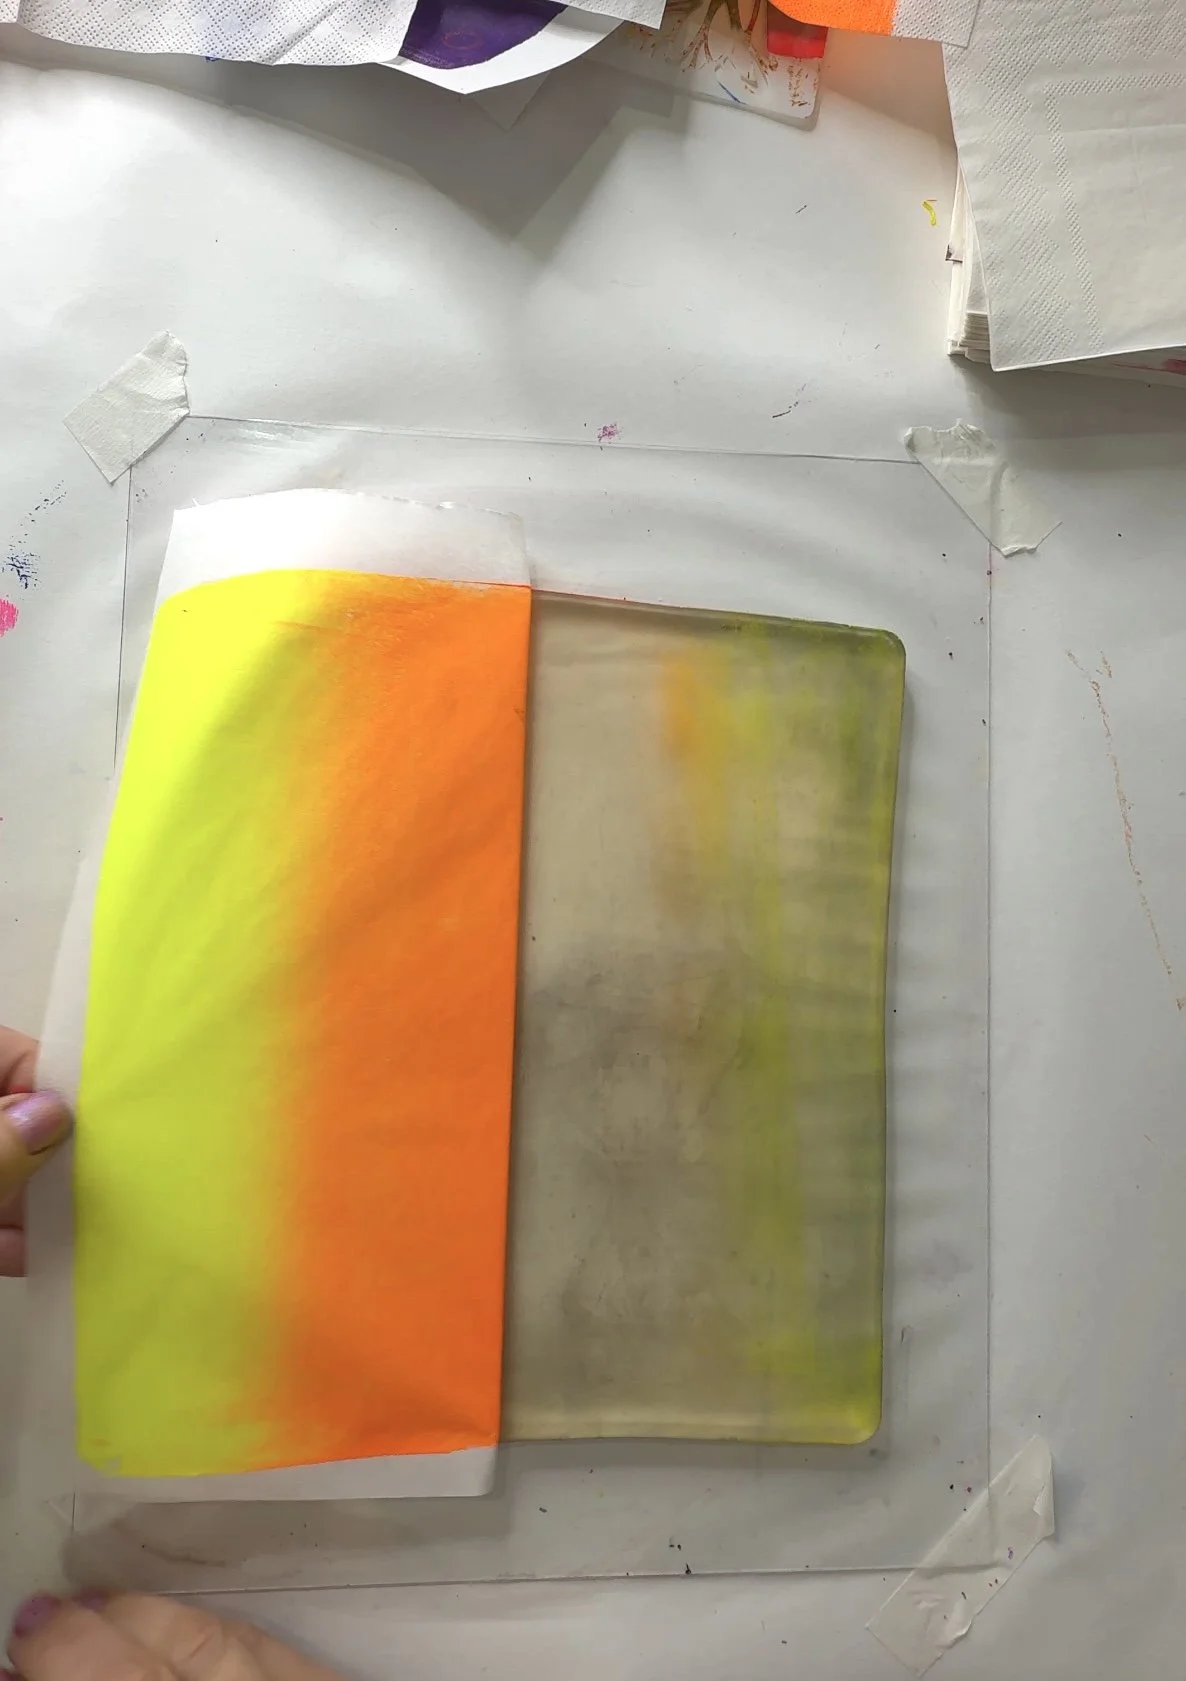
Slowly peel the paper from the gelli plate to reveal the ombre' effect.
If there is still paint on your gelli plate, you can add a fresh piece of paper and try to pull another print OR you can wait for it to dry, add a lighter color like white using your brayer and pull a more layered print.
Other things you can do with the ombre effect on a gelli plate

Add interesting textures

Once you have a nice smooth ombre, you can add some texture. You do not have to do this step. However, if you want to give your piece more depth, you can use:
stencils
found objects like bottle caps, lace and more
Everyday items like packing materials (bubble wrap) make for a great texture. Crumpled tissue paper works well, too!
Stamps work great on gelli plates, too!
(But if you want a clean ombré, just leave it smooth!)
Add multiple layers

Once you've pulled your gelli print, you can let it dry for a few minutes and then add an additional layer or two, Here's how its done:

Go ahead and apply paint again to your gelli plate. This can be a single color or another two colors.
Bray the paint so that the entire plate is completely covered and smooth.
If you choose to do another ombre' effect, be sure it contrasts with the first one.
Once you've added the paint to the gelli plate, it is now time to add items to the plate. My two favorite things to add are stencils and masks. For example, you can cut out little shapes and apply them to the plate.
Then add your previously printed ombre to the plate and repeat the reverse rubbing of the paper.
Pull your print to reveal a layered design,
This can also be done with found objects like feathers, string, botanicals and more.
You can contrast your gel plate printing using metallic acrylic paints if desired.

INSERT THIS YOUTUBE: https://www.youtube.com/shorts/qWCbe9h5l5w
*Instead of a standard brayer, try using a double handle brayer. If you choose this method, you do not need to move the brayer from left to right. You can simply begin at the top and roll the paint downwards.
If you love gelli printing, but you're a true beginner, check out my full beginner's guide with links and tips and tricks!

Happy making!