
Can you print onto fabric using your Gelli plate?
If you’ve been gelli printing for a while and loving the process, you’ve probably started wondering: can you gelli print on fabric?
The answer is yes!
That said, printing onto fabric with a gelli plate isn’t quite as simple as printing on paper. While the technique itself isn’t difficult, there is a specific process you’ll want to follow to get the best results… especially if you want your prints to stay soft, flexible, and washable. 🤩
Once you get the hang of gelli printing on fabric, the possibilities are endless: t-shirts, tea towels, quilt fabric, tote bags, and more.
Let’s get started.
Materials You’ll Need to Gelli Print on Fabric
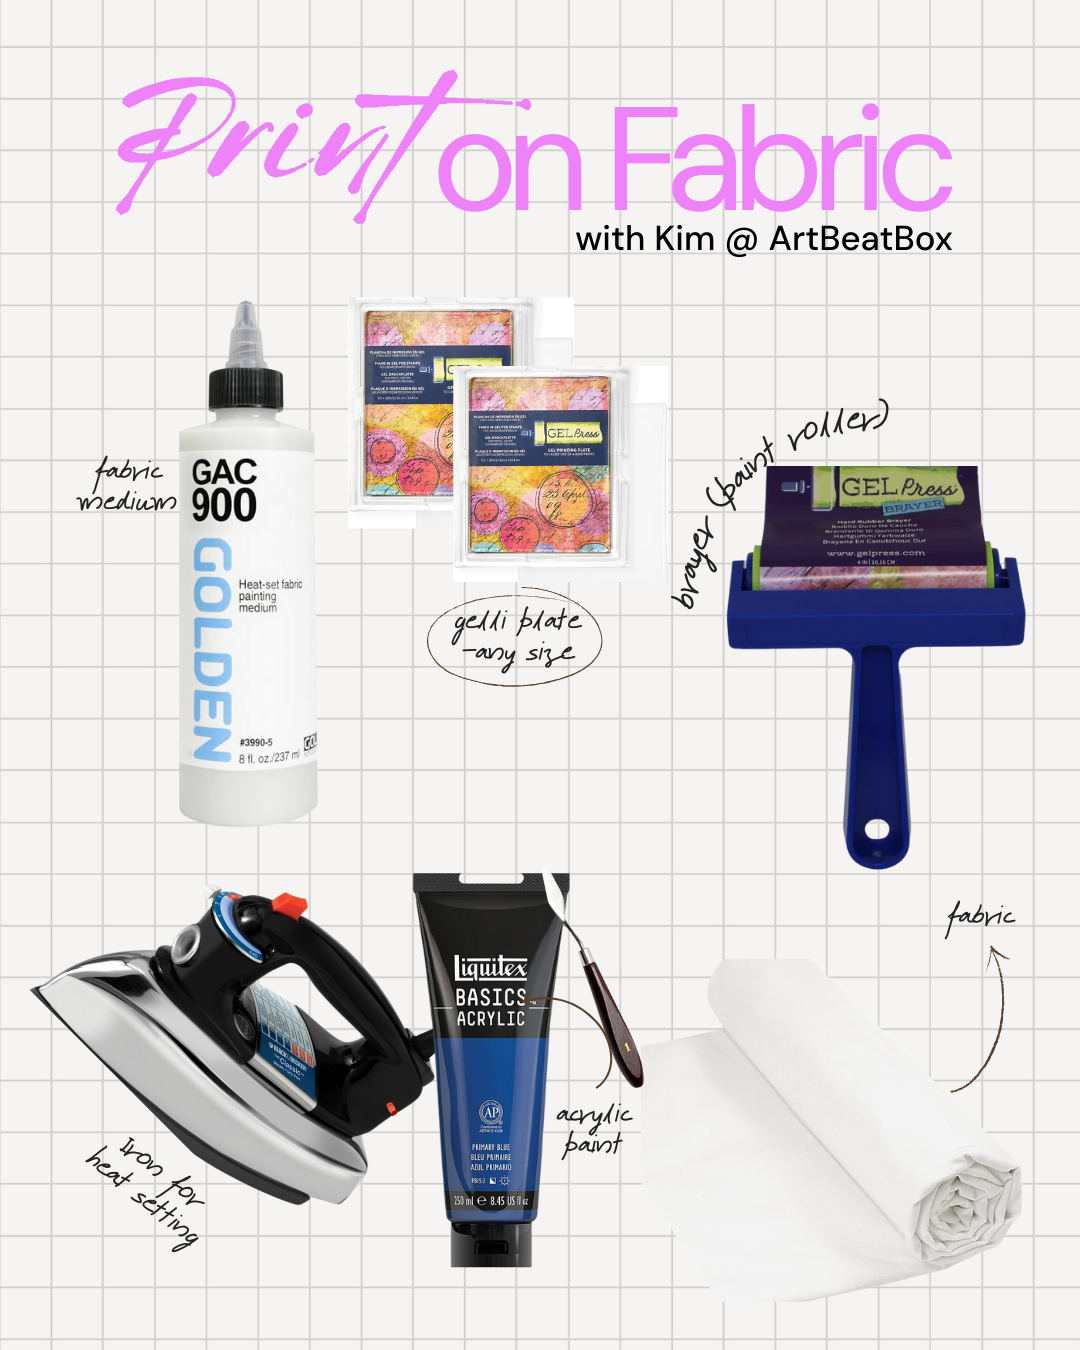
As you move into more advanced techniques, it’s worth investing in better supplies. But to begin, here’s what you’ll need:
Gel Printing Plate - Gel plates come in a variety of sizes and shapes. Choose one that works best for the size of fabric you’re printing.
Paint - I use regular acrylic paints with a fabric additive. (More on that below.)
Fabric Medium - This is essential if you want your fabric to remain soft and washable. I’ve had consistent success with GAC 900, but if you’re outside the U.S., look for a similar fabric medium designed to mix with acrylic paint.
Brayer (Roller) - Use a soft rubber brayer to spread paint evenly across the gel plate without streaks.
Parchment Paper or Teflon Sheet - Used during heat setting to protect your iron and fabric.
Fabric - You can print on many fabrics. I’ve experimented with muslin, denim, flat cotton sheets, t-shirts, and more. Smoother fabrics give cleaner results, while heavier or textured fabrics (like canvas tote bags) create a more distressed look—which can still be beautiful.
Stencils, Masks, Textures, or Laser-Printed Images - Anything you’d normally use for paper gel prints will work here too.
Paper Towels or Wipes - For quick, easy cleanup.
Vinyl-Backed Tablecloth (Optional but Helpful) - I love these because you can roll paint directly onto the flannel backing to clean your brayer. They’re usually easy to find in spring and summer.
Palette Knife & Mixing Surface - For thoroughly mixing paint and fabric medium.
Iron - So you can heat set any fabric that will be worn or washed.
What Fabric Projects Can You Make?
Once you’ve mastered the technique, you can create:
Custom tote bags
One-of-a-kind tea towels
Art quilts
Pillow covers
Wearable art like jackets, scarves, or shirts
The Best Fabric for Gelli Printing
Not all fabric behaves the same way when printing.
Best Fabrics to Start With
Natural fibers work best:
Old t-shirts
Cotton sheets
Pillowcases
Muslin
Linen
Smoother fabrics give more detailed prints. Heavier or textured fabrics will absorb more paint and may look more distressed—but they’re still worth experimenting with.
Fabrics to Avoid (Especially as a Beginner)
Nylon
Lycra or other stretchy fabrics
Polyester
Any fabric that cannot be ironed
If you’re new to fabric printing, plain cotton fabric or an inexpensive cotton tote bag (not canvas) is a great place to start.
Do You Need Special Paint for Fabric?
This is one of the most common questions, and the answer is: it depends on your goals. Let me break it down for you:
Option 1: Acrylic Paint + Fabric Medium (Recommended)
This is the most reliable option if you want soft, flexible, washable results.
Mix acrylic paint with fabric medium (such as GAC 900)
Reduces cracking and stiffness
Ideal for wearable art
Requires heat setting
This is the method I recommend if you plan to continue printing on fabric.
Option 2: Fabric Paint
Fabric paint can work, but it’s less predictable—especially for image transfers. It’s worth experimenting, but results can vary depending on brand and fabric.
How to Gelli Print on Fabric (Step-by-Step)
1. Prep Your Fabric
Fabric often comes with factory sizing. Washing first is best practice, though I’ll be honest—I don’t always do it and still get great results.
Iron your fabric so it’s completely smooth. Wrinkles will create a more distressed print.
If printing on a garment (like a t-shirt), place cardboard between layers to prevent bleed-through.
2. Mix Your Paint
Mix acrylic paint and fabric medium at a 1:1 ratio. You can eyeball it or measure, but mix very thoroughly with a palette knife. The mixture will be more fluid than regular paint—this is normal.
Fabric absorbs more paint than paper, so expect to use a slightly thicker layer.
3. Prepare Your Gelli Plate
Place your gelli plate on top of a firm surface like glass or acrylic. This makes it much easier to lift and use the plate like a stamp without it flopping.
Apply paint to the plate using a brayer. Work fairly quickly—don’t let the paint dry.
4. Add Texture or Design
This is where you can play. Use:
Leaves or flowers
Corrugated cardboard
Stencils or masks
Laser-printed images
Just like you would with paper printing.
5. Print Onto Fabric
Lift the gelli plate (with the glass or acrylic underneath) and use it as a stamp, pressing it onto your fabric. In my experience, this is my secret sauce. I find that lifting the gel plate and using it as a stamp is much easier if the plate is not floppy!
Place several heavy books on top to apply even pressure.
6. Let It Dry
Allow the fabric to dry for several hours.
Peel it up slowly and admire your print.
7. Heat Set the Fabric
This step is essential if the fabric will be worn or washed.
Place parchment paper between the iron and fabric
Iron on medium heat
Move the iron continuously
Heat set for about 3–5 minutes, working in intervals
This locks the paint into the fibers.
8. Wash & Dry
Once heat set, the fabric can be washed and air dried.
Common Problems (and How to Fix Them)
Print Looks Dull
Use more opaque, high-quality paints and apply a slightly thicker layer. Check out my guide to the best acrylic paints here.
Paint Is Cracking
Add more fabric medium or try a fabric paint or screen-printing ink.
Details Disappear
Fabric absorbs paint more than paper. Use more contrast and bolder designs.
Paint Bleeds Through
Always protect your work surface and place a barrier inside garments.
Final Thoughts
If you’re already comfortable with gelli printing on paper, printing on fabric is a fun next step!
Next time you go down the gelli printing rabbit hole, try fabric and see where it takes you. Happy crafting!